on the load after 10 minutes delay for several hours which users set on the timer.
The timer setting operation is referred to as “Load Work Mode Setting”.
3. Test Mode
It is used to test the system and the same as Dusk to Dawn. But there is no 10-
minute delay when controller recognizes the starting voltage. When below the
starting voltage, the controller will turn on the load, if higher, it will turn off load.
The test mode makes it easy to check the system installation.
4. Manual Mode
This mode is to turn on/off the load by the Setting button.
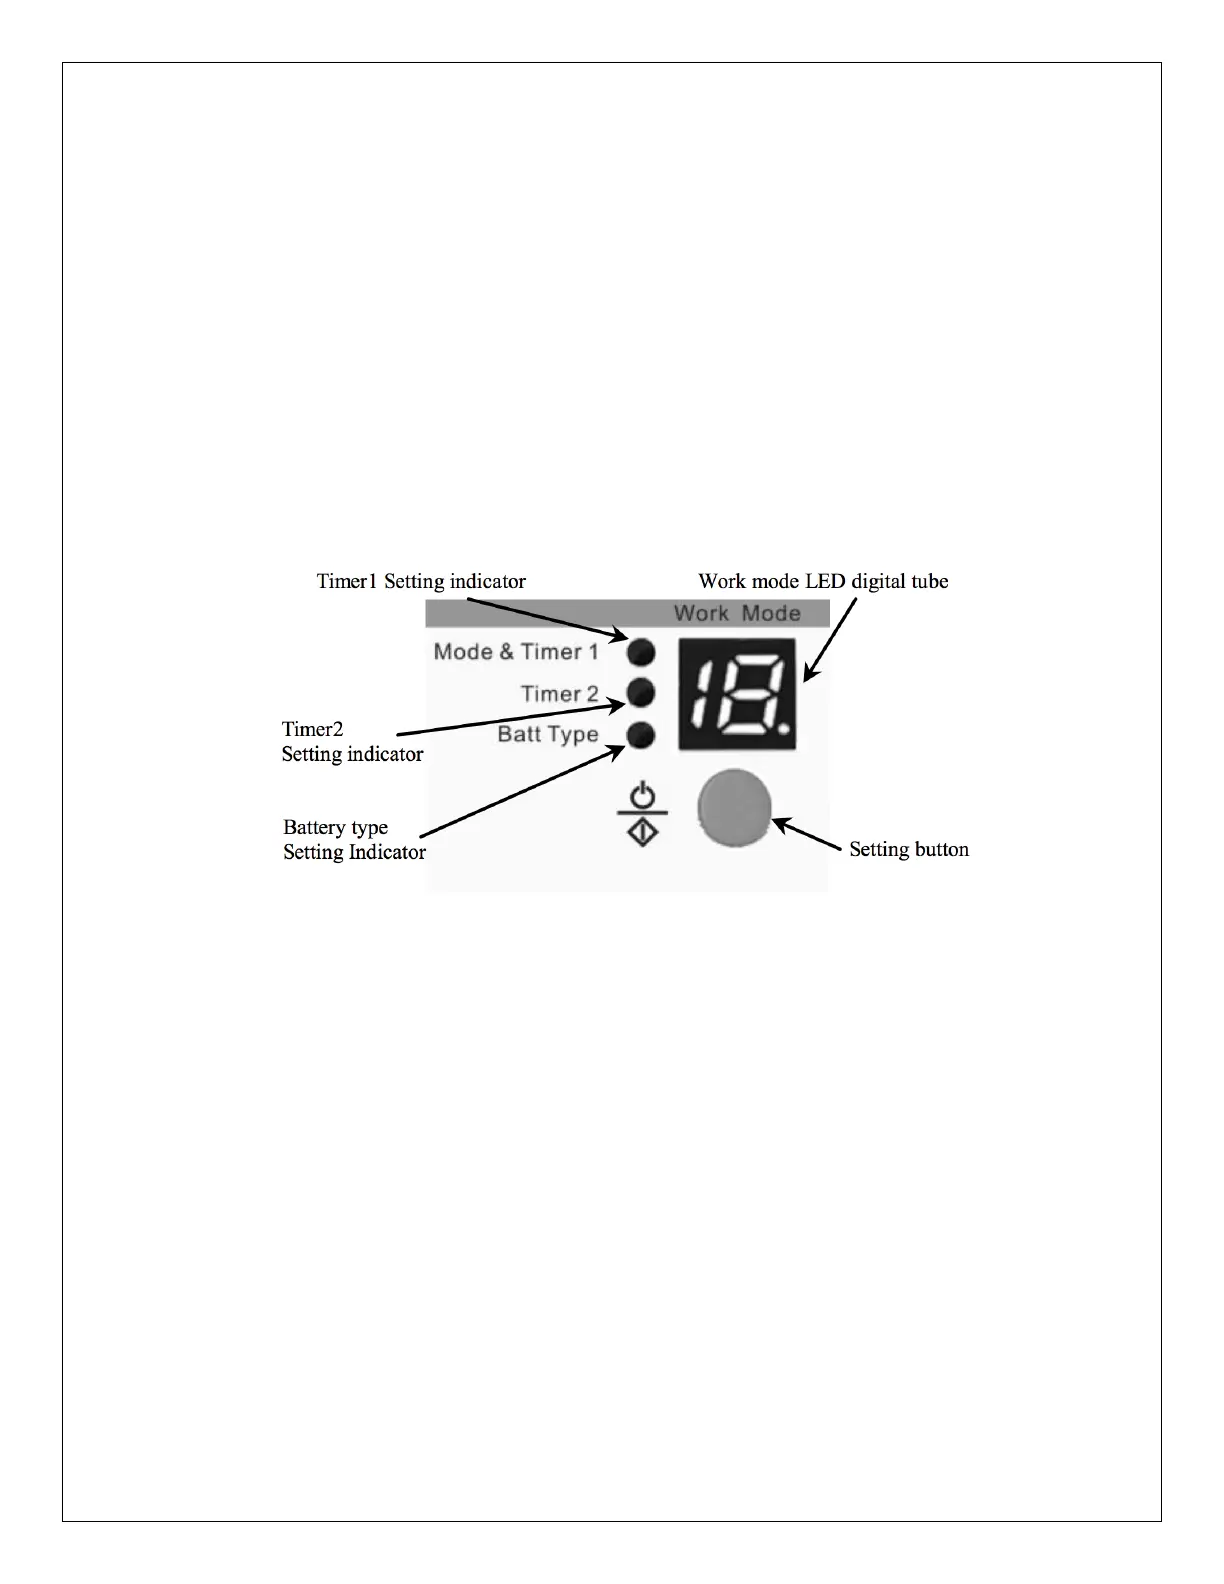
Load Work Mode Setting
Figure 4-5 Instruction figure on setting
Press the setting button once and the setting indicators will be changed once
among Timer 1, Timer 2 and battery type.
When Timer 1 setting indicator is on, press the setting button for more than 5
seconds until the LED digital display flashes. Then press the setting button until
the desired number appears according to the Table 4-6. The setting is finished
when the digital display stops flashing.
Likewise, Timer 2 set-up instructions are the same as Timer 1 using Table 4-7 as
reference.
 Loading...