• In Dierent Network (In WAN)
NOTICE: To save power, the
camera will log out if no
operation is conducted for
about 5 minutes. You need to
log in the camera again by
clicking the “ ” button.
1. Click “Add Device” on the right-side menu.
2. Choose “UID” as the Register Mode.
3. Type in the UID of your camera.
4. Create a name for the camera displayed on Reolink Client.
5. Input the password created on Reolink App to log in.
6. Click “OK” to log in.
Please download the Reolink Client software from our ocial website:
https://reolink.com/software-and-manual/ and install it.
NOTICE: It’s recommended to set up the camera on Reolink App first before adding the
camera to Reolink Client.
Launch the Reolink Client software and manually add the camera to the Client. Please
follow the steps below.
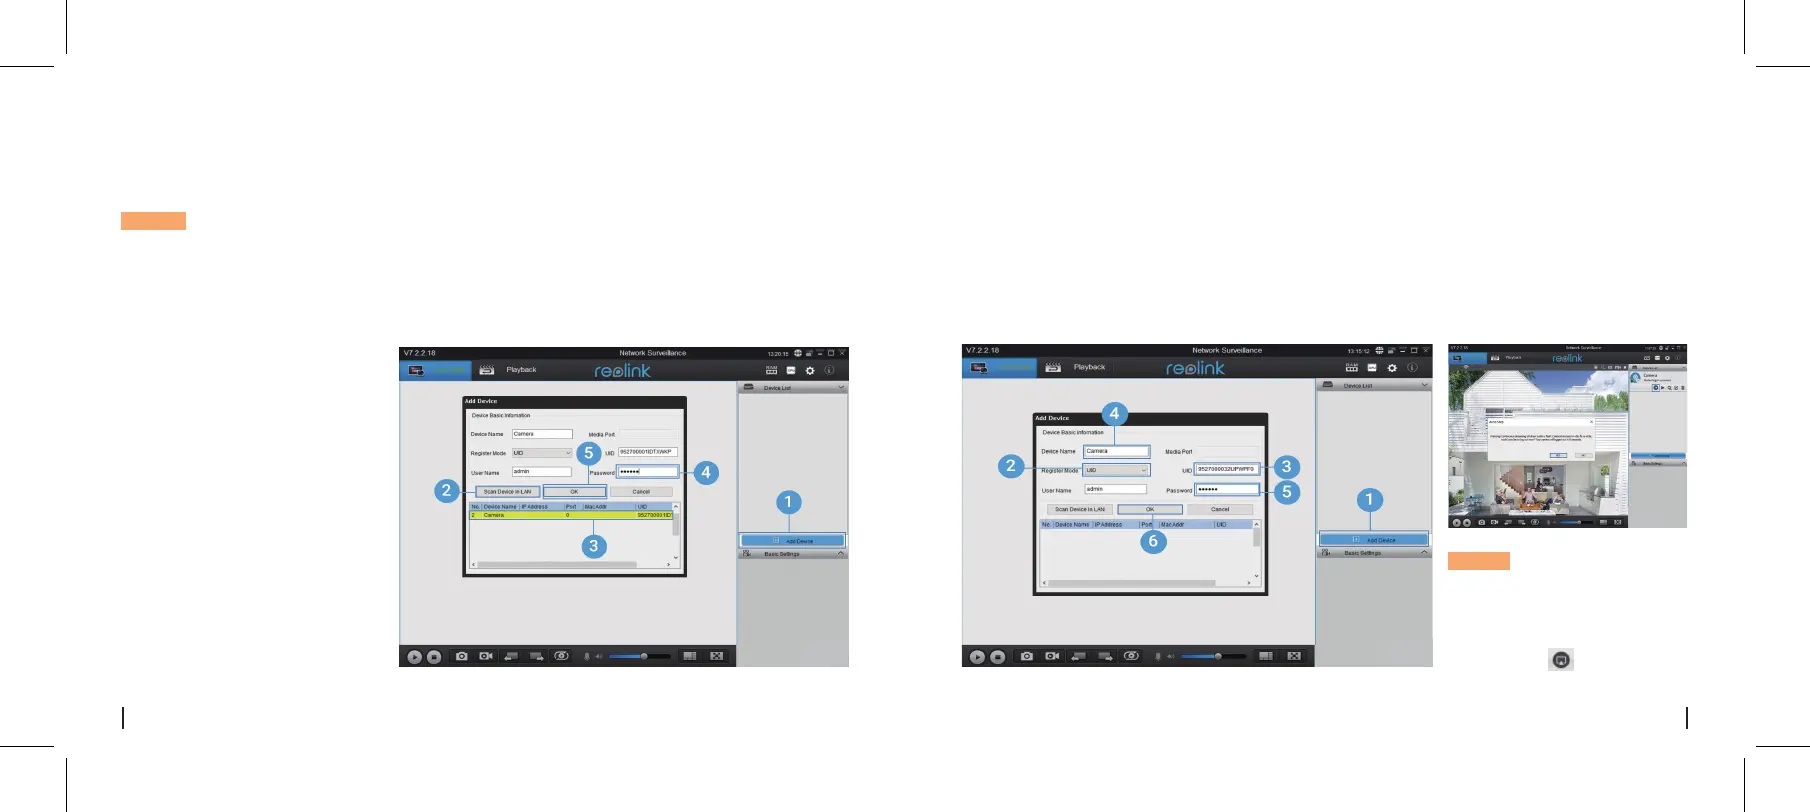
1. Click “Add Device” on the
right-side menu.
2. Click "Scan Device in LAN".
3. Double click on the camera you
want to add. The information will
be filled in automatically.
4. Input the password created on
Reolink App to log in.
5. Click “OK” to log in.
• In Same Network
(In LAN)
Set up Camera on Reolink Client (For PC)
7English6 English

 Loading...