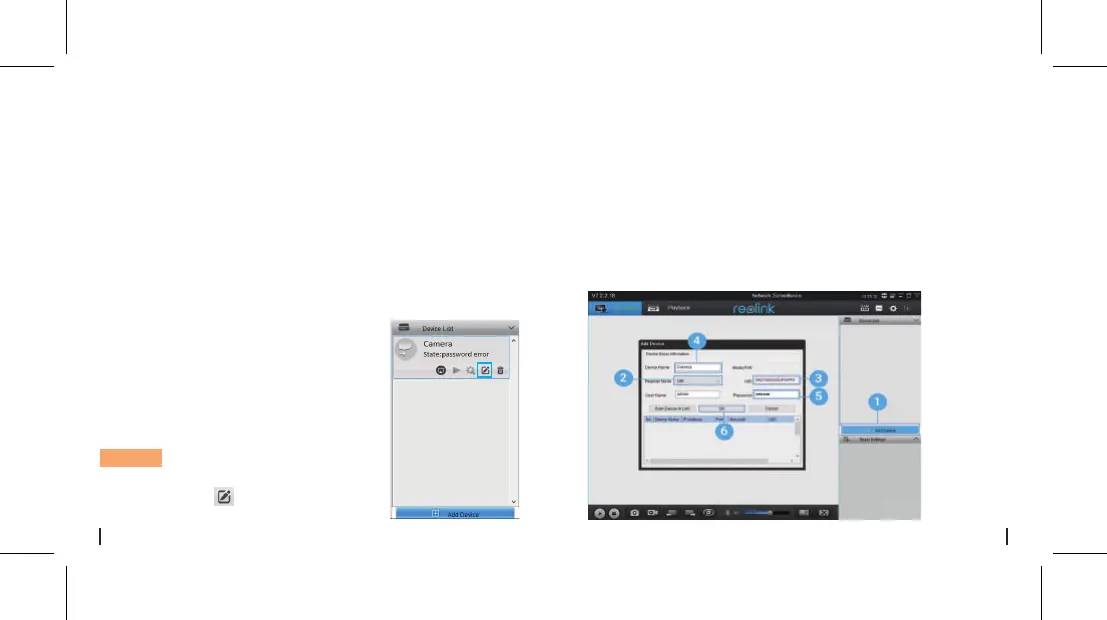
• In Una Rete Diversa (In WAN)
1. Fare clic su "Aggiungi dispositivo" a destra.
2. Scegliere "UID" come modalità.
3. Scrivere l'UID.
4. Creare un nome della telecamera.
5. Inserire la password di accesso.
6. Fare clic su "OK" per il login.
Scaricare il software Reolink Client dal nostro sito web
uciale: https://reolink.com/software-and-manual/ e
installarlo.
Impostare la telecamera sulla App Reolink prima di
aggiungere la telecamera al Reolink Client.
1. Connettere il computer allo
stesso router al quale è connessa
la telecamera.
2. Lanciare Reolink Client. La
telecamera verrà visualizzata
automaticamente nella lista
dispositivi in LAN.
AVVISO: Se hai creato la password
per la telecamera a sulla Reolink
App clicca su “ ” per inserire la
password corretta e accedere.
• Nella Stessa Rete (In LAN)
Aggiungere la Telecamera al
Client Reolink (per PC)
56Italian55 Italian

 Loading...