• In WAN
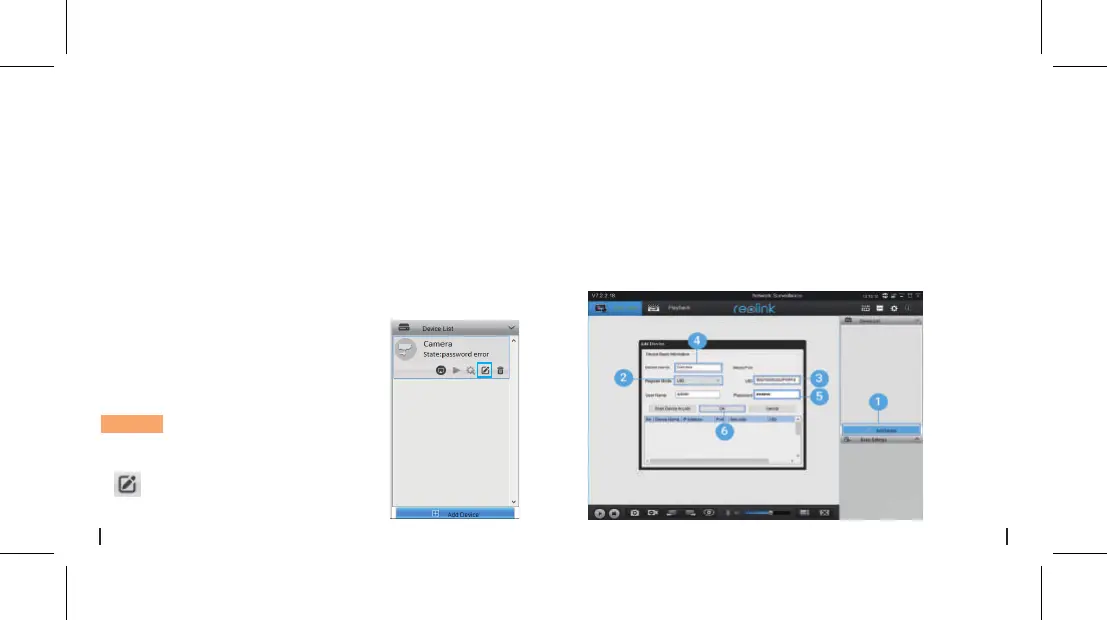
1. Click “Add Device” on the right-side menu.
2. Choose “UID” as the Register Mode.
3. Type in the UID of your camera.
4. Create a display name for the camera.
5. Input the login password created on Reolink App.
6. Click “OK” to log in.
Please download and install the Reolink Client software:
https://reolink.com/software-and-manual/ and install it.
Please configure the camera using the Reolink App first.
Launch the Reolink Client software and follow the steps
below toadd the camera.
1. Connect your computer to the
WiFi network of your router.
2. Launch Reolink Client. The
camera will automatically display
in the device list in LAN.
NOTICE: If you’ve created the
password for your camera on
Reolink App, please click the
“ ” button to enter the correct
password to log in.
• In Same Network (In LAN)
Add the Camera to Reolink
Client (For PC)
8English7 English

 Loading...