• en WAN
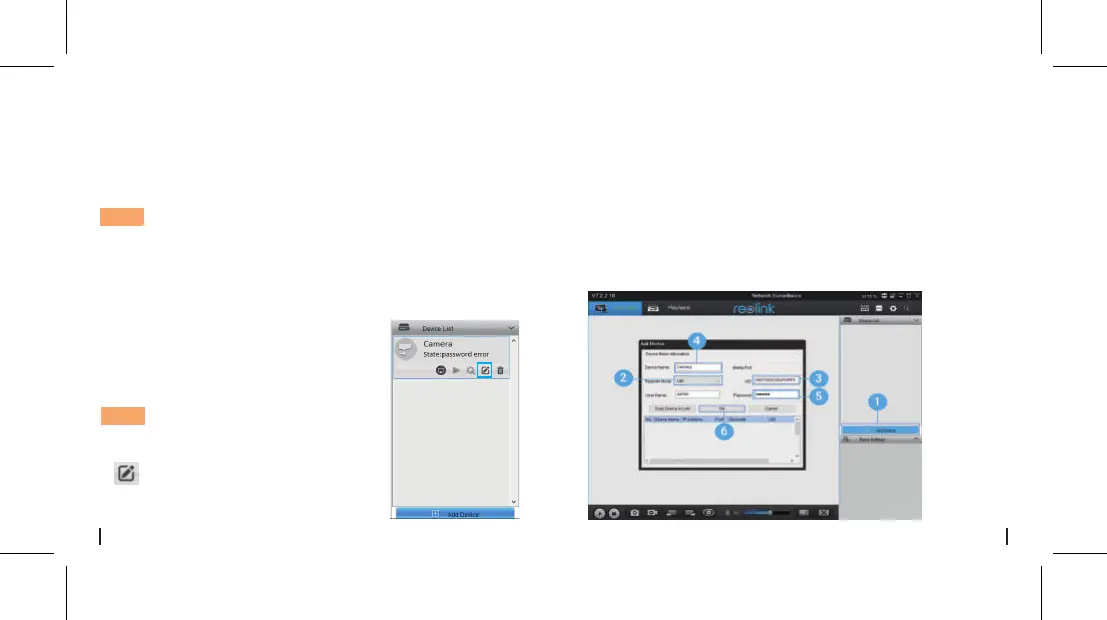
1. Haga clic "Agregar dispositivo" en el menú.
2. Elija "UID" como el modo de registro.
3. Escriba el UID de su cámara.
4. Cree un nombre para mostrar para la cámara.
5. Ingrese el clave de inicio sesión creada en Reolink App.
6. Haga clic en "Aceptar" para iniciar sesión.
Descargue e instale el software Reolink Client desde nuestro
sitio web oficial: https://reolink.com/software-and-manual
Nota: Por favor configurarse primero en Reolink App.
1. Conecte su computadora al
mismo enrutador al cual la cámara
esta conectada.
2. Inicie Reolink Client. La Cámara
se mostrará automáticamente en
la lista de dispositivos en LAN.
Nota: Si ha creado la contraseña
para su cámara en la aplicación
Reolink, por favor haga clic en el
“ ” botón para ingresar la
contraseña correcta para iniciar
sesión.
• en LAN
Agregue la cámara al Reolink
client (para PC)
72Spanish71 Spanish

 Loading...