4
Setup
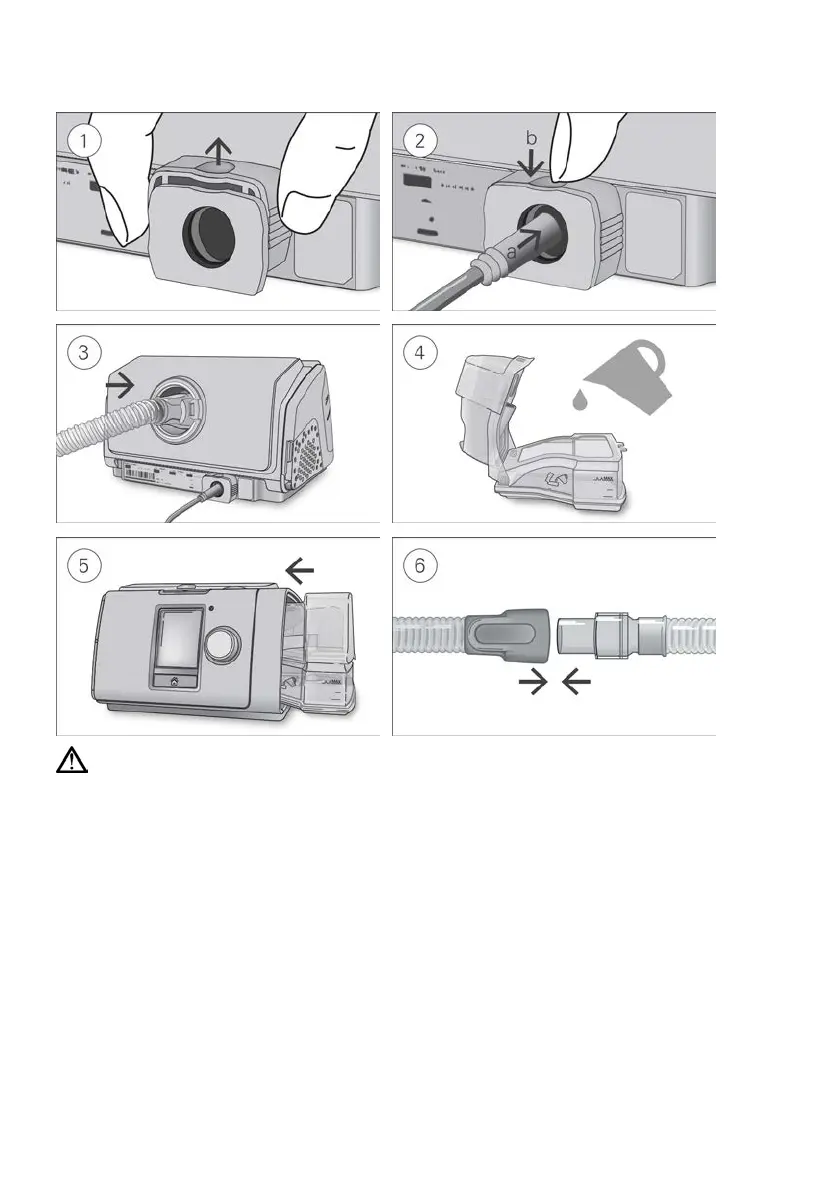
CAUTION
Do not overfill the humidifier as water may enter the device and air tubing.
1. With the device on a stable level surface, grip the retention clip on the back of the device and
pull up to open. Note: The retention clip is shown in the open position.
2. (a) Plug the power connector into the device power inlet then (b) push down the retention clip to
secure in place. Connect one end of the power cord into the power supply unit and the other end
into the power outlet.
3. Connect the air tubing firmly to the air outlet located on the rear of the device.
4. Open the humidifier and fill it with water up to the maximum water level mark.
Do not fill the humidifier with hot water.
5. Close the humidifier and insert it into the side of the device.
6. Connect the free end of the air tubing firmly onto the assembled mask.
See the mask user guide for detailed information.
Recommended masks are available on www.resmed.com.
Note: Ensure the device is placed so that the LED alarm indicator is clearly visible.
 Loading...