Do you have a question about the Resolution RE6100 and is the answer not in the manual?
Lists the key capabilities and specifications of the Helix security and automation platform.
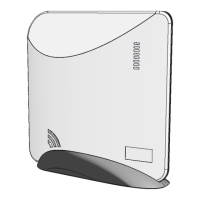
Details the items provided with the Helix panel, including the base unit, battery, and accessories.
Outlines available expansion cards for internet connectivity and other functionalities like Z-Wave.
Set up a new account with your interactive services provider using the provided insert.
Choose a suitable location for Helix, considering AC power and network connectivity requirements.
Mount Helix using the table-top base or wall mounting holes, potentially requiring battery removal.
Connect Helix to the internet via Ethernet or Wi-Fi/Cellular expansion cards, including Wi-Fi enrollment.
Power Helix by connecting the power supply to the jack and routing the cable under the strain relief peg.
Specific requirements for UL installations, including cover screw, power receptacle, and supply mounting.
Enroll sensors and peripherals by pressing the Enroll/WPS button or using the HeliLink app/web portal.
Install your sensors and peripherals in desired locations around the house, referring to specific device manuals.
Configure Helix, sensors, and peripherals using the HeliLink mobile app or the interactive services provider's web portal.
Test the system after setup, verifying proper operation of all installed sensors and peripherals.
Steps for installing an expansion card, including power disconnection, alignment, and seating.
Guidance on routing the antenna wire and installing the antenna with the feed wire on the top side.
Explains RF signal strength, its measurement, and factors affecting it like ambient noise and location.
Tips on interpreting signal strength, averaging, and proper testing of sensor mounting locations.
Optimizes wireless performance for door/window sensors and advises avoiding interference from electronic devices.
Explains how to suppress trouble beeps, allowing them only during specific times or temporary silencing.
Describes using the HeliLink app to enroll sensors by scanning their barcodes for quick setup.
Provides detailed guidelines and diagrams for installing smoke alarms in single and multi-floor homes.
Instructions for replacing the Helix backup battery, noting connector polarization.
Offers tips for discussing and rehearsing emergency plans, understanding system use, and escape strategies.
Explains the meaning of the eight LEDs on the front of Helix for system status indication.
Details how to disarm, arm (Away/Stay), and trigger panic alarms using the HeliPad.
Describes how to view system status and interpret various indicators on the HeliPad display.
Explains how to disarm, arm (Away/Stay), and trigger panic alarms using the PINPad.
Troubleshooting steps for Network Connectivity LED Off, covering Ethernet, Wi-Fi, and Cellular connections.
Troubleshooting steps for Central Station Connectivity LED Off, focusing on port settings and registration.
Troubleshooting steps for Interactive Connectivity LED Off, involving port settings and account registration.
Troubleshooting steps for System Firmware Update LED Off, focusing on port settings for updates.
Details UL system requirements for the control unit, compatible devices, and specific alarm system standards.
Outlines CE system requirements including access levels, user codes, priority of indicators, and ancillary devices.
Details physical dimensions, weight, operating temperature, storage temperature, and humidity.
Lists radio frequencies, power supply, battery, current draw, sensors, interface devices, and user limits.
Enlists the various certifications obtained by the RE6100, RE6110, and RE6120 models.
Covers the product warranty, FCC notice, IC notice, and CE declaration of conformity.
| Brand | Resolution |
|---|---|
| Model | RE6100 |
| Category | Home Automation |
| Language | English |