EasyManua.ls Logo

Rev-A-Shelf 53WC Series User Manual

Rev-A-Shelf 53WC Series
8 pages
To Next Page IconTo Next Page
Page #1 background imageLoading...
Page #1 background image
INSTALLATION INSTRUCTIONS: 53WC SERIES PULLOUT WASTE CONTAINER
12400 Earl Jones Way
Louisville, KY 40299
rev-a-shelf.com
Customer Service: 800-626-1126
53WC SERIES PULLOUT WASTE CONTAINER
TOOLS REQUIRED:
30 MIN
ESTIMATED ASSEMBLY TIME:
CARE AND MAINTENANCE:
Clean with a damp cloth and
wipe parts dry.
I-53WC-0419
Parts List
No. Description Qty
1 Slides 2
2 Chassis Bottom 1
3 Waste Container 1 or 2
4 Door Mount Bracket 2
5 Wall Sides 2
6 Rear Basket (Single Version Only) 1
7 Connecting Rod 1
8 #8 x 3/4” Deep Thread Screws 8
9 #6 x 3/8” Pan Head Screws 2
10 M4 x 10mm Flat Head Screws 4
11 #6 x 1/2” Flat Head Screws 6
12 1/4-20 x 5/8” Phillips Bolt (w/ Washer) 4
13 1/4-20 x 1-1/4” Phillips Bolt (w/ Washer) 4
14 Connecting Rod Arm 2
15 Spacer 8
4 5 6
10 11 151412 13
7 8 9
1 2 3
Question and Answer IconNeed help?

Do you have a question about the Rev-A-Shelf 53WC Series and is the answer not in the manual?

Rev-A-Shelf 53WC Series Specifications

General IconGeneral
Series53WC
Product TypeWaste Container
LidYes
TypePull-Out
FinishWhite
Installation TypeIn-Cabinet
MountCabinet
Capacity35 Quarts
ColorWhite

Summary

53WC Series Pullout Waste Container Installation

Parts List

Lists all components and quantities required for installation.

Tools Required

Details the necessary tools for the assembly process.

Estimated Assembly Time

Provides an estimate of the time needed for assembly.

Care and Maintenance

Instructions for cleaning and maintaining the installed unit.

Installation Steps

Step 1: Install Wall Sides

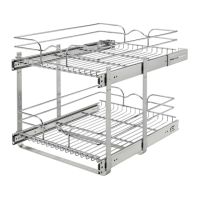
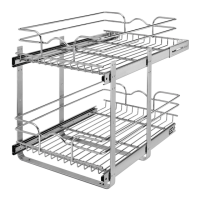
Attach the wall sides to the slides, ensuring proper engagement.

Step 2: Install Main Chassis

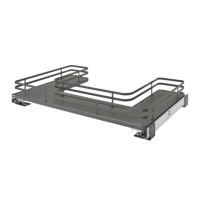
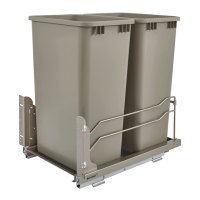
Install the main chassis to the slides and connect the connecting rod.

Step 3: Mount Waste Container Frame

Use the template to mount the waste container frame to the cabinet floor.

Step 4A: Attach Door Brackets

Attach the door brackets to the L-brackets using 5/8" bolts.

Step 4B: Align Door Brackets

Align door brackets with the thick portion of the cabinet door.

Step 5A: Determine Door Mounting Holes

Measure and mark door hole locations using the template guide.

Step 5B: Alternate Door Mounting Method

Use double stick tape to temporarily secure door brackets for easier alignment.

Step 6: Secure Brackets to Cabinet Door

Use flat head wood screws to secure the brackets to the cabinet door.

Step 7: Adjust Cabinet Door Alignment

Loosen and position bolts to adjust door alignment, then retighten.

Step 8: Install Waste Containers

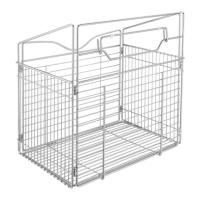
Place the waste containers into the installed unit.

Related product manuals