Step four: Installing the controller (cont.)
Follow these instructions if you intend to operate the Roamer with your LEFT hand.
Identify the left-side armrest cap, and remove it to reveal the installation point. (Then
install the cap onto the installation point of the right-side armrest, to prevent dust or
debris from going inside.)
1)
2)
Ensure the controller installation knob (located beneath the left-side armrest) is
partially loosened. (Turn clockwise to loosen.)
3)
Undo the velcro strap that attaches the power cable to the right-side armrest.4)
Move the power cable behind the seat until it reaches the left-side armrest. (Ensure
that the power cable is NOT in the way of sitting down, or in the way of any parts
that may move while the Roamer is in motion. Otherwise, there’s risk of damage to
the power cable.)
5)
Install the controller (with the joystick and control buttons facing upward) by sliding
the metal tube into the installation point, all the way to the end.
6)
Secure the controller by continuously turning the controller installation knob to the
right until it is fully tightened.
7)
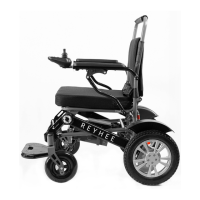
Instructions for installing the controller in the left-side armrest:
Assembly (Cont.)
15