6
Section 1
Burner Orifice Plate Replacement (all models).
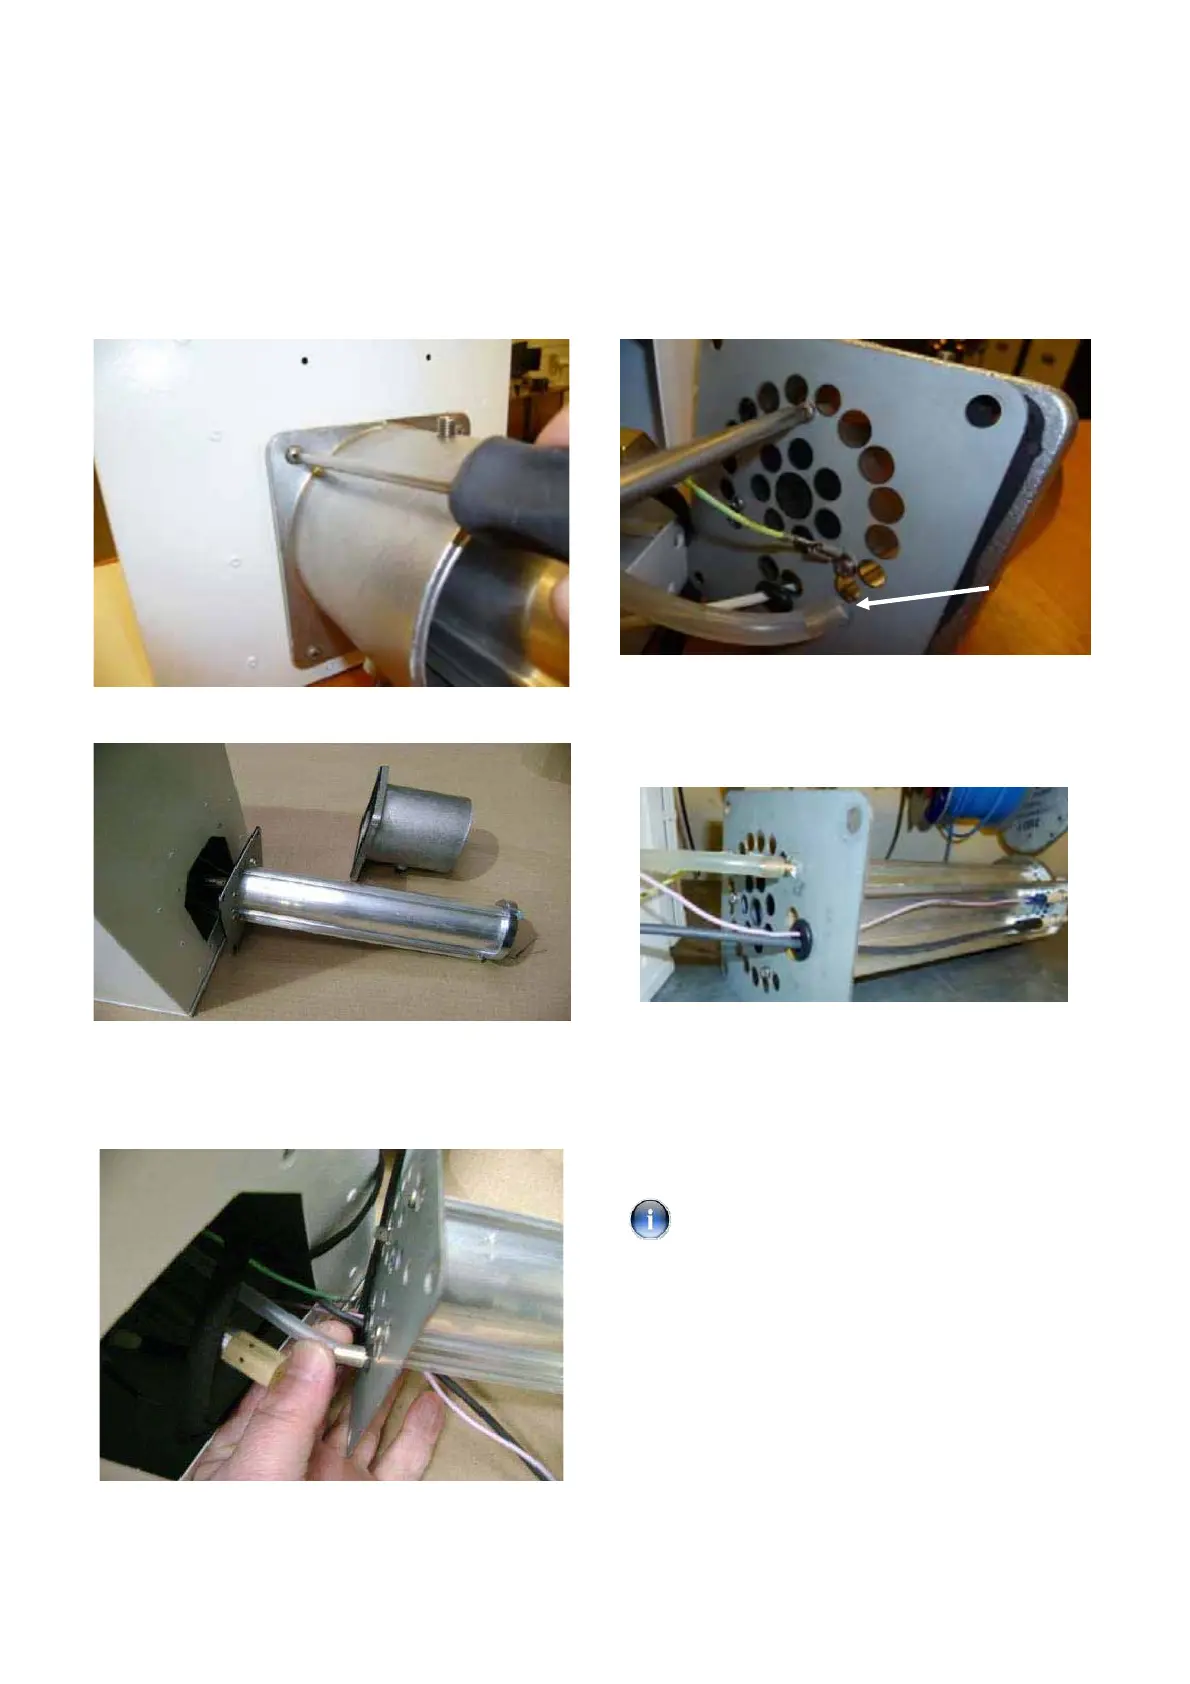
Step 1: Remove the four retaining screws securing
the burner casting using a no. 2 crosshead
screwdriver.
Step 3: The burner head assembly can now be
disconnected by separating the connectors of the
ignition and flame probe lead assemblies and
removing the ground lead and pressure switch silicon
tube.
Step 2: Remove the supporting casting and gasket.
Step 4: The burner orifice plate can then be released
by removing the 3 fixing screws from the burner tube
using a No.2 crosshead screwdriver.
Step 5: Using a flathead screwdriver remove the
retaining washer securing the impulse stud (arrowed).
Remove the stud. Remove the cable grommet from
the old orifice plate and attach to the replacement
plate.
Step 6: Fit new propane burner orifice plate to burner
tube ensuring the impulse stud is facing the correct
direction. The cable grommet is fitted to the lower of
the 3 holes at the bottom of the plate (arrowed). Two
new gaskets are provided and should be used when
reconnecting to the burner housing. Dispose of the old
gaskets.
See Section 13 for correct burner orifice plate
identification.
Section 2
Turbulator Information.
These heaters have a different arrangement of
turbulators and tube inserts when operating on LPG.
This section will guide you through the process of
changing these components where necessary.

 Loading...