Connecting the Network Cable to the Network
6
2
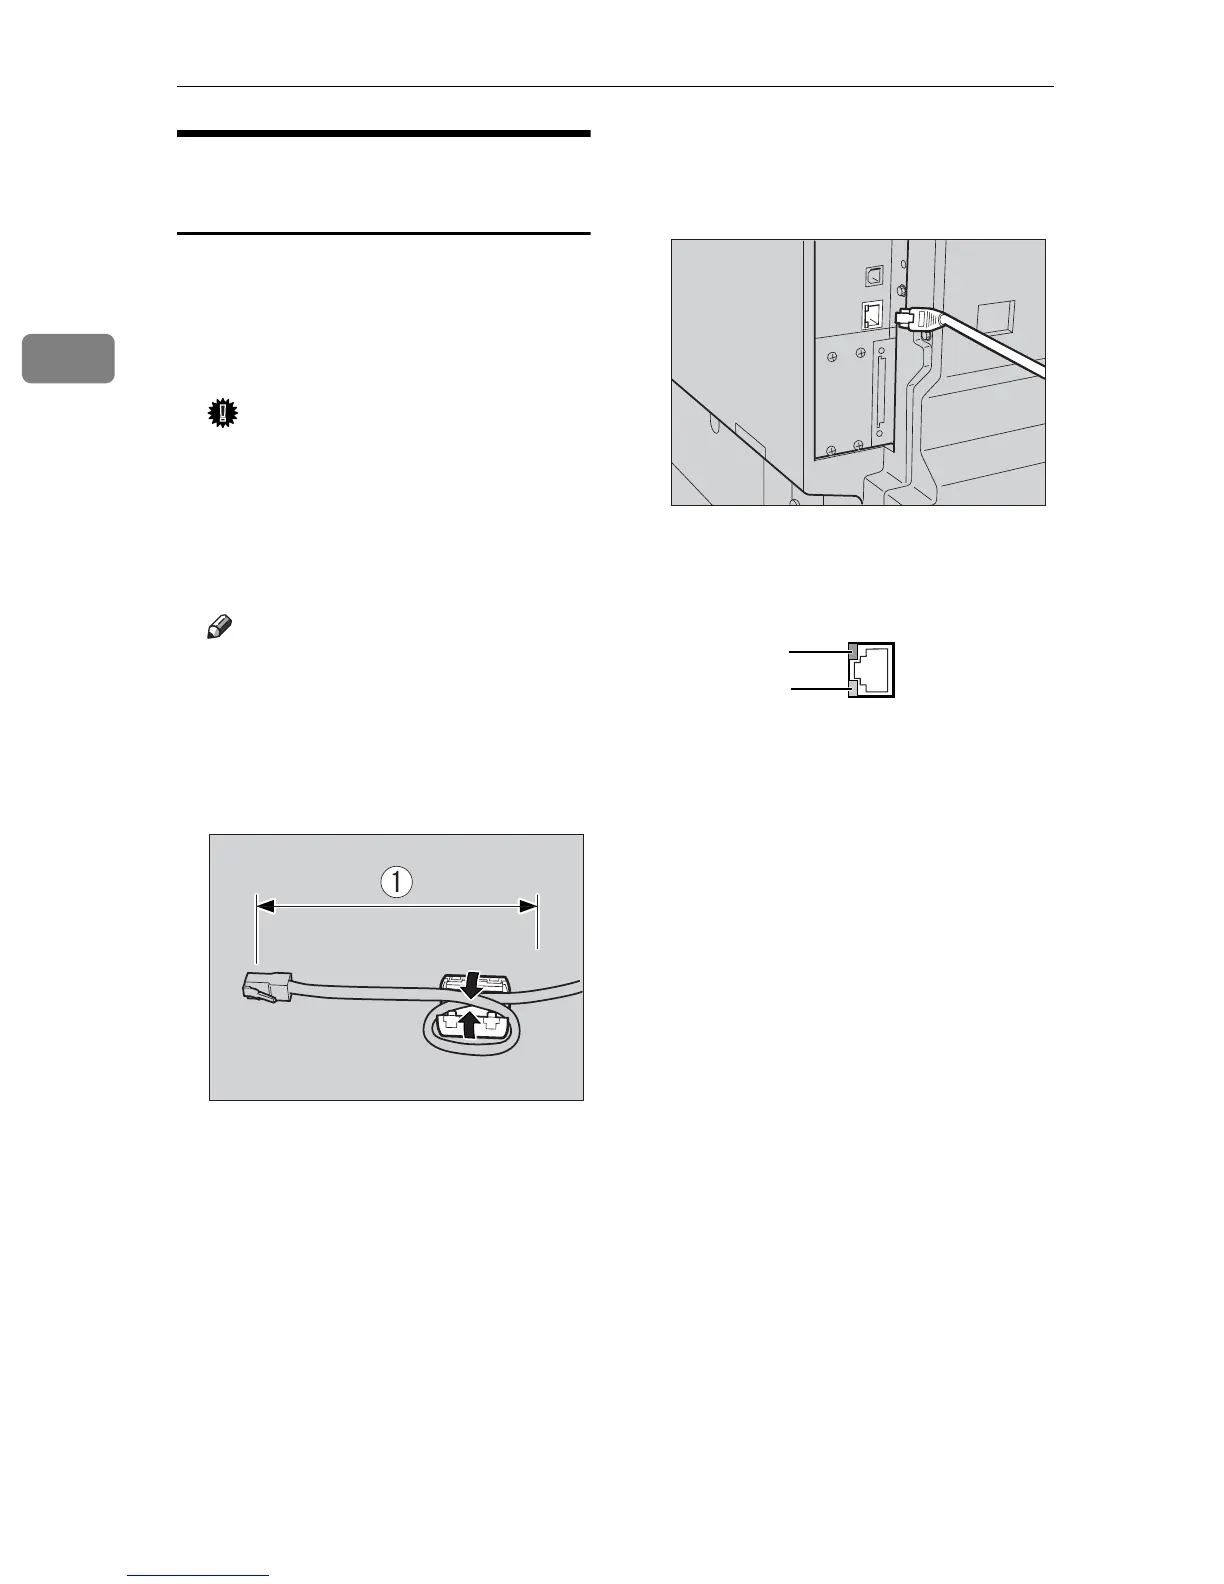
Connecting to the Ethernet
Interface
The network interface board supports
10BASE-T or 100BASE-TX connec-
tions.
A Turn off the main power switch.
Important
❒ Make sure the main power is
off. See “Turning On the Pow-
er”, Copy Reference.
B Loop the network interface cable
and attach the ferrite core.
Note
❒
The network interface cable loop
should be about 10 cm (4”)(A)
from the end of the cable (clos-
est end to the printer). The fer-
rite core at the end of the cable
should be a ring type.
C Connect the network interface ca-
ble to the 10BASE-T/100BASE-TX
port.
D Turn on the main power switch.
1. Indicator (green)
Remains green when the machine is
properly connected to the network.
2. Indicator (yellow)
Turns yellow when 100 BASE-TX is
operating. Turns off when 10 BASE-T
is operating.
AAW026S1
ANY001S
AAW022S1
1.
2.
 Loading...