9
M 320
1. Check that the router (access point) is working correctly.
2. Make sure the wireless LAN option is attached to the
machine and the wireless (Wi-Fi) connection is enabled.
For details, see page 6 "Attaching the wireless LAN option".
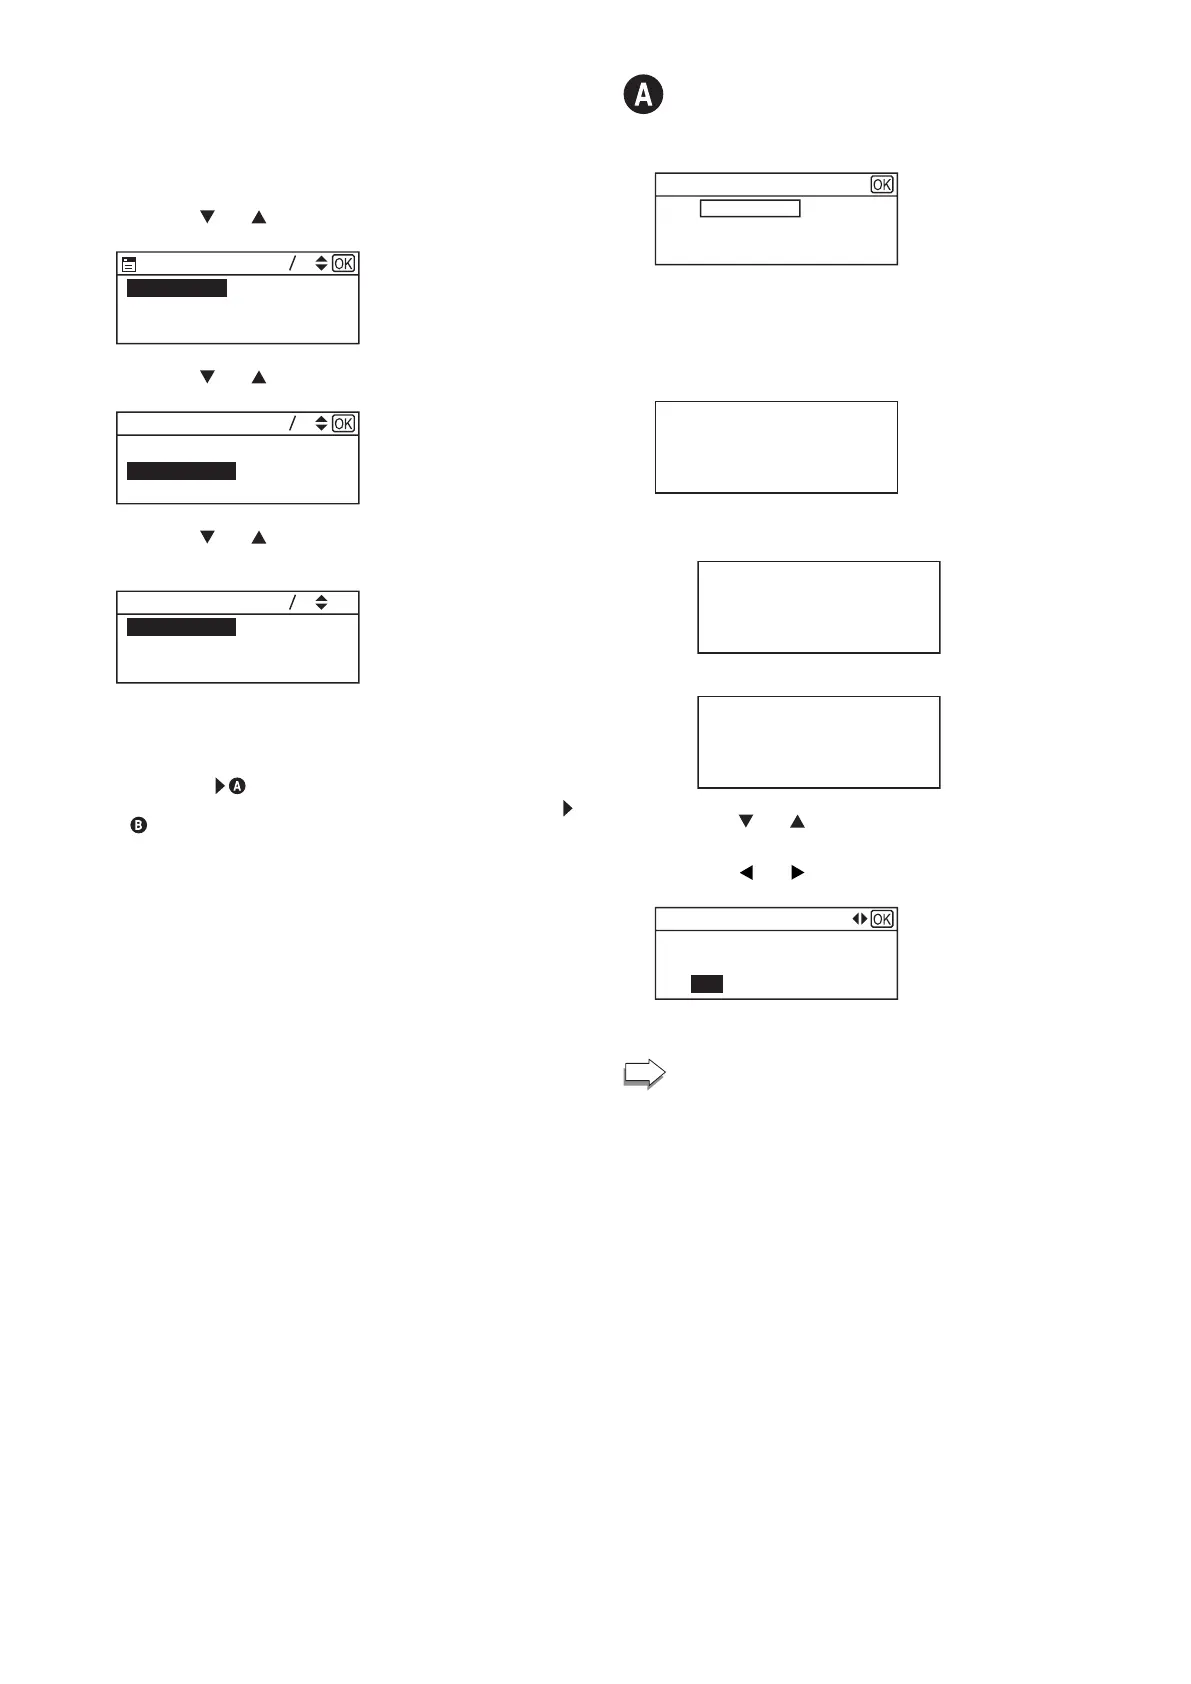
3. Press the [
] or [ ] key to select [Network Setup], and then
the [OK] key.
12
Network Setup
Quit Setup
4. Press the [ ] or [ ] key to select [Wireless (Wi-Fi)], and
then the [OK] key.
Network Wizard
12
Wired (Ethernet)
Wireless (Wi-Fi)
5. Press the [ ] or [ ] key to select SSID of the router (access
point) from the searched SSID list, and then press the [OK]
key.
113
Network 2
Network 3
Network 1
The next steps differ depending on the authentication method
that you have selected. Proceed to Step 6 of the appropriate
section.
• If the authentication method is set to [WPA2-PSK] or [Mixed Mode
WPA2/WPA]
• If the authentication method is set to [Open system] or [Shared Key]
• If the authentication method has not been configured, proceed to
Ste p 7.
Connecting to devices using the WPA2-PSK or
Mix Mode WPA2/WPA authentication
6. Enter the encryption key using the number keys, and then
press the [OK] key.
WPA2-PSK
(8-63 chars/64 hex)
Key :
As the passphrase, you can enter either 8 to 63 ASCII
characters (0x20-0x7e) or 64 hexadecimal digits (0-9, A-F, a-f).
For details about checking the encryption key, see "Checking the
SSID and Encryption key".
7. Press the [OK] key.
(OK/Back)
Are you sure to connect?
8. Check the result.
Connection has succeeded:
Connect succeed!
Connection has failed:
Connect failed!
9. Press the [ ] or [ ] key to select [Quit Setup], and then the
[OK] key.
10. Press the [
] or [ ] key to select [Yes], and then the [OK]
key.
Network Wizard
Do not auto display
Menu from next time
Yes No
11. Configuring the Wireless (Wi-Fi) settings is complete.
To use the printer driver, install the printer driver
according to the procedure on page 19 "4. Installing the
Printer Driver".
 Loading...