
T
timjonesAug 18, 2025
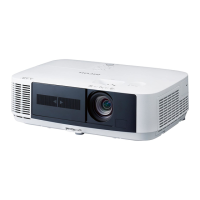
What to do if the lamp burns out on Ricoh PJ KU12000?
- AAmber KnightAug 18, 2025
If the lamp burns out or makes a popping sound on your Ricoh Projector, the projector will not turn on until the lamp module has been replaced.
What to do if the lamp burns out on Ricoh PJ KU12000?
If the lamp burns out or makes a popping sound on your Ricoh Projector, the projector will not turn on until the lamp module has been replaced.
Why does my Ricoh PJ KU12000 Projector show no image on screen?
If no image appears on the screen of your Ricoh Projector, ensure all cables and power connections are correctly and securely connected. Check that the connector pins are not crooked or broken, and that the projection lamp is securely installed. Also, make sure you have removed the lens cover and the projector is switched on.
What to do if the Ricoh PJ KU12000 image is out of focus?
If the image on your Ricoh Projector is out of focus, adjust the Focus function for the projector lens. Also, ensure the projection screen is positioned within the required distance.
How to fix slanted sides on my Ricoh PJ KU12000 image?
To correct slanted sides on your Ricoh Projector image, reposition the projector so that it is centered on the screen and below the bottom of the screen, if possible. Alternatively, press the "Keystone H" or "Keystone V" button on the remote control until the sides are vertical.
Why is the image on my Ricoh PJ KU12000 unstable or flickering?
If the image on your Ricoh Projector is unstable or flickering, try adjusting the “Phase” setting. You can also try changing the monitor color setting from your computer.
What to do if Ricoh Projector image is too small or too large?
If the image from your Ricoh Projector is too small or too large, move the projector closer to or further from the screen. Alternatively, press “Menu” on the control panel or keypad, go to “OUTPUT” then “Aspect Ratio”, and try the different settings.
How to correct a reversed image on a Ricoh Projector?
To correct a reversed image on your Ricoh Projector, adjust the “SETUP” then “Rear Projection” settings.
How do I fix a partial image on my Ricoh Projector?
If your Ricoh Projector displays a partial, scrolling, or incorrectly displayed image, press "SYNC" on the control panel or the remote control. Verify that your display resolution setting is lower than or equal to WUXGA (1920x1200). You can also try restarting all equipment, including the projector.
Why does my Ricoh PJ KU12000 Projector have a vertical flickering bar?
If your Ricoh Projector's image has a vertical flickering bar, use the “Frequency” setting to make an adjustment. Also, check and reconfigure the display mode of your graphic card to make it compatible with the projector.
How to fix 3D display issue on Ricoh Projector?
If your Ricoh Projector image does not display in 3D, check if the battery of the 3D glasses is drained and that the 3D glasses are turned on. Also, check if the 3D supported format timings are correct.
Instructions for setting up the projector and connecting peripherals.
General safety precautions, symbols, and environmental considerations for safe use.
Guidelines for safe management of power cables and connectors to prevent hazards.
Precautions for operating and handling the projector unit itself, including warnings.
Safety measures for accessing or cleaning internal components, warning about high voltage.
Detailed instructions for safe lamp replacement, operation, and potential explosion risks.
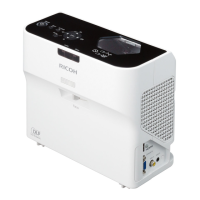
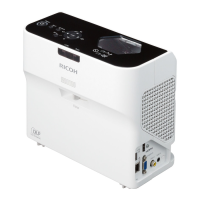
Explains the purpose of each button on the projector's integrated control panel.
Details and labels all available ports for connecting external devices and signals.
Explains the function of each button on the projector's remote control.
Guidelines for optimal placement relative to the screen, considering distance and angle.
Step-by-step instructions for installing and removing the projector lens safely.
Diagram showing how to connect PCs, notebooks, and monitors to the projector.
Diagrams for connecting DVD players, cameras, and other video devices.
Describes the sequence for turning on the projector and initial configuration steps.
Step-by-step instructions for safely turning off the projector and its cooling cycle.
Interpretation of LED lights for lamp status, overheating, and operational errors.
Settings for lamp modes, power levels, and automatic switching between lamps.
Steps to resolve common issues like no image, incorrect display, or screen freezing.
Steps for handling unresponsive controls, lamp end-of-life, or popping sounds.
Explains messages related to projector shutdown and component life expectancy.
Detailed steps and crucial safety warnings for lamp replacement.
Instructions for cleaning and replacing the projector's air filters.
Detailed list of the projector's technology, resolution, compatibility, and power consumption.
| Light Source | Laser |
|---|---|
| Technology | DLP |
| Brightness | 12000 lumens |
| Lamp Life | 20, 000 hours |
| Input Terminals | HDMI, DVI-D, VGA, 3G-SDI |
| Output Terminals | VGA |
| Operating Temperature | 5°C - 40°C |
| Resolution | 3840 x 2160 (4K UHD) |