40
1
Press the four-way controller (4)
in A mode.
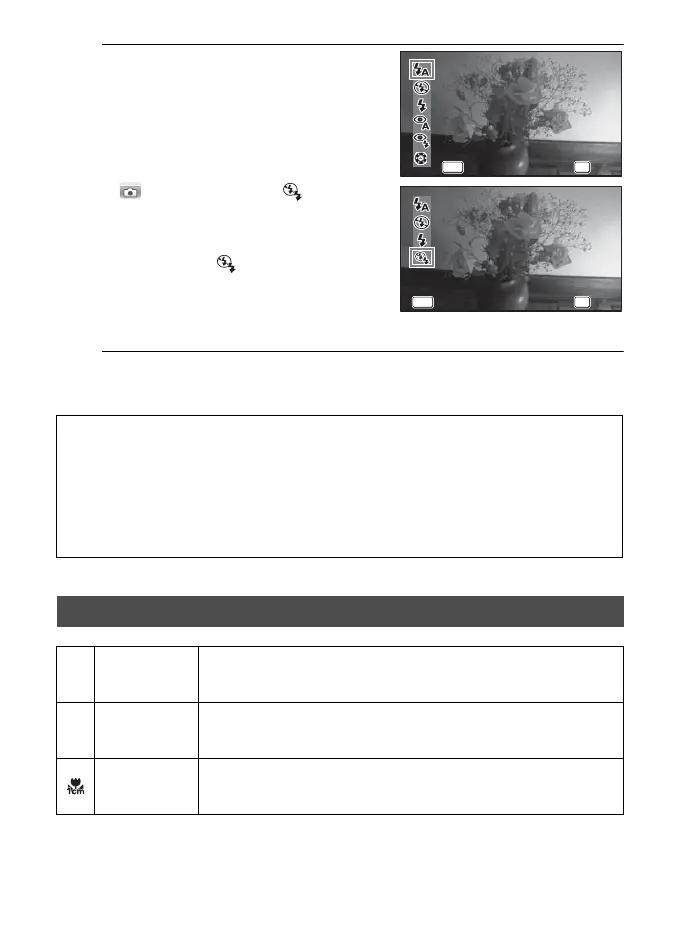
The [Flash Mode] screen appears.
The flash mode changes each time the
button is pressed. You can also change the
setting using the four-way controller (23).
In (Underwater) mode, (Flash Off +
Flash On (2 shots)) appears instead of c
(Auto + Red-eye) and d (Flash On + Red-
eye) as shown on the right.
When you select (Flash Off + Flash On
(2 shots)), two images are taken in
succession in a (Flash Off) and b (Flash
On). After taking the pictures, you can
select the best shot from them.
2
Press the 4 button.
The setting is saved and the camera returns to capture mode.
About the red-eye phenomenon
Taking pictures using the flash may cause the subject’s eyes to appear red in the
resulting picture. This phenomenon occurs when the light from the flash is reflected
in the subject’s eyes. It can be reduced by increasing the illumination in the area
around the subject and/or decreasing the subject distance and adjusting the lens to
wider angle setting. Setting the flash mode to c (Auto + Red-eye) or d (Flash On +
Red-eye) is also an effective way of reducing red eyes.
Selecting the Focus Mode
=
Standard
This mode is used when the distance to the subject is from 50 cm
to ∞. The camera is focused on the subject in the autofocus area
when the shutter release button is pressed halfway.
q
Macro
This mode is used when the distance to the subject is from 10 cm
to 60 cm. The camera is focused on the subject in the autofocus
area when the shutter release button is pressed halfway.
1cm Macro
This mode is used when the distance to the subject is from 1 cm
to 30 cm. The camera is focused on the subject in the autofocus
area when the shutter release button is pressed halfway.
MEN
MENU OK
OK
OKCancel
Cancel
Flash Mode
Auto
Flash Mode
Auto
MEN
MENU OK
OK
OKCancel
Cancel
Flash Mode
Flash Off+Flash On
(2 shots)
Flash Mode
Flash Off+Flash On
(2 shots)

 Loading...