For the most up to date documents, bike models, additional information, instructional videos,
And more visit us at Ride1UP.com
3.2 Front Wheel Assembly:
• Remove front wheel from fully wrapped frame and separate front fender.
• Do not touch the brake pads or rotors with your fingers. The oil will contaminate them and cause
noises when braking.
• Take the front axle and remove the axle nut.
• Insert the axle through the front wheel axle hole.
• Screw but do not tighten the axle nut back onto the axle of the front wheel, after placing the spacer
and washer on the axle. Leave space for future tightening in the following steps.
• Align the disc rotor so it fits between the brake pads. Do not force it. (Figure 1)
• Place the front wheel axle onto the fork dropouts assuring that the disc rotor is aligned and fits
between the brake pads.
• Use two 13/15 wrenches to secure the front wheel to the fork by tightening both axle bolts at the
same time.
• Place the front fender to the front wheel through the back of the wheel.
• Insert the screw through the fork’s bridge then through the fender’s top bracket and screw in the hex
nut.
• Use the 5mm allen wrench and a 10mm wrench to tighten the screw and hex nut.
• Screw a 34mm screw through the bottom fender brackets and into the fork on both sides.
WARNING ◆ IT IS VITAL THAT THE AXLE BOLTS HAVE BEEN TIGHTENED. IF THEY ARE NOT
PROPERLY ALIGNED, THE WHEEL MAY COME OFF, CAUSING SERIOUS INJURY AND/OR DEATH. ◆
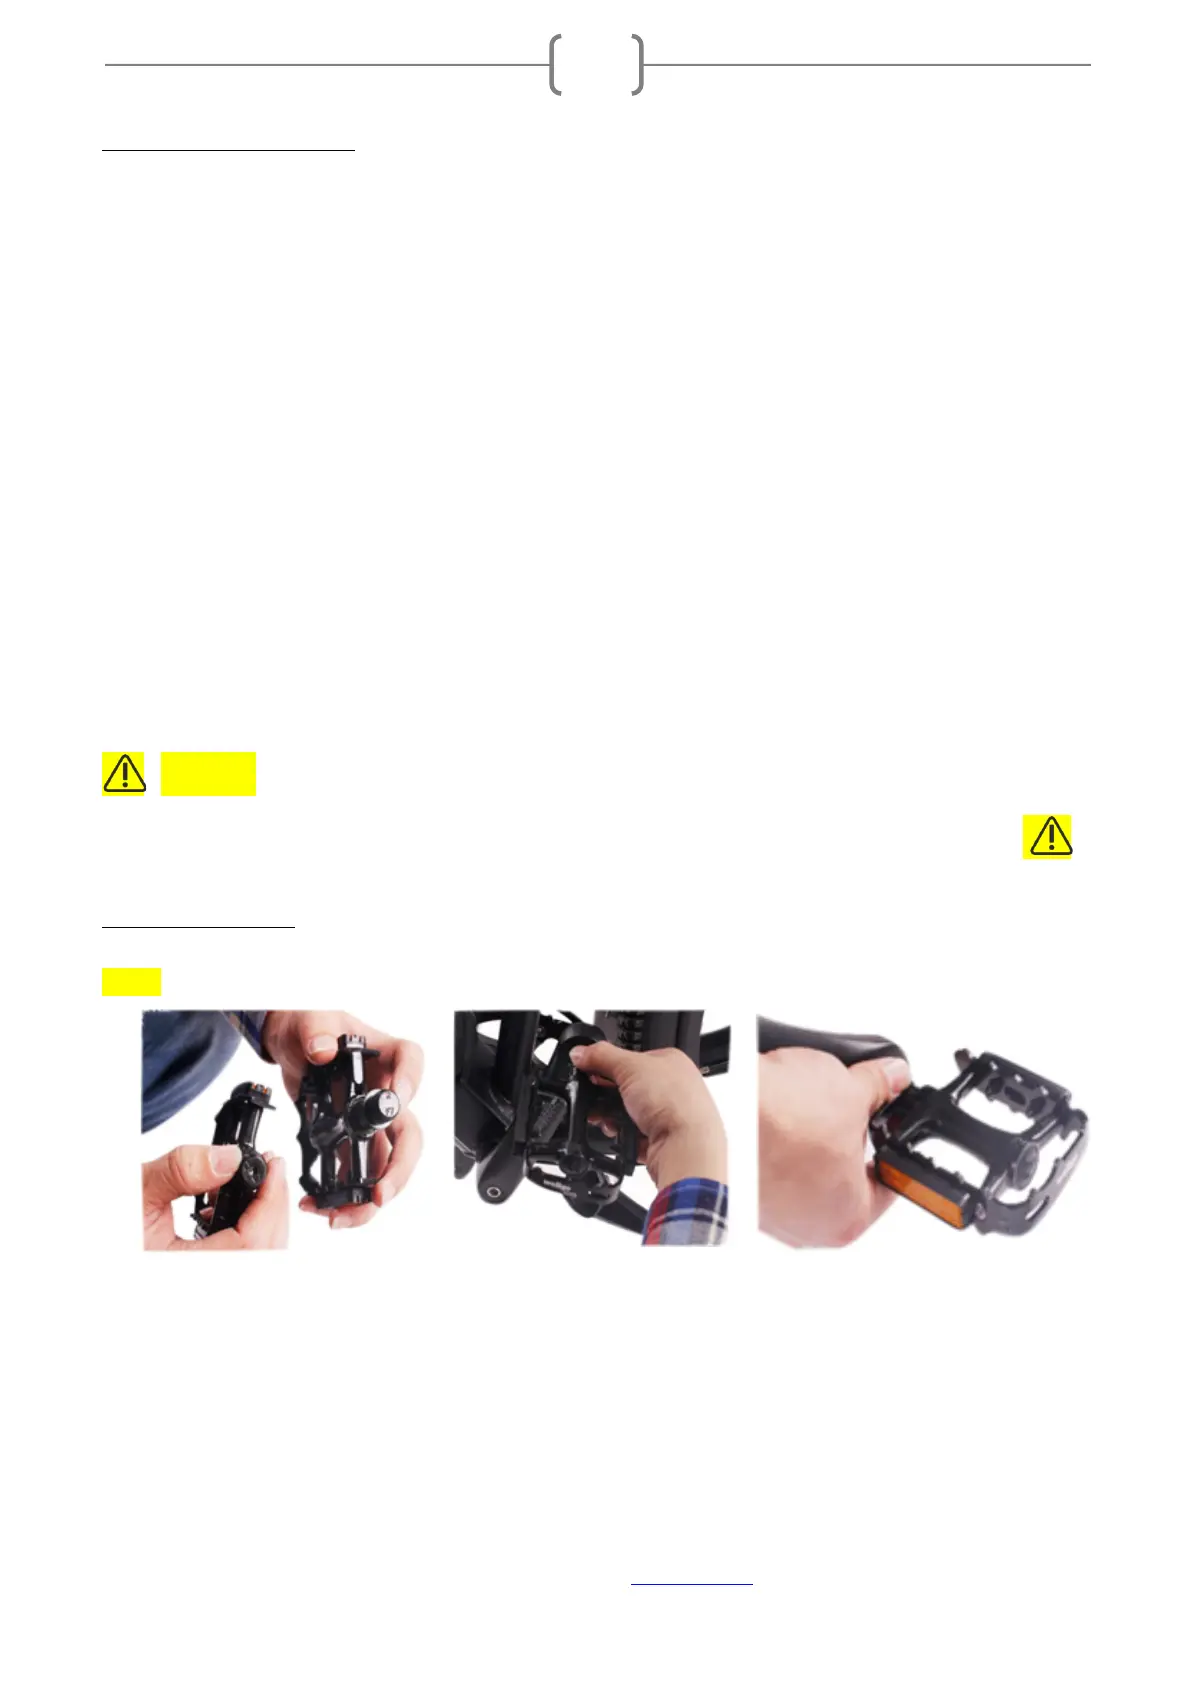
3.3 Pedal Assembly:
NOTE:
◆
THE LEFT AND RIGHT PEDALS ARE UNIQUE.
• The left pedal (marked “L”) must be installed in the left crank arm. It is reverse thread, rotate counter-
clockwise to install and tighten.
• Screw each pedal in by hand. They should screw in easily to start. Do not force them.
• The right pedal (marked “R”) must be installed in the right crank arm. It is standard thread, rotate
clockwise to install and tighten.
• Use a 15mm wrench on pedals to finish tightening the pedals in place.