This document serves as the owner's manual for the Ride1Up RIFT e-bike, providing comprehensive information on its assembly, operation, maintenance, and safety. It emphasizes the importance of proper assembly and adherence to safety guidelines to ensure a safe and enjoyable riding experience.
Function Description:
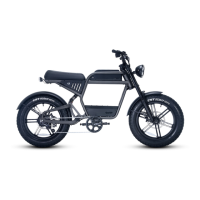
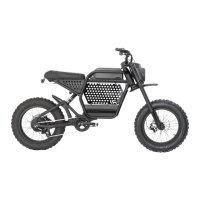
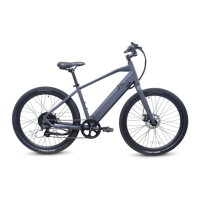
The Ride1Up RIFT is an electric bicycle designed for use on paved roads and designated e-bike paths. It features pedal assist, allowing riders to receive electric motor assistance while pedaling, and a throttle for independent electric propulsion. The e-bike is designed to enhance the riding experience by providing additional power, making commutes and recreational rides more accessible and less strenuous. It is equipped with a display unit that shows important information such as battery voltage, speed, and mileage. The e-bike's electrical system includes a battery, motor, and controller, all working in conjunction to provide power. It also features a rear rack with a maximum weight capacity of 150 lbs, allowing for the transport of cargo or a passenger with extra caution.
Usage Features:
The manual outlines several key usage features to ensure safe and effective operation of the RIFT e-bike:
- Assembly and Inspection: The owner is responsible for properly assembling the e-bike and inspecting all components, ensuring all nuts and bolts are tightened. It is highly recommended that a qualified third party or professional bike mechanic perform or verify the assembly. This is critical for safety and warranty coverage.
- Age and Weight Restrictions: Riders must be eighteen (18) years or older. The e-bike has a maximum permitted overall weight capacity (rider + passenger + cargo) of 350 lbs. Exceeding this limit can compromise the bike's integrity and lead to serious injury or death.
- Riding Environment: The e-bike is intended for use on paved roads or designated e-bike paths only. Using it for other purposes may result in serious injury. Riders should practice in a safe, hazard-free area to learn the e-bike's controls and power.
- Local Laws and Regulations: Riders must understand and follow all local laws and regulations pertaining to e-bike operation, including speed limits, which vary by location. The top speed on pedal assist is 28mph.
- Visibility and Lighting: For night riding or low visibility conditions, the e-bike MUST have white front lights and red rear lights lit, along with a red rear reflector and amber pedal reflectors. Reflective and light-colored clothing is also recommended.
- Throttle and Pedal Assist: The throttle should be applied gradually for smooth acceleration. The pedal assist level can be adjusted from "0" (no assist) to "5" (maximum power) using the UP or DOWN buttons on the display.
- Brake Operation: The manual emphasizes the importance of understanding and practicing brake operation. Riders should never brake with only the front brake and should practice emergency stops in a clear area. Wet weather reduces braking power and increases stopping distances.
- Display Unit (KD218 LCD): The display unit provides real-time information.
- Power On/Off: Press and hold the POWER button for 2 seconds to turn the display on or off. The display automatically shuts down after 10 minutes of inactivity.
- Speed & Mileage Mode Switch: Pressing the POWER button cycles through speed and mileage modes (AVG, SPEED, MAX SPEED, TRIP, ODO, TIME). The display returns to real-time speed after 5 seconds of no operation.
- Backlight On/Off: Press and hold the UP button for 2 seconds to turn the display backlight on or off.
- Walk/Push Assist: Press and hold the DOWN button for 2 seconds to activate walking mode (4mph) until released.
- Change Settings: Hold the POWER button to enter setting menus, use UP/DOWN buttons to change parameters, and press POWER to switch to the next item. Holding POWER again exits the menu.
- Battery Connection & Removal: The battery is connected and removed using a key. Insert the key, turn it clockwise 90 degrees, and gently rotate a knob while supporting the battery with both hands to prevent dropping. To lock, replace the battery with the key in the same position, then turn the key to lock.
- Safe Riding Practices:
- Always wear a helmet, appropriate shoes, and eye protection. Avoid loose clothing.
- Do not wear earplugs, headphones, or headsets, or use a cell phone while riding.
- Never hitch rides or operate the bike under the influence of alcohol or drugs.
- Turn the bike on only after straddling the frame and turn it off before dismounting. This minimizes unintentional acceleration.
- Be aware of traffic and obstacles in your path.
- Avoid riding in unsafe weather conditions or on compromised road surfaces (ice, snow, water, sand, loose gravel) to prevent loss of traction.
Maintenance Features:
The manual provides detailed instructions and recommendations for maintaining the RIFT e-bike to ensure its longevity and safe operation:
- Regular Inspections: Owners are advised to regularly check all screws, nuts, and bolts for tightness before each ride. A professional bike shop should perform regular checks, with frequency depending on usage (weekly to twice a year).
- Brake Maintenance: Regularly check brakes for signs of wear and tear and functionality. Any worn parts must be repaired or replaced immediately. Ensure braking surfaces and pads are free of wax, grease, and oil.
- Tire Maintenance: Regularly check tire pressures (refer to sidewall for correct psi range) and tread depth.
- Post-Accident Inspection: After an accident or crash, the e-bike must be taken to a bike repair specialist for inspection, as damage may not be visible.
- Part Replacement: Always use genuine replacement parts when performing maintenance. Any cracks, scratches, or changes in coloring in highly stressed areas indicate that the part has reached its life expectancy and should be replaced immediately.
- Battery Care:
- Only use the charger supplied by Ride1Up. Never tamper with or modify the charger.
- Do not leave the e-bike or battery plugged into a wall outlet unattended. Unplug the battery before leaving the bike alone.
- Check the charger cord for damage before use. Keep the cord away from hot surfaces and sharp edges.
- Do not store or charge the e-bike outdoors.
- The charger must be removed from the socket before removing the battery, cleaning, or maintaining the e-bike.
- Never charge the battery when its temperature or the storage space is below freezing.
- Charge the battery in an ambient temperature, on a non-flammable and dry surface, away from heat, humidity, or flammable materials. Do not cover the battery while charging.
- If sparks occur during charging, inspect the charging port and charger tip and contact support.
- Chargers stop charging when the battery is full. It takes 3-6 hours for a full charge with the standard charger.
- For extended life, store the battery with a 40-80% charge and check it monthly. Recommended storage temperatures are 50°-77°F in a dry area.
- Always keep the charger port covered to protect against moisture, especially in wet climates.
- Derailleur and Shifter Adjustment: Verify that the shifter and derailleur are properly adjusted. Initial tuning may be needed if noise occurs during shifting or if shifting is not smooth. Pay close attention to the low and high limit screws to prevent the chain from coming off the cog and damaging components. Professional adjustment or following helpful videos is recommended.
- Brake Adjustment: After assembly, test and adjust front and rear brakes. Ensure the disc rotor is centered between the brake pads to prevent rubbing. If the disc rotor is bent, it can often be trued or replaced. If unsure, consult the website for videos or take the bike to a local bike shop.
- Error Code Troubleshooting: In case of electrical problems, the display will show an error code. The manual provides a list of common error codes (21, 22, 23, 24, 25, 30) and their potential sources, such as current abnormality, throttle abnormality, motor phase abnormality, motor hall signal abnormality, brake abnormality, and communication abnormality. This helps riders diagnose and resolve issues or seek appropriate support.
- Warranty Information: The e-bike comes with a One-Year Limited Warranty covering product defects present at the time of handover. It does not cover normal wear and tear, misuse, accidents, or improper assembly. The warranty is upheld if the user follows the owner's manual. Ride1Up may require photos/videos for warranty claims. Shipping damage claims must be reported within 3 days of receipt. For the first 30 days, Ride1Up covers labor and parts. After 30 days, Ride1Up ships replacement parts at no charge, but the owner is responsible for labor.