For the most up to date documents, bike models, additional information, instructional videos,
And more visit us at Ride1UP.com
• The seat post angle is adjustable. Ensure the grooves are properly aligned. Ensure the bolt(s)
is correctly torqued. If left loose or over-tightened, the seat post bolt could snap causing
serious injury and/or death.
NOTE:
◆
SOME GENERATIONS COME WITH THE SEAT POST SEPARATE FROM THE SADDLE. IF
ALREADY JOINED, CHECK THAT THE TORQUE ON THE BOLT IS TIGHTENED TO THE PROPER TORQUE.
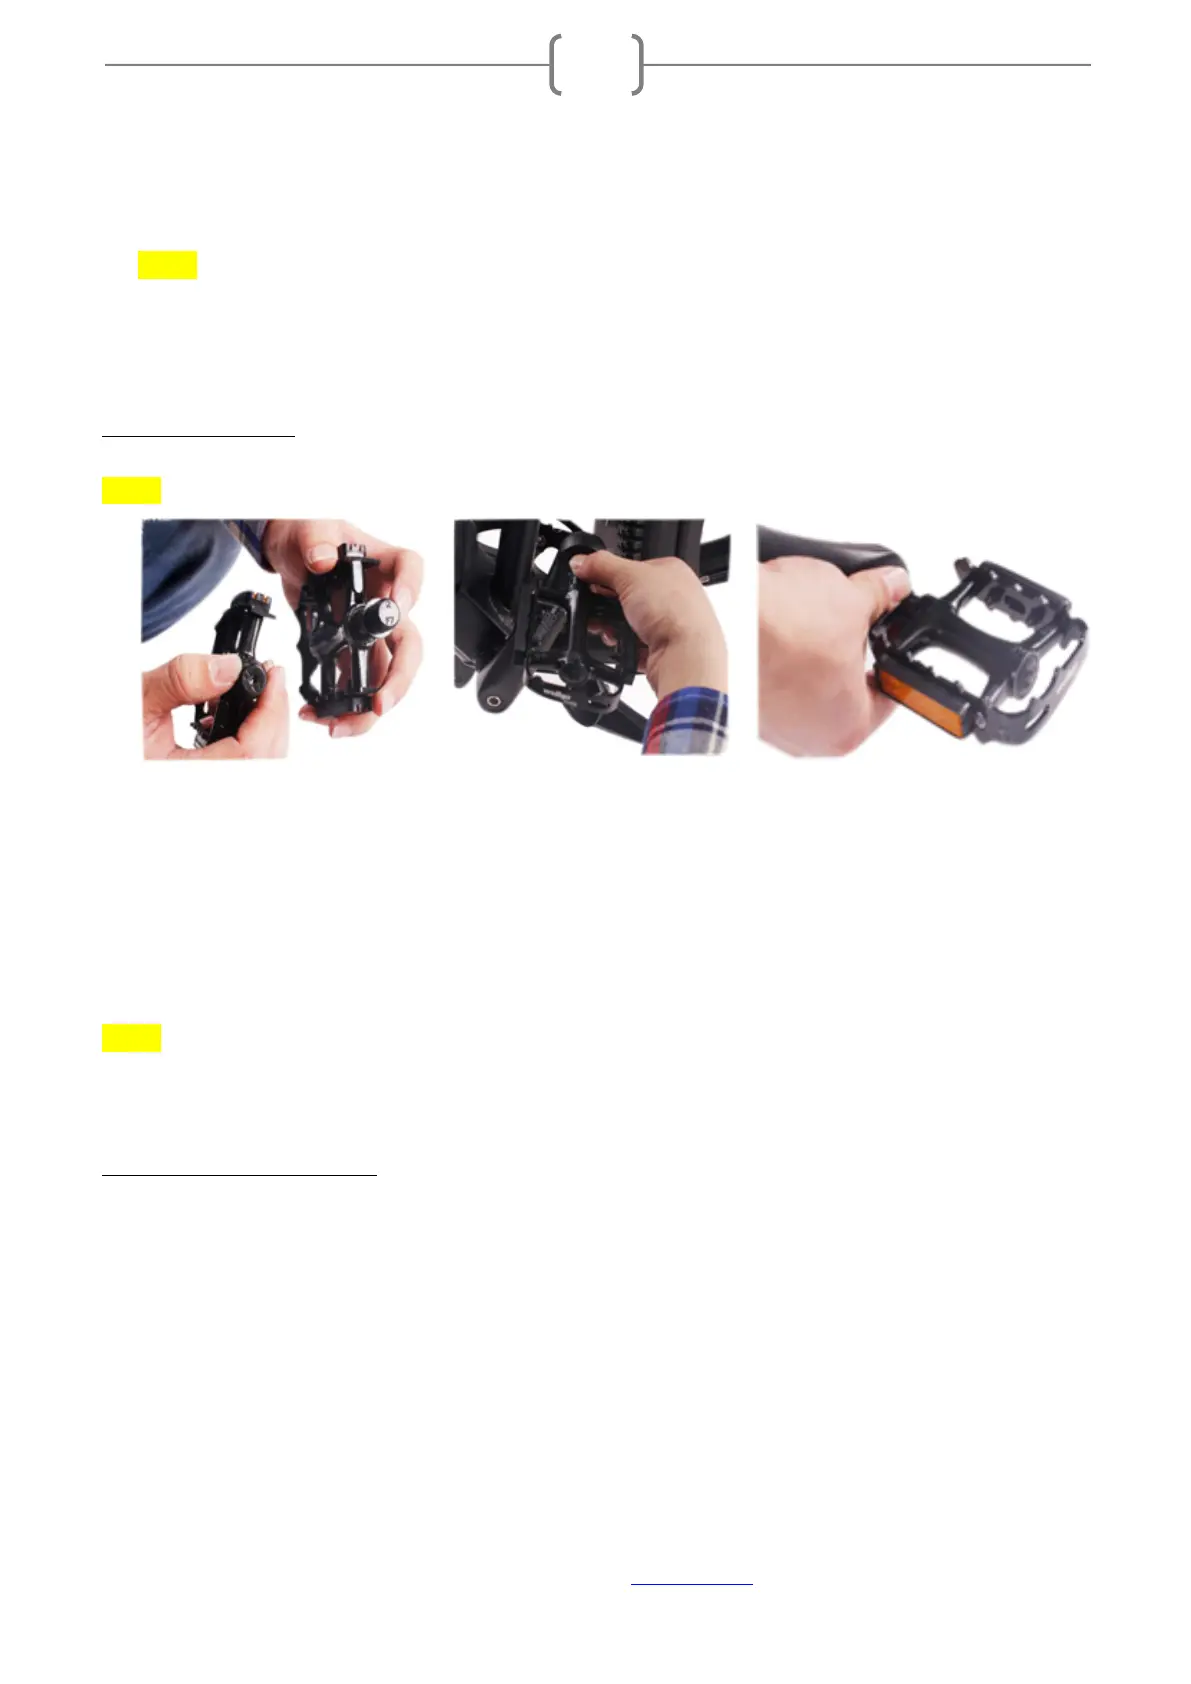
3.5 Pedal Assembly:
NOTE:
◆
THE LEFT AND RIGHT PEDALS ARE UNIQUE.
• The left pedal (marked “L”) must be installed in the left crank arm. It is reverse thread, rotate counter-
clockwise to install and tighten.
• Screw each pedal into a crank by hand. They should screw in easily to start. Do not force them.
• The right pedal (marked “R”) must be installed in the right crank arm. It is standard thread, rotate
clockwise to install and tighten.
• Use a 15mm wrench on pedals to finish tightening the pedals in place.
NOTE:
◆
THERE ARE TWO PEDALS INCLUDED IN THE BOX WITH YOUR BIKE. THE PEDALS SCREW INTO
THE ENDS OF THE CRANKS WITHOUT EXTRA NUTS, SCREWS OR PINS. FAILURE TO USE THE CORRECT
PEDAL ON THE CORRECT SIDE WILL RESULT IN A STRIPPED CRANK ARM. ◆
3.6 Detailed Torque Settings:
Saddle Clamp Bolt: 12 nm (unless otherwise marked on seat post)
Crank Arms: 39nm
Compression Cap (bolt): 4-5nm (unless otherwise marked)
Stem/Steerer Clamp: 8-9nm (unless otherwise marked on stem)
Handlebar Clamp: 5-9nm (unless otherwise marked), tighten evenly in a cross pattern - If installed properly
the gap at each bolt should be similar. Failure to do so may result in serious injury and/or death.