EasyManua.ls Logo

RIDGID TP1300LS User Manual

RIDGID TP1300LS
24 pages
To Next Page IconTo Next Page
Page #1 background imageLoading...
Page #1 background image
Your new planer has been engineered and manufactured to our high standards for dependability, ease of operation, and
operator safety. When properly cared for, it will give you years of rugged, trouble-free performance.
WARNING:
To reduce the risk of injury, the user must read and understand the operator’s manual before using this product.
Thank you for buying a Ridgid product.
OPERATOR'S MANUAL
13 in. THICKNESS PLANER
TP1300LS
SAVE THIS MANUAL FOR FUTURE REFERENCE
1
Repeat
Cut
A
-
-
1
1
1
1
1
3
3
2
2
"
"
4
4
4
4
8
1
1
1
3
1/8
3/32
1/16
1/32
0
2.5
2
1.5
1
.5
0
Ind
I
Cut
6
5
4
2
1
0
0
1
2
3
4
5
6
7
8
9
10
11
12
13
14
15
3
Question and Answer IconNeed help?

Do you have a question about the RIDGID TP1300LS and is the answer not in the manual?

RIDGID TP1300LS Specifications

General IconGeneral
Motor Power15 Amp
Planing Width13 inches
Feed Rate26 feet per minute
Maximum Material Thickness6 inches
Cutterhead Speed10, 000 RPM
Voltage120V
Planing Depth1/8 inch
Knives2
Dust Port Diameter4 in.
Power SourceCorded Electric

Summary

Symbols and Safety Precautions

Rules for Safe Operation

Outlines essential safety precautions for operating the planer to prevent injury.

Electrical Safety and Connections

Extension Cord Guidelines

Details requirements for using extension cords with the planer, including wire size and condition.

Grounding Instructions

Explains the importance and procedure for proper grounding of the tool for electrical safety.

Unpacking and Tools

Unpacking Procedure

Steps for carefully unpacking the planer and inspecting for damage.

Assembly Instructions

Assembling the Leg Stand

Details the process of assembling the leg stand using provided parts and hardware.

Planer Assembly Steps

Mounting Planer to Leg Stand

Guides on securing the planer onto the assembled leg stand.

Planer Mounting Options

Mounting to Workbench

Instructions for permanently mounting the planer to a workbench.

Clamping to Workbench

Guidance on using a mounting board for portable workbench clamping.

Assembly Adjustments

Blade Height Adjustment

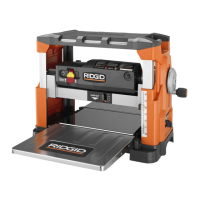
Instructions for adjusting the cutter head height for depth of cut.

Operation Guide

Getting Started and Planing

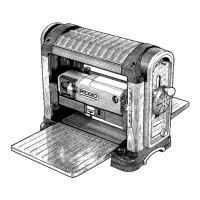
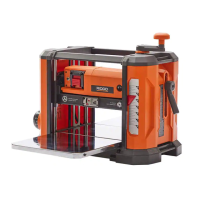
Initial checks, test run, and basic planing techniques.

Operation Details

Maintenance Procedures

Cutter Blade Replacement

Detailed steps for replacing the planer's cutter blades.

Maintenance and Storage

General Maintenance and Cleaning

Troubleshooting Common Problems

Related product manuals