MAINTENANCE AND CLEANING
50
CONDEXA 55-70 HPR
D
E
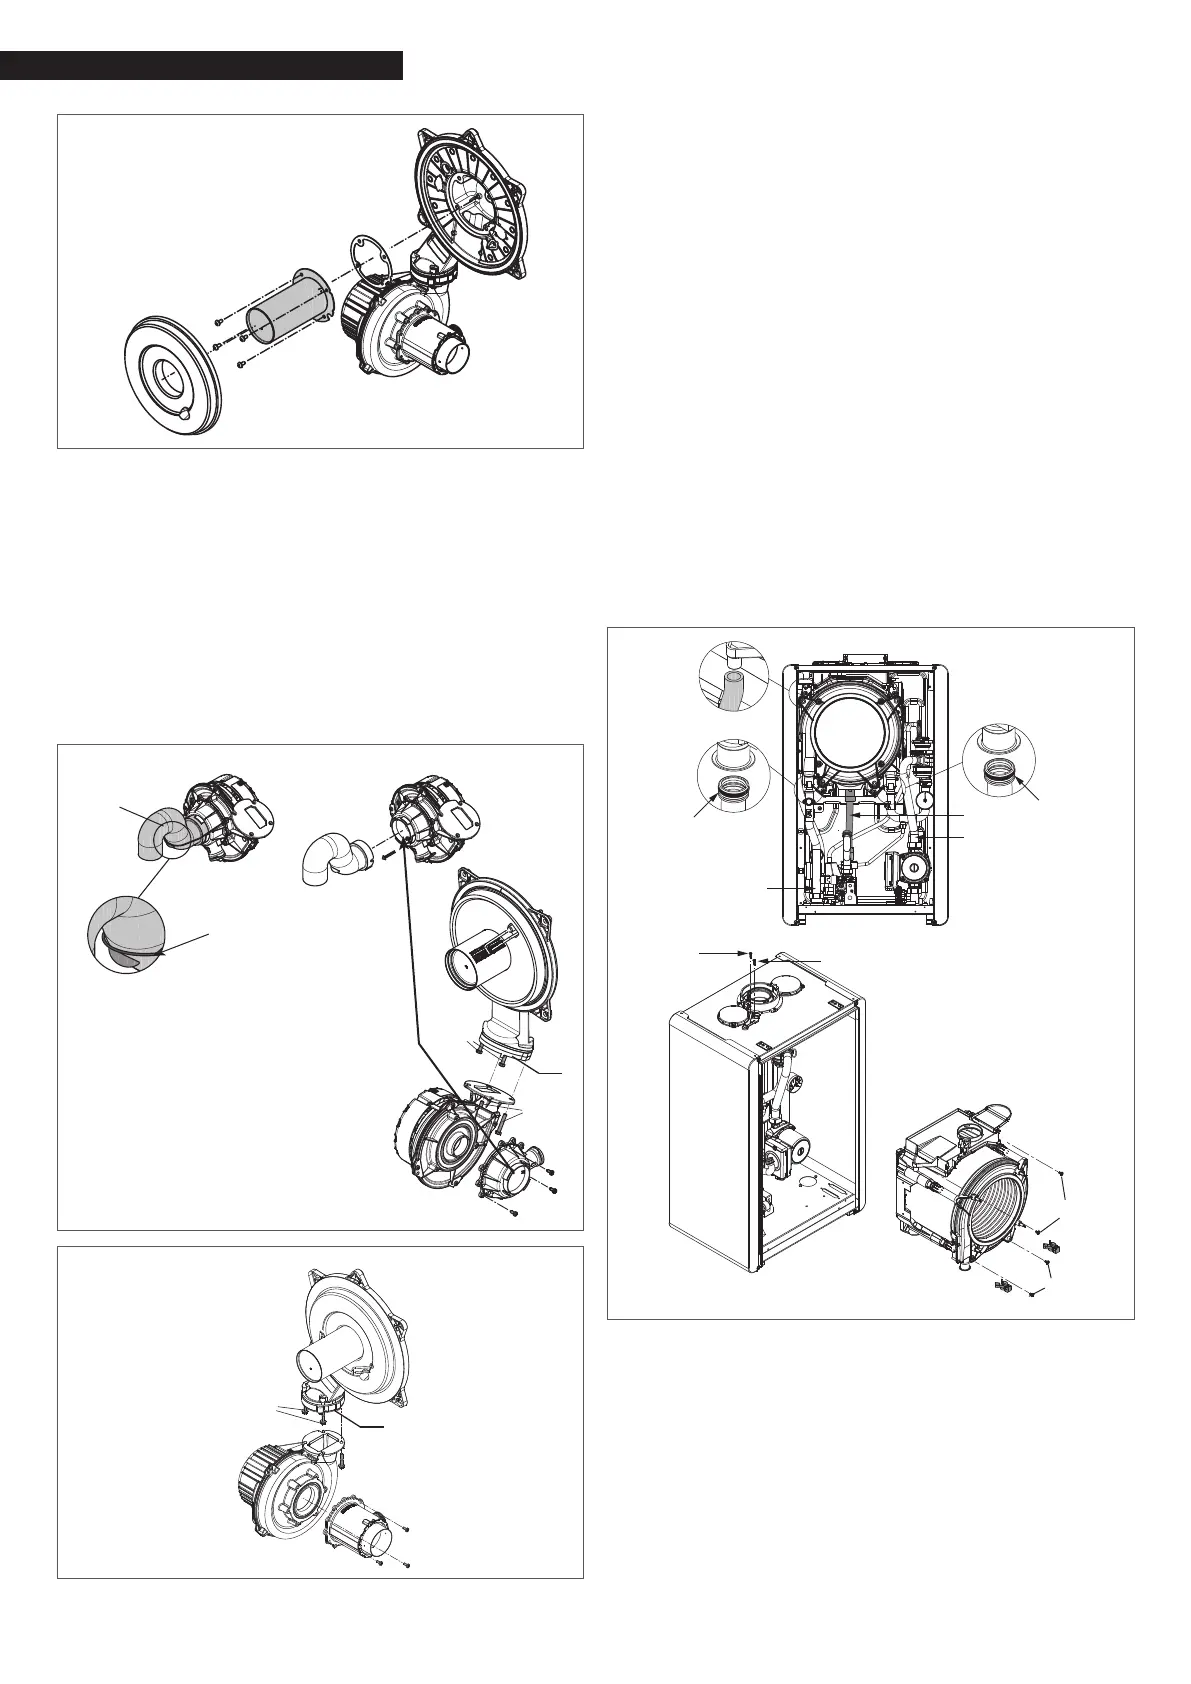
Disassembling the fan and mixer
Remove the components as explained in “DISASSEMBLING
THE COMBUSTION UNIT”.
Completely unscrew the 2 screws (B) and loosen the 2
screws (C) to extract the fan.
Take out the silencer by releasing it from its support.
Loosen the 3 screws (A) xing the mixer to the fan, then
take it out.
To dis
assemble the check
valve (D), fully loosen
the 2
screws (C) as well.
Once the operations are nished, put back all the com-
ponents, following the above instructions in the reverse
order.
Turn the power and gas feeding to the boiler back on.
D
A
C
B
silencer
xing support
CONDEXA 35-45 HPR
D
A
C
B
Disassembling the heat exchanger
CONDEXA 35-45 HPR
Remove the components as described in the chapter
“REMOVING THE COMBUSTION UNIT”.
Disconnect the power supply by placing the main swi-
tch of the system on “off”.
Empty the system.
Loosen the nuts of the 2 trains (A and B).
Take out the clips (C) so you can remove the 2 trains (
A and B
).
Take the 2 trains (A and B) out of the heat exchanger.
Take out the condensate discharge pipe (D).
Take out the discharge pipe of the rainguard (E).
Detach the ue gas probe connector.
Remove the screw (F) of the ue gas analysis outlet,
then remove the plug.
Remove the screw (G) that holds the rainguard in place.
Loosen the 4 screws (H) that hold the heat exchanger in its
seat.
Take out the heat exchanger.
Once the operations are nished, put back all the compo-
nents, following the above instructions in the reverse order.
Pay special attention when inserting the trains A and B;
use pliers at the base of the aring to prevent an inlet
overstroke of the heat exchanger connections.
Turn the power and gas feeding to the boiler back on.
E
clamp
position
clamp
position
B
A
G
F
C
H
H
D
CONDEXA 55-70 HPR
Remove the components as described in the chapter
“REMOVING THE COMBUSTION UNIT”.
Disconnect the power supply by placing the main swi-
tch of the system on “off”.
Empty the system.
Disassemble the right andleft side panels (A) by loosen-
ing the screws (B).
Loosen the nut and rotate the gas train (C).
Take out the silicone pipes (D) and (E).
Take out the train (F).
Take the condensate discharge pipe out of the heat ex-
changer (G).
Take out the clip (H).
Loosen the nut and take out the train (I).
Disconnect the circulator wiring, take out the probe and
loosen the 2 nuts.
Raise the upper nut (L).
Lower the bottom nut (M).
CONDEXA 55-70 HPR
 Loading...