3388
7
GB
3.6 ELECTRICAL WIRING
D7198
220/230V ~ 50/60Hz
●
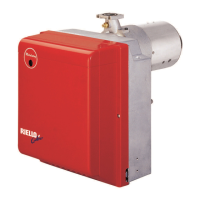
CONTROL BOX
MG569
Main switch
KEY TO LAY-OUT
B5 –2
nd
stage working signal
C – Capacitor
CN1 – Connector ionization probe
E –Electrode
h1 –1
st
stage hour counter
h2 –2
nd
stage hour counter
M –Motor
PA – Air pressure switch
PG – Min. gas pressure switch
RS – Remote reset
SM –Servomotor
SO – Ionization probe
3.6.1 STANDARD ELECTRICAL WIRING
TO BE DONE BY
THE INSTALLER
CARRIED-OUT
IN THE FACTORY
ATTENTION:
³
Do not swap neutral and phase over, fol-
low the diagram shown carefully and
carry out a good earth connection.
³
The section of the conductors must be at
S3 – Remote lock-out signal
(230V - 0,5 A max.)
T6A – Fuse
TB – Burner earth
TL – Limit thermostat
TR –2
nd
stage thermostat
TS – Safety thermostat
V10 – Safety valve
V11 –1
st
stage valve
V12 –2
nd
stage valve
X.. –Plug
XP.. –Socket
least 1mm². (Unless requested otherwise by local standards and legislation).
³
The electrical wiring carried out by the installer must be in compliance with the rules in force in the country
● Connect the 2
nd
stage thermostat (TR) to terminals T6 - T8 and remove the bridge.
TESTING
³
Check the burner has stopped by opening the thermostats.
³
Check that the burner is blocked by opening the connector (CN1) inserted in the probe red wire and located
outside the control box.
NOTES
The burners have been type-approved for intermittent operation. This means they must stop at least once every
24 hours in order to allow the electrical control box to check its efficiency on start-up. The boiler limit thermostat
(TL) normally ensures the burner halts. If this does not happen a time switch halting the burner at least once
every 24 hours must be applied in series to limit thermostat (TL).
 Loading...