Do you have a question about the Rinnai RHFE-1004FTR and is the answer not in the manual?
Simple one-touch operation for turning the heater on and off.
Allows programming two separate on/off periods daily for automated heating control.
Features electronic thermostat and fan control for adjustable heating levels.
Heats room to a set temperature before the programmed ON time.
Energy-saving feature that gradually reduces temperature to save gas consumption.
Stores pre-set temperatures and timer settings even after power loss.
Temporarily changes heater operation until the next programmed setting.
Enables convenient ON/OFF and temperature adjustments from a distance.
Secures the control panel, ideal for commercial or child-safe use.
Prevents accidental changes to settings by children or others.
Alerts when the heater filter needs cleaning via a flashing indicator.
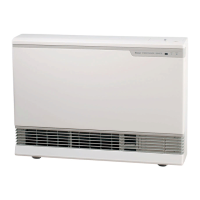
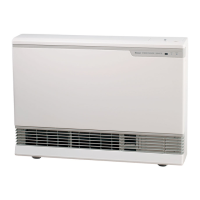
Ensures clean room air by drawing combustion air from outside and exhausting flue products.
Location of the main control interface, indicators, and digital display.
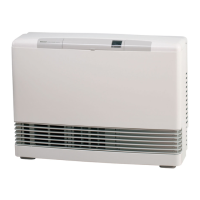
Points for warm air output and the humidifier tray access.
Gas connection, thermistor, power cord, and flue terminal locations.
Identification of air filter, remote control sensor, and filter indicator.
The primary switch for manually turning the heater on and off.
Shows current time, temperatures, or error messages on the control panel.
Lights indicating clock setting mode or active timer programs.
Buttons for selecting Timer 1 or Timer 2 operation modes.
Buttons used to set desired room temperature and adjust time/date.
Activates the energy-saving economy mode for reduced gas consumption.
Buttons for temporary operation override and locking controls.
Used for programming clock and timer settings into the unit.
Do not use for purposes other than heating; maintain clearances from walls and objects.
Keep curtains, flammable materials, and stored products away from the heater and flue.
Supervise children near the heater and prevent them from sleeping directly in front.
Do not allow children to insert objects into louvres, place liquids on top, or sit on the heater.
Avoid spraying aerosols near the heater during operation due to fire hazard.
Step-by-step guide to igniting the heater using the ON/OFF button.
Procedure for safely shutting down the heater and cooling fan operation.
Warnings regarding power cord disconnection and function lock status during operation.
How to adjust the temperature using up/down buttons to a desired level.
Available settings including 'L', numerical ranges, and 'H' for continuous high heat.
Understanding how the display shows room temperature relative to set points.
The unit stores set temperatures automatically in its microcomputer memory.
Reduces gas consumption and saves energy by gradually lowering set temperature.
Explains gradual temperature reduction and comfort control adjustments.
Functionality is restricted for set temperatures below 16°C or above 26°C.
How to engage the lock feature to prevent unauthorized setting changes.
Steps to disengage the lock feature and restore control access.
Describes which controls are locked and the impact on turning the heater on/off.
How to manually start heating or change operation status.
Procedure to return the heater to its previous standby or programmed mode.
Override continues until manually deactivated or a timer program begins.
What the display shows when first plugged in or after a power failure.
Step-by-step guide using buttons to set hours and minutes accurately.
How to lock in settings and verify the clock is running correctly.
Ensure the clock is set correctly before programming timers.
Step-by-step process to set the ON time for Timer 1 or Timer 2.
Step-by-step process to set the OFF time for Timer 1 or Timer 2.
Final step to save programmed timer ON/OFF times.
Clock and timer programming must be correct for operation.
How to select timers and start the heater's programmed cycles.
Heater attempts to reach temperature by the programmed start time.
Heater cycles automatically between programmed intervals for convenience.
Memory retains programs; clock needs resetting after power restoration.
Ensures room reaches set temperature by the programmed ON time.
Senses room temperature an hour prior to start time to adjust ignition.
Visual guide illustrating how room temperature affects pre-heat timing.
Instructions for filling the tray to humidify air; do not fill while unit is operating.
Cleaning fan filters and the function of the filter clean warning indicator.
Notes on steam discharge and general installation requirements for the flue.
ON/OFF operation and temperature adjustment capabilities of the remote.
Guide for opening the remote and replacing the CR2032 lithium battery.
Tips on signal interference, placement, range, and battery care.
Considerations for flueing and warm air distribution when choosing a location.
Minimum distances from walls, floor, and obstructions for safe operation.
Avoid placing curtains, flammable items, or gas near the heater and flue terminal.
Rules for using Rinnai flue kits and proper flue terminal placement.
Information on different flue lengths available for various wall thicknesses.
Diagram and measurements for side clearances and avoiding obstructions.
Advice on avoiding dusty areas and using flue guards for safety.
Guidance on drilling flue holes and ensuring the floor is level.
List of components provided with the heater for installation, e.g., flue manifold, clips, screws.
Verify unit correctness for gas type and check for any shipping damage before installation.
Steps to separate the flue manifold components for installation.
Method for adjusting the sleeve protrusion based on wall thickness.
Inserting the terminal, attaching fixing ties, and securing the assembly.
Pushing the inner connection assembly into the terminal tube and securing it.
Attaching the flue adapter to the manifold using a locking clamp.
Securing the air inlet hose to the manifold and heater unit.
Attaching back spacers and fitting the unit using wall brackets.
Clamping the sliding tube and insulation sleeve for the flue connection.
Purging air, connecting gas, and checking for leaks with soapy water.
Testing ignition sequence, thermostat function, and temperature cut-down.
Replacing casing, securing the top spacer, and confirming unit is fixed to the wall.
Contacting Rinnai for final installation checks if required.
Wiping the outer case and cleaning fan filters weekly.
Periodically check the flue terminal for obstructions like shrub growth.
A list of common problems, their causes, and recommended remedies before calling service.
Verifying fan start delay, smoke/smell on first use, and clicking noises.
Understanding clunking noises related to thermostat and solenoid valve operation.
Checking convection fan run-on and steam discharge from the flue.
Ensuring timer is off for manual use and addressing temperature setting issues.
Table listing error codes, their corresponding faults, and potential remedies.
Advice to turn the heater OFF then ON again to clear most error messages.
How the overheat switch and fusible links protect the unit from excessive temperature.
Mechanism that shuts off gas if the flame is not detected.
Controls fan activation based on heat exchanger temperature for efficiency.
How to contact Rinnai for service through their nationwide network.
Rinnai recommends the appliance be serviced every 2 years.
Diagrams showing the overall size and key measurements of the heater unit.
Schematic showing the electrical connections and components within the heater.
Overview of the heater's functional blocks and their interconnections.
List of component marks and their corresponding names and colors.
Information on the 2-year guarantee for parts and labour.
Space to record retailer, installer, and purchase/installation dates for warranty.
Identifies the Rinnai RHFE-1004FTR as a Fully Automatic Space Heater.
Details gas input rates for Natural Gas and Propane, and the gas control system.
Information on burner type, gas inlet thread size, and test point pressures.
Specifications for flue type, ignition method, and electrical supply requirements.
Details the type and speed of the centrifugal fan used in the unit.
Phone numbers for consumers and installers to inquire about Rinnai appliances.
Contact information including address, phone, fax, email, and website for Rinnai NZ.
| natural gas input (high) | 37 MJ/h |
|---|---|
| propane input (high) | 37 MJ/h |
| natural gas input (lo) | 11 MJ/h |
| propane input (lo) | 11 MJ/h |
| gas inlet | R1 / 2” Male Thread (15mm) |
|---|---|
| test point pressure natural gas (high) | 0.76 |
| test point pressure propane (high) | 2.33 |
| test point pressure natural gas (lo) | 0.49 |
| test point pressure propane (lo) | 1.07 |
| electrical supply | 230V, 50Hz |
|---|---|
| ignition | Electronic - Continuous Spark |
| fan type | Centrifugal 7 Speed Fan |