3.1 Wiring Cautions
For thermocouple input, use the appropriate compensation wire.
For RTD input, use low resistance lead wire with no difference in resistance between the three lead wires.
To avoid noise induction, keep input signal wire away from instrument power line, load lines and power lines of other electric equipment.
For the current input specification, an external resistor (250 0.02 %, 0.25 W or more, 10 ppm/C) must be connected between the input terminals. For external resistor
(shunt resistor), use the KD100-55: sold separately (RKC product). If this resistor is installed, close horizontal mounting is not possible.
Signal connected to Voltage input and Current input shall be low voltage defined as “SELV” circuit per IEC 60950-1.
If there is electrical noise in the vicinity of the instrument that could affect operation, use a noise filter.
Shorten the distance between the twisted power supply wire pitches to achieve the most effective noise reduction.
Always install the noise filter on a grounded panel. Minimize the wiring distance between the noise filter output and the instrument power supply terminals to achieve the most
effective noise reduction.
Do not connect fuses or switches to the noise filter output wiring as this will reduce the effectiveness of the noise filter.
Allow approximately 4 seconds for contact output when the instrument is turned on. Use a delay relay when the output line is used for an external interlock circuit.
Power supply wiring must be twisted and have a low voltage drop.
This instrument is not provided with an overcurrent protection device.
For safety install an overcurrent protection device (such as a fuse) with adequate high breaking capacity close to the instrument.
Fuse type: Time-lag fuse (Approved fuse according IEC60127-2 and/or UL248-14)
Fuse rating: Rated current: 0.5 A
For an instrument with 24 V power supply input, supply power from a "SELV" circuit defined as IEC 60950-1.
A suitable power supply should be considered in end-use equipment. The power supply must be in compliance with a limited-energy
circuits (maximum available current of 8 A).
Use the solderless terminal appropriate to the screw size.
Screw size: M3 x 6
Recommended tightening torque: 0.4 Nm [4 kgfcm]
Specified solderless terminals: With isolation
Applicable wire: Solid/twisted wire of 0.25 to 1.65 mm
2
Make sure that during field wiring parts of conductors cannot come into contact with adjacent conductive parts.
3.2 Terminal Configuration
4. PARTS DESCRIPTION
5. SETTING
Operation Menu
Input type and input range display
This instrument immediately confirms the input type symbol and input range following power ON.
Example: When sensor type of input is K thermocouple.
6. MODEL CODE
(1) Control action
F: PID action with autotuning (Reverse action)
D: PID action with autotuning (Direct action)
W: Heat/Cool PID action with autotuning (Water cooling)
1
A: Heat/Cool PID action with autotuning
(
Air cooling
)
1
(2) Input type, (3) Range code: Refer to “INPUT RANGE TABLE.”
(4) First control output [OUT1] (Heat-side)
M: Relay contact V: Voltage pulse
8: Current (4 to 20 mA DC) G: Trigger for triac driving
T: Triac
(5) Second control output [OUT2] (Cool-side)
No symbol: When control action is F or D. V: Voltage pulse
8: Current (4 to 20 mA DC) M: Relay contact
T: Triac
(6) Alarm 1 [ALM1], (7) Alarm 2 [ALM2]
N: No alarm J: Process low alarm
A: Deviation high alarm K: Process high alarm with hold action
B: Deviation low alarm L: Process low alarm with hold action
C: Deviation high/low alarm P: Heater break alarm (HBA) [CTL-6]
2
D: Band alarm S: Heater break alarm (HBA) [CTL-12]
2
E: Deviation high alarm with hold action R: Control loop break alarm (LBA)
3
F: Deviation low alarm with hold action V: SV high alarm
G: Deviation high/low alarm with hold action W: SV low alarm
H: Process high alarm
(8) Communication function
N: No communication function 5: RS-485 (2-wire system)
(9) Waterproof/Dustproof
N: No Waterproof/Dustproof 1: Waterproof/Dustproof
(10) Case color
N: White A: Black
(11) Version symbol
No code: For Japanese domestic market /Y: For International market
1
No self-tuning function is provided in the W or A control action type.
2
Heater break alarm (HBA) cannot be specified in case of ALM1. Also, it isn’t possible to
specify when control output is current output.
3
As control loop break alarm (LBA), only either the ALM1 or ALM2 is selected.
Check that power supply voltage is also the same as that specified when ordering.
INPUT RANGE TABLE
Input type
Model
cod
Input type
Model
c
d
Input type
Model
cod
K
0 to 200 C K 01
B
0 to 1820 C
1, 3
B02
L
0 to 800 F L A1
0 to 400 C K 02 800 to 3200 F
3
B A1 0 to 1600 F L A2
0 to 600 C K 03 0 to 3308 F
1, 3
B A2
Pt100
199.9 to
649.0 CD 01
0 to 800 C K 04
E
0 to 800 C E 01
199.9 to
200.0 CD 02
0 to 1000 C K 05 0 to 1000 C E 02
100.0 to
50.0 CD03
0 to 1200 C K 06 0 to 1600 F E A1
100.0 to
100.0 CD 04
0 to 1372 C K 07 0 to 1832 F E A2
100.0 to
200.0 CD 05
0 to 100 C K 13
N
0 to 1200 C N 01 0.0 to 50.0 C D 06
0 to 300 C K 14 0 to 1300 C N 02 0.0 to 100.0 C D 07
0 to 450 C K 17 0 to 2300 F N A1 0.0 to 200.0 C D 08
0 to 500 C K 20 0 to 2372 F N A2 0.0 to 300.0 C D 09
0 to 800 F K A1
T
199.9 to
400.0 C
2
T 01 0.0 to 500.0 C D 10
0 to 1600 F K A2
199.9 to
100.0 C
2
T02
199.9 to
999.9 F D A1
0 to 2502 F K A3
100.0 to
200.0 CT03
199.9 to
400.0 F D A2
20 to 70 F K A9 0.0 to 350.0 C T 04
199.9 to
200.0 F D A3
J
0 to 200 C J 01
199.9 to
752.0 F
2
T A1
100.0 to
100.0 F D A4
0 to 400 C J 02
100.0 to
200.0 F T A2
100.0 to
300.0 F D A5
0 to 600 C J 03
100.0 to
400.0 F T A3 0.0 to 100.0 F D A6
0 to 800 C J 04 0.0 to 450.0 F T A4 0.0 to 200.0 F D A7
0 to 1000 C J 05 0.0 to 752.0 F T A5 0.0 to 400.0 F D A8
0 to 1200 C J 06
W5Re/
W26Re
0 to 2000 C
3
W01 0.0 to 500.0 F D A9
0 to 450 C J 10 0 to 2320 C
3
W02
JPt100
199.9 to
649.0 CP 01
0 to 800 F J A1 0 to 4000 F
3
W A1
199.9 to
200.0 CP 02
0 to 1600 F J A2
PL II
0 to 1300 C A 01
100.0 to
50.0 CP03
0 to 2192 F J A3 0 to 1390 C A 02
100.0 to
100.0 CP 04
0 to 400 F J A6 0 to 1200 C A 03
100.0 to
200.0 CP 05
R
0 to 1600 C
1
R 01 0 to 2400 F A A1 0.0 to 50.0 C P 06
0 to 1769 C
1
R 02 0 to 2534 F A A2 0.0 to 100.0 C P 07
0 to 1350 C
1
R 04
U
199.9 to
600.0 C
2
U 01 0.0 to 200.0 C P 08
0 to 3200 F
1
R A1
199.9 to
100.0 C
2
U 02 0.0 to 300.0 C P 09
0 to 3216 F
1
R A2 0.0 to 400.0 C U 03 0.0 to 500.0 C P 10
S
0 to 1600 C
1
S 01
199.9 to
999.9 F
2
U A1 0 to 5 V DC
0.0
to
100.0
401
0 to 1769 C
1
S 02
100.0 to
200.0 F U A2 0 to 10 V DC
4
501
0 to 3200 F
1
S A1 0.0 to 999.9 F U A3 1 to 5 V DC 6 01
0 to 3216 F
1
S A2
L
0 to 400 C L 01 0 to 20 mA DC 7 01
B 400 to 1800 C
3
B 01 0 to 800 C L 02 4 to 20 mA DC 8 01
1
0 to 399 C/0 to 799 F: Accuracy is not guaranteed.
2
199.9 to 100.0 C/199.9 to 158.0 F: Accuracy is not guaranteed.
3
This input type cannot be selected in the Z-1021 specification.
4
Z-1010 specification
φ
3.2 MIN
φ
5.5 MAX
4 mm
Solderless
terminal
(1) Measured value (PV) display [Green]
Displays PV or various parameter symbols.
(2) Set value (SV) display [Orange]
Displays SV or various parameter set values
(or CT input value).
(3) Indication lamps
Alarm output lamps (ALM1, ALM2) [Red]
ALM1: Lights when alarm 1 output is turned on.
ALM2: Lights when alarm 2 output is turned on.
Autotuning (AT) lamp [Green]
Flashes when autotuning is activated.
(After autotuning is completed: AT lamp will go out)
(5) (Shift & R/S key)
Shift digits when settings are
changed.
Select the RUN/STOP function.
(6) (DOWN key)
Decreases numerals.
(7) (UP key)
Increases numerals.
R/S
Control output lamps (OUT1, OUT2)
[Green]
OUT1: Lights when control output is turned on.*
OUT2: Lights when cool-side control output is
turned on.*
* Lamp indication becomes as follows for
current output.
For an output of less than 0 %: Extinguished
For an output of more than 100 %: Lit
For an output of more than 0 % but less than
100 %: Dimly lit.
(4)
(Set key)
Used for calling up parameters and set value
registration.
SE
To avoid damage to
the instrument, never
use a sharp object to
press keys.
Power ON
Press
the <R/S key
while pressing
the SET key.
Press and hold the SET key for 2 seconds.
Press the
SET key
Communication Setting Mode
This mode is used to set the communication parameters when
specified. For details on protocol, identifiers and communication
setting mode, refer to the Communication Instruction Manual
(IMCB03-E).
PV/SV Display Mode
The controller will display the Measured
value (PV) and the Set value (SV).
The controller can be switched to RUN o
STOP mode (Factory set value: RUN).
PV/SV monitor
(RUN mode)
PV
SV
Press and hold the <R/S key
fo
1 second.
SV
STOP character display
(STOP mode)
Input type and Input range Display
utomatically (in 4 seconds)
P = 0 (0.0):
ON/OFF action
Parameter Setting Mode
This mode is used to set the parameters such as alarms, PID constants, etc.
The following parameter symbols are displayed as the SET key is pressed.
SET key
Current transformer
(CT) input value 1
monitor
Control loop break
alarm (LBA) time
LBA deadband
larm 1 set value
(ALM1)
larm 2 set value
(ALM2)
Heater break alarm
(HBA) 1 set value
utotuning (AT)
Self-tuning (ST)
Proportional band
Integral time
Derivative time
nti-reset windup
Heat-side proportioning
cycle
Cool-side proportioning
band
Deadband
Cool-side proportioning
cycle
PV bias
Set data lock
Return to the first parameter
SET key
SET key
SET key
SET key
SET key
SET key
SET key
SET key
SET key
SET key
SET key
SET key
SET key
SET key
SET key
SET key
SET key
Parameters which are not related to existing functions on the controller are not displayed.
(CT1)
(AL1)
(AL2)
(HbA1)
(LbA)
(Lbd)
(ATU)
(STU)
(P)
(I)
(D)
(Ar)
(T)
(Pc)
(db)
(t)
(Pb)
(LCK)
SV Setting Mode
SV setting
This is the mode used to set the SV.
Factory set value: 0 C [F] or 0.0 C [F]
PV
SV
Display returns to the PV/SV display mode if no key operation
is performed within 1 minute.
Symbol
PV
SV
PV
SV
Unit for input and SV display
(Celsius: C, Fahrenheit: F, Voltage/Current input: no character shown)
Input type symbol *
Input range high
Input range low
Automatically
-* - //Y
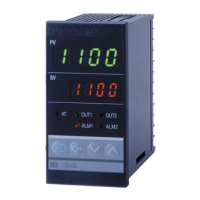
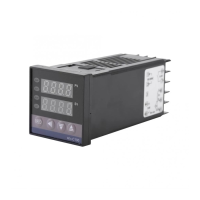
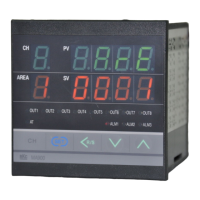
CB100
CB400
CB500
CB700
CB900
(1) (2) (3) (4) (5) (6) (7) (8) (9) (10) (11)
CB400
(1)
(3)
(2)
(4) (5)(6) (7)
PV
SV
AT
OUT1
ALM1 ALM2
OUT2
CB400
SET
R/S
R
K
(2)
CB500
(1)
(3)
(4) (5) (6) (7)
AT OUT1
PV SV
OUT2 ALM1 ALM2
R/
S
T
CB50
(1)
(3)
(2)
CB700, CB900
PV
SV
AT
OUT1 OUT2 ALM1 ALM2
CB900
(4) (5) (6) (7)
R/S
SET
(1)
CB100
(2)
(3)
(4) (5) (6) (7)
PV
SV
AT
ET
OUT1 OUT2 ALM1 ALM2
R/S
CB100
KC
The first edition: MAY 2017 [IMQ00
The first edition: AUG. 2018 [IMQ00]
HEADQUARTERS: 16-6, KUGAHARA 5-CHOME, OHTA-KU TOKYO 146-8515 JAPAN
PHONE: 03-3751-9799 (+81 3 3751 9799) E-mail: info@rkcinst.co.jp
Website: http://www.rkcinst.com/ AUG. 2018
Company names and product names used in this manual are
the trademarks or registered trademarks of the respective
companies.
Website:
http://www.rkcinst.com/
(): This input type is not displayed in the Z-1021 specification.
* Input Type Symbol Table
Symbol
Thermocouple (TC)
W5Re/
W26Re
U
Voltage
(Current)
KJ
SBETN
()
Input
type
RTD
()
PL II
Pt100 JPt100
L
** CT inputs accept signal from dedicated current
transformers (CT). Two types of CT available.
Measurable current range:
0 to 30 A (CTL-6-P-N),
0 to 100 A (CTL-12-S56-10L-N)
Input range: 0.0 to 0.1 Arms
Alarm output
Power supply
Control output
Input
Communication*
NO: Normally open NC: Normally closed
7
8
9
10
11
12
13
14
15
16
17
18
1
2
3
4
5
6
(Optional)
CT in
ut **
Current
transformer input
(Optional)
TC input
RTD input
Voltage input
0 to 5 V DC
1 to 5 V DC
Current input
0 to 20 mA DC
4 to 20 mA DC
W, A action types
Triac
F, D action types
CB100
* Cautions for Communication terminal wiring :
Make sure that lugs or unshielded cables of the communication terminals are not touched to the screw heads, lugs, or unshielded
cables of the power supply terminals to prevent electric shock or instrument failure. Use additional care when two lugs are screwed
to one communication terminal.
It is recommended that the host computer communication line be isolated from the power supply and earth.
Voltage pulse
Current
Voltage pulse
Curren
External
resistor
100240 V
C
24 V
DC
24 V
C
L
N
L
N
CT1
TC
A
B
B
RTD
IN
NO
OUT2
NO
OUT1
OUT2
OUT1
OUT2
Triac out
OUT1
Triac out
OUT1
OUT1
Triac out
OUT1
OUT1
T2
T1
G
4
Alarm 1
Alarm 2
SG
RS-485
NO
ALM1
ALM2
NO
T/R(A)
T/R(B)
NC
NO
!
5
6
4
5
Trigger
Relay contact
5
6
4
5
6
3
4
5
6
Triac
3
4
5
6
3
4
5
6
Relay contact
1
2
1
2
1
2
1
14
1
(Optional)
1
1
7
8
9
10
11
1
11
1
11
1
11
1
Power supply
Control output
NO: Normally open
NC: Normally closed
Communication
(Optional)
CT input **
Relay contact
Tria
F, D action types
CB700
W, A action types
Rela
contac
Tria
1
2
3
4
5
6
7
8
Alarm output
(Optional)
Voltage pulse
Current
Voltage pulse
Current
100240 V
C
24 V
DC
24 V
C
2 2
1 1
2
1
L
N
L
N
OUT1
4
5
6
OUT1
6
5
Triac out
OUT1
5
4
OUT1
T2
T1
G
4
6
5
NO
OUT2
NO
OUT1
3
4
5
6
OUT2
OUT1
3
4
5
6
OUT2
3
4
Triac out
5
6
OUT1
Triac out
9
10
11
12
13
14
15
16
17
18
Alarm 1
Alarm 2
7
8
SG
RS-485
NC
NO
NO
ALM1
ALM2
10
NO
11
12
T/R(A)
T/R(B)
Trigger
(Optional)
Curren
transformer in
u
1
14
CT1
Input
RTD input
0 to 5 V DC
1 to 5 V DC
0 to 20 mA DC
4 to 20 mA DC
TC input Current input Voltage input
External
resistor
TC
17
18
A
B
B
RTD
16
17
18
IN
17
18
17
18
** CT inputs accept signal from dedicated current transformers (CT).
Two types of CT available.
Measurable current range:
0 to 30 A (CTL-6-P-N), 0 to 100 A (CTL-12-S56-10L-N)
Input range: 0.0 to 0.1 Arms
Power su
l
Control output
NO: Normally open NC: Normally closed
Communication
O
tional
Alarm output
(Optional)
Input
TC in
u
RTD in
u
Current input
W, A action types F, D action types
CB400/CB500/CB900
The terminal arrangement of CB500 is as shown in
the following diagram, but the terminal configuration
of CB500 is the same as that of CB400.
1
2
3
4
5
6
7
8
10
11
9
12
13
14
15
16
17
18
19
20
22
23
21
24
CT input **
(Optional)
100240 V
AC
24 V
DC
24 V
AC
L
N
L
N
TC
A
B
B
RTD
NO
OUT2
NO
OUT1
OUT2
OUT1
OUT2
Triac out
OUT1
Triac out
OUT1
OUT1
Triac out
OUT1
OUT1
T2
T1
G
Alarm 1
Alarm 2
SG
RS-485
NC
NO
13 14 15 16 17 18 19 20 21 22 23 24
1
2 3 4 5 6 7 8 9 10 11 12
CT1
NO
ALM1
ALM2
NO
T/R(A)
T/R(B)
Voltage input
0 to 5 V DC
1 to 5 V DC
0 to 20 mA DC
4 to 20 mA DC
Triac
Voltage pulse
Current
Trigger
Relay contact
4
5
6
4
5 5
6
4
5
6
3
4
5
6
3
4
5
6
3
4
5
6
Voltage pulse
Curren
Triac
Relay contact
7
8
9
1
2
1
2
1
2
1
14
1
24
Current
transformer input
10
11
1
11
1
11
1
11
1
External
resistor
** CT inputs accept signal from dedicated current transformers (CT).
Two types of CT available.
Measurable current range:
0 to 30 A (CTL-6-P-N), 0 to 100 A (CTL-12-S56-10L-N)
Input range: 0.0 to 0.1 Arms
2
IN

 Loading...