EasyManua.ls Logo

RKC INSTRUMENT THV-1 - User Manual

RKC INSTRUMENT THV-1
30 pages
Print Icon
To Next Page IconTo Next Page
Loading...
®
RKC INSTRUMENT INC.
All Rights Reserved, Copyright 2002, RKC INSTRUMENT INC.
Single-phase Thyristor Unit
THV-1
Instruction Manual
IMR01M01-E16
Thank you for purchasing this RKC product. In order to
achieve maximum performance and ensure proper operation
of the instrument, carefully read all the instructions in this
manual. Please place the manual in a convenient location for
easy reference.
SYMBOLS
: This mark indicates precautions that must be
taken if there is danger of electric shock, fire,
etc., which could result in loss of life or injury.
: This mark indicates that if these precautions
and operating procedures are not taken,
damage to the instrument may result.
: This mark indicates that all precautions should
be taken for safe usage.
: This mark indicates important information on
installation, handling and operating procedures.
: This mark indicates supplemental information
on installation, handling and operating
procedures.
: This mark indicates where additional
information may be located.
An external protection device must be installed if
failure of this instrument could result in damage to
the instrument, equipment or injury to personnel.
All wiring must be completed before power is turned
on to prevent electric shock, fire or damage to the
instrument and the equipment.
This instrument must be used in accordance with the
specifications to prevent fire or damage to the
instrument and the equipment.
This instrument is not intended for use in locations
subject to flammable or explosive gases.
Do not touch high-voltage connections such as
power supply terminals, etc. to avoid electric shock.
When the withstand voltage test or each test is
performed, please contact RKC sales office or the
agent. If you make a mistake in the test method, the
instrument failure may result.
RKC is not responsible if this instrument is repaired,
modified or disassembled by other than
factory-approved personnel. Malfunction may occur
and warranty is void under these conditions.
High temperature caution:
Do not touch the heat radiation fin while the
power is turned on or just after the power is
turned off as it may be at high temperatures.
If touched, burning may result.
This product is intended for use with industrial machines,
test and measuring equipment. (It is not designed for use
with medical equipment and nuclear energy plant.)
This is a Environment A instrument. In a domestic environment,
this instrument may cause radio interference, in which case the
user may be required to take additional measures.
Be sure to provide an appropriate surge control circuit
respectively for the following:
If input/output or signal lines within the building are
longer than 30 meters.
If input/output or signal lines leave the building,
regardless the length.
This product is manufactured on the assumption that it is
mounted within a control panel. All high-voltage
connections such as power supply terminals must be
enclosed in the control panel to avoid electric shock to
operating personnel.
All precautions described in this manual should be taken to
avoid damage to the instrument or equipment.
All wiring must be in accordance with local codes and
regulations.
Always use this product at the rated power supply voltage,
load current and power frequency.
All wiring must be completed before power is turned on to
prevent electric shock, instrument failure, or incorrect
action.
To prevent instrument damage or failure, protect the power
line and the input/output lines with a protection device such
as fuse, etc.
If this product is used for phase control, higher harmonic
noise may be generated. Therefore in this case, take such
measures as separating the power line from the
high-voltage line for load drive.
Prevent metal fragments or lead wire scraps from falling
inside instrument case to avoid electric shock, fire or
malfunction.
Tighten each terminal screw to the specified torque found
in the manual to avoid electric shock, fire or malfunction.
For proper operation of this instrument, provide adequate
ventilation for heat dissipation.
Do not connect wires to unused terminals as this will
interfere with proper operation of the instrument.
Turn off the power supply before cleaning the instrument.
Do not use a volatile solvent such as paint thinner to clean
the instrument. Deformation or discoloration may occur.
Use a soft, dry cloth to remove stains from the instrument.
To avoid damage to the instrument display, do not rub with
an abrasive material or push the front panel with a hard
object.
NOTICE
This manual assumes that the reader has a fundamental
knowledge of the principles of electricity, process control,
computer technology and communications.
The figures, diagrams and numeric values used in this
manual are only for explanation purpose.
RKC is not responsible for any damage or injury that is
caused as a result of using this instrument, instrument
failure or indirect damage.
RKC is not responsible for any damage and/or injury
resulting from the use of instruments made by imitating this
instrument.
Periodic maintenance is required for safe and proper
operation of this instrument. Some components have a
limited service life, or characteristics that change over time.
Every effort has been made to ensure accuracy of all
information contained herein. RKC makes no warranty,
expressed or implied, with respect to the accuracy of the
information. The information in this manual is subject to
change without prior notice.
No portion of this document may be reprinted, modified,
copied, transmitted, digitized, stored, processed or
retrieved through any mechanical, electronic, optical or
other means without prior written approval from RKC.
CAUTION
WARNING
CAUTION
!
!
WARNING
*00586183*
Question and Answer IconNeed help?

Do you have a question about the RKC INSTRUMENT THV-1 and is the answer not in the manual?

RKC INSTRUMENT THV-1 Specifications

General IconGeneral
BrandRKC INSTRUMENT
ModelTHV-1
CategoryController
LanguageEnglish

Summary

SYMBOLS

Symbol Definitions

Summarizes the meaning of Warning, Caution, and Information symbols used in the manual for safe operation.

General Safety and Operational Precautions

Electrical Safety and Hazard Prevention

Covers electric shock, wiring, high voltage, unauthorized repairs, and heat precautions for safe use.

Environmental and Usage Guidelines

Advises on temperature, ventilation, location, and specific usage conditions to ensure safety.

Installation, Handling, and Maintenance

Provides guidance on terminal tightening, cleaning, and proper handling to maintain instrument integrity.

Protective Measures and Control

Details surge control, protection devices, and measures for harmonic noise to ensure stable operation.

Important Notices

Manufacturer Disclaimers and Policies

Outlines RKC's responsibilities, accuracy disclaimers, and reprint restrictions for manual content.

Product Verification and Accessories

Checking Contents and Model Code

Ensures the included product and manual are correct and confirms the model code against specifications.

Available Optional Accessories

Lists and describes optional accessories that can be purchased separately for enhanced functionality.

Component Identification and Mounting Prep

Unit Component Overview

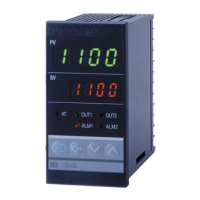
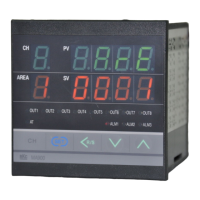
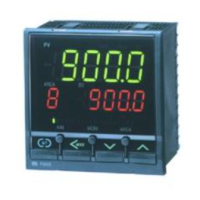
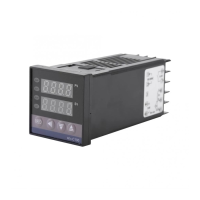
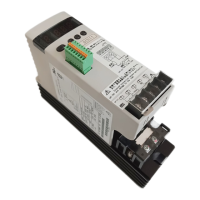
Identifies and describes the main components and interfaces on the instrument's front and rear panels.

Mounting Environment Considerations

Details environmental factors to avoid for proper mounting, ensuring optimal performance and longevity.

Physical Dimensions

20 A;30 A Model Dimensions

Provides detailed dimensions and mounting space requirements for the 20A and 30A instrument models.

45 A;60 A Model Dimensions

Provides detailed dimensions and mounting space requirements for the 45A and 60A instrument models.

Physical Dimensions and Mounting Procedures

80 A;100 A Model Dimensions

Provides detailed dimensions and mounting space requirements for the 80A and 100A instrument models.

Mounting Orientation and Installation Steps

Specifies correct mounting orientation for ventilation and outlines the step-by-step installation process.

Wiring Instructions

Main Circuit Wiring Essentials

Covers crucial wiring steps, phase alignment, and load-side connections for the main circuit.

Phase Alignment and Load-Side Connections

Ensures correct phase and terminal connections and provides precautions for load-side components.

Main Circuit Wiring Details

Terminal, Wire, and Rating Specifications

Details wire capacity, terminal screw sizes, tightening torque, and fuse requirements for main circuits.

Wiring Diagram and Fuses

Presents a visual representation of the main circuit wiring and specifies fuse types and ratings.

Input Signal Wiring

Signal Type Configuration and Wiring

Explains how to configure and wire for current, voltage, or pulse input signals using short bars.

Wiring Examples

Illustrates wiring configurations for series connections of input signals, particularly current inputs.

Input and Connector Wiring

Parallel Input Connection Example

Shows a wiring example for parallel connection of voltage input signals to the instrument.

Connector Pinout and Wire Prep

Details the purpose of each connector pin and provides guidelines for preparing leadwires.

Connector Wiring Functions

Input and Control Wiring

Covers wiring for contact input, ON/OFF control, and manual/auto mode selection via the connector.

Alarm Output Wiring

Details the specific wiring required for the heater break alarm output function.

Parameter Settings Overview

Display Flowchart and Parameter Groups

Outlines the instrument's display logic, parameter groups, and navigation methods.

Parameter Adjustment Process

Explains the general procedure for changing parameter values using the instrument's front panel keys.

Parameter Navigation and Management

Selecting Parameter Groups

Describes the method for switching between Parameter group 1 and Parameter group 2 for settings.

Adjusting Parameter Values

Details how to change numeric values for specific parameters using UP keys and the Parameter key.

Set Data Lock Functionality

Explains how to enable or disable the Set data lock feature to prevent unintended parameter changes.

Transformer Protection Settings

Primary Side Protection Setup Procedure

Provides a step-by-step guide to configure parameters for transformer primary side protection.

Parameter Reference Guide

Parameter Group 1 Definitions

Lists and describes parameters in Group 1, including symbols, ranges, factory settings, and details.

Parameter Reference Guide

Parameter Group 1 Definitions (continued)

Continues the detailed listing and description of parameters within Parameter Group 1.

Parameter Reference Guide

Parameter Group 1 Definitions (continued)

Further details on parameters within Parameter Group 1, covering various control and alarm settings.

Parameter Group 2 Definitions

Lists and describes parameters available in Parameter Group 2, focusing on monitoring functions.

Key Instrument Functions

Manual Mode and Input Signal Monitoring

Describes how to select manual mode types and how the input signal monitor displays values.

Control Method Options

Explains the principles of Phase Control and Zero-cross Control for managing power to the load.

Ramp Functionality (Soft-Start;Soft-Down)

Details the ramp function for gradual output voltage changes, preventing sudden load or voltage shifts.

Advanced Output Control Features

Gradient Setting Function

Explains how gradient setting adjusts output values based on internal or external setters.

Output Limiters and Base-Up Setting

Describes how output limiters constrain values and the function of base-up setting for output bias.

Phase Control Output Modes

Outlines the four selectable output modes for phase control, including proportional voltage and current.

Specialized Control and Monitoring Functions

Constant Current Control

Function to maintain constant output current despite changes in load resistance or temperature.

Power Frequency Monitoring

Automatic detection and monitoring of power supply frequency, with error reporting for deviations.

Heater Break Alarm Functionality

Alarm Delay and Type 1 Settings

Configures alarm delay times and settings for Type 1 heater break alarms for phase control.

Alarm Activation Conditions

Specifies the conditions under which heater break alarms are triggered, based on current and phase angle.

Heater Monitoring Application Example

Illustrates setting up alarms for detecting broken or deteriorated heaters using Type 1 functionality.

Heater Break Alarm Function (Continued)

Checking Alarm Status

Explains how to interpret error codes displayed on the unit to identify specific alarm conditions.

Type 2 Alarm Configuration and Activation

Details Type 2 alarm settings, activation conditions, and its suitability for specific heat generation substances.

Type 2 Application Example

Provides a practical setup example for using Type 2 heater break alarm for monitoring heater performance.

Heater Break Alarm in Zero-Cross Control

Zero-Cross Control Applications

Describes use cases for heater break alarms when employing zero-cross control methods.

Zero-Cross Alarm Activation and Examples

Details alarm activation conditions and provides an example setup for heater monitoring in zero-cross control.

Current Limiter and Data Lock Functions

Current Limiter Functionality

Explains how the current limiter restricts measured current values to a preset limit, preventing overload.

Set Data Lock Functionality

Details the procedure to enable the Set data lock feature, preventing unintended parameter changes.

Transformer Primary Side Protection

Protection Function Overview

Explains the purpose and necessary parameters for protecting the thyristor from inrush current during power failures.

Break Detection and Release Mechanism

Details how the instrument detects momentary power failures on the secondary side and recovers automatically.

Transformer Primary Side Protection (Continued)

Break Condition Display and Indicators

Describes how the instrument's display indicates a break condition on the secondary side of the transformer.

Output Limiter and Soft-Start During Breaks

Explains the function of output limiters and soft-start when recovering from a break condition.

Error and Alarm Displays

Error Display Interpretation

Explains how to interpret error codes shown on the display for troubleshooting system issues.

Alarm and System Error Code Reference

Lists and explains error numbers for system faults and alarms like Heater break and Thyristor breakdown.

Technical Specifications

Electrical and Input Specifications

Details power supply, frequency, input signal types, current ratings, and applicable loads.

Control, Load, and Optional Function Specs

Covers specifications for control methods, load types, ramp functions, alarms, and protection features.

Technical Specifications (Continued)

Optional Features and Environmental Ratings

Details specifications for optional current limiters, ambient conditions, and insulation resistance.

Compliance and EMC Standards

Lists safety standards (UL, CE) and EMC emission/immunity test standards the instrument complies with.

Optional Accessories

Setter and Voltmeter Details

Describes the setter (potentiometer) and output voltmeter accessories, including dimensions and characteristics.

Fuse Unit Specifications

Details the specifications for 3-circuit and 1-circuit fuse units, including fuse ratings and dimensions.

Optional Accessories (Continued)

UL Approved Fuse Holders

Provides details on UL approved fuse holders (THVP-H04, THVP-H05), including replacement and wiring.

Related product manuals