IMR01M01-E16 JUL. 2020
HEADQUARTERS: 16-6, KUGAHARA 5-CHOME, OHTA-KU TOKYO 146-8515 JAPAN
PHONE: 03-3751-9799 (+81 3 3751 9799) E-mail: info@rkcinst.co.jp
Website: https://www.rkcinst.co.jp/english/
The first edition: JUN. 2002 [IMQ00]
The sixteenth edition: JUL. 2020 [IMQ00]
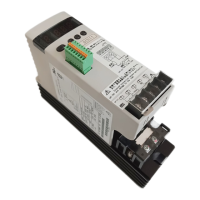
Fuse holder (UL approved instrument) for 20 A and 30 A (1 circuit type) THVP-H04
Unit: mm
Fuse holder (UL approved instrument) for 45A, 60 A, 80 A and 100 A (1 circuit type) THVP-H05
Unit: mm
Replacement method of the fuse
Wiring method of fuse holder
The Figure shows the type of 20 A and 30 A. However, the replacing procedure or wiring procedure is the same as
for the type of 45 A to 100 A.
79.5
61
56
17.8
35.6
53.4
71.2
10
43
2.5
3.2
78
45
16.5
Rated current of fast-blow fuse
(UL approved instrument)
Details Rating
Fast-blow fuse (UL approved
instrument) for 20 A
20 A
Fast-blow fuse (UL approved
instrument) for 30 A
32 A
35.6
106.8
142.4
140
27
110.5
87.5
75.5
53
40
8
16
53
2.5
50.5 45
4.4
109.5
7.5
71.2
Rated current of fast-blow fuse
(UL approved instrument)
Details Rating
Fast-blow fuse (UL approved
instrument) for 45 A
50 A
Fast-blow fuse (UL approved
instrument) for 60 A
63 A
Fast-blow fuse (UL approved
instrument) for 80 A
80 A
Fast-blow fuse (UL approved
instrument) for 100 A
100 A
Fuse
Open a front lid. Take fuse
out of the holder.
Insert the new fuse.
Close a front lid to finish the
work.
Confirm the location and
insert a leadwire.
Leadwire of main
circuit (1/L1)
Loosen a screw of holder front.
Tighten a screw of holder front. Wire the
leader to the bottom side in the same
way as in 1, 2 and 3.
 Loading...