IMCB02-E5 1
DIGITAL CONTROLLER
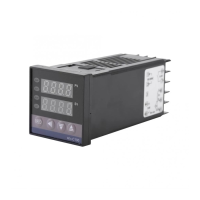
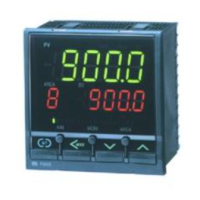
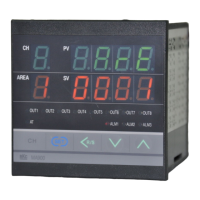
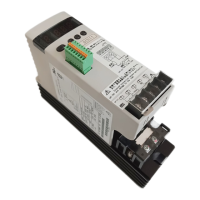
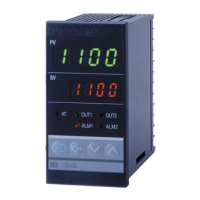
CB400/CB500/CB700/CB900
INSTRUCTION MANUAL
IMCB02-E5
Before operating this instrument, please carefully read this manual and
fully understand its contents. And always keep it around you to make it
available easily anytime.
•
If failure or error of this instrument could result in a critical
accident of the system, install an external protection circuit to
prevent such an accident.
•
Do not turn on the power supply until all of the wiring is completed.
Otherwise electric shock, fire or malfunction may result.
•
Use this instrument within the scope of its specifications.
Otherwise fire or malfunction may result.
•
Do not use this instrument in the places subject to flammable or
explosive gas.
•
Do not touch high-voltage blocks such as power supply terminals,
etc. Otherwise electric shock may result.
•
Never disassemble, repair or modify the instrument. This may
cause electric shock, fire or malfunction.
•
This is a Class A instrument. In a domestic environment this
instrument may cause radio interference, in which case the user is
required to take adequate measures.
•
This instrument is protected from electric shock by reinforced
insulation. So please arrange reinforced insulation to the wire for
input signal against the wires for instrument power supply, source of
power and loads as far as possible.
•
This instrument is manufactured on the assumption that it is used in
the condition of being mounted on the instrumentation panel.
Therefore, take the necessary measures on the equipment side
mounted with this instrument so that the operator or other personnel
are not accessible to high-voltage blocks in this instrument such as
power supply terminals, etc.
•
Always observe precautions described in this manual. Otherwise
serious injury or accident may result.
•
Conduct all of the wiring in accordance with the local codes and
regulations.
•
Install a protection device such as a fuse, etc. in the power supply,
input or output line, if necessary.
•
Do not allow metal fragments or lead wire scraps to fall inside this
instrument. This may cause electric shock, fire or malfunction.
•
Firmly tighten each terminal screw at the specified torque. Otherwise
electric shock or fire may result.
•
Do not place any obstacle around this instrument in order not to
impede radiation of heat. And do not close ventilation holes.
•
Do not connect wires to unused terminals.
•
Before cleaning the instrument, always turn off the power supply.
•
Remove stains from this instrument using a soft, dry cloth. Do not use
a volatile solvent such as thinner in order to avoid deformation or
discoloration.
•
Do not rub nor strike the display unit of this instrument with a hard
object.
Notice
•
This manual is subject to change without prior notice.
•
Examples of figures, diagrams and numeric values used in this
manual are for a better understanding of the text, but not for assuring
the resultant operation.
•
This manual may not be reproduced or copied in whole or in part
without RKC's prior consent.
•
RKC assumes no responsibility for any of the following damage
which the user or third party may suffer.
!"
Damage incurred as a result of using this product
!"
Damage caused by product failure which cannot be predicted by RKC
!"
Other indirect damage
•
In order to use this instrument continuously and safely, periodic
maintenance is required. Some of components and parts used in this
instrument have a limited service life, or deteriorate over time.
1. PRODUCT CHECK
Check whether the delivered product is as specified by referring to the
following model code list.
#
Control action
F : PID action with autotuning
(
Reverse action
)
D : PID action with autotuning
(
Direct action
)
W: Heat/cool PID action with autotuning
(
Water cooling
)
*1
A : Heat/cool PID action with autotuning
(
Air cooling
)
*1
$
Input type
,
%
Range code
:
See “8. INPUT RANGE
TABLE.”
&
First control output [OUT1] (Heat-side)
M: Relay contact T : Triac V : Voltage pulse
8 : Current (4 to 20 mA DC) G : Trigger (for triac driving)
'
Second control output [OUT2] (Cool-side)
No symbol: When control action is F or D. M: Relay contact
T : Triac V : Voltage pulse 8 : Current (4 to 20 mA DC)
(
First alarm
[
ALM1
]
,
)
Second alarm
[
ALM2
]
N: No alarm H: Process high alarm
A: Deviation high alarm J: Process low alarm
B: Deviation low alarm K: Process high alarm with hold action
C: Deviation high/low alarm L: Process low alarm with hold action
D: Band alarm P: Heater break alarm
(
CTL-6
)
*2
E: Deviation high alarm S: Heater break alarm
(
CTL-12
)
*2
with hold action R: Control loop break alarm *3
F: Deviation low alarm V: SV high alarm
with hold action W: SV low alarm
G: Deviation high/low alarm with hold action
*
Communication function
N: No communication function 5: RS-485
(
2-wire system
)
+
Waterproof/dustproof construction
N: No waterproof/dustproof construction
1: Waterproof/dustproof construction
,
Case color
N: Off-white A: Off-black
*1: No self-tuning function is provided in the W or A control action type.
*2: Heater break alarm can not be specified in case of ALM1. Also, it isn
’
t
possible to specify when control output is current output.
*3: As control loop break alarm, only either the first alarm or second
alarm is selected.
2. MOUNTING
2.1 Mounting cautions
(1) This instrument is intended to be used under the following
environmental conditions.
(
IEC1010
)
*OVERVOLTAGE CATEGORY II *POLLUTION DEGREE 2
(2) Avoid the following when selecting the mounting location.
-"
Ambient temperature of less than 0
°
C
(
32
°
F
)
or more than 50
°
C
(
122
°
F
)
.
-"
Ambient humidity of less than 45 % or more than 85 % RH.
-"
Rapid changes in ambient temperature which may cause
condensation.
-"
Corrosive or inflammable gases.
-"
Direct vibration or shock to the mainframe.
-"
Water, oil, chemicals, vapor or steam splashes.
-"
Excessive dust, salt or iron particles.
-"
Excessive induction noise, static electricity, magnetic fields or
noise.
-"
Direct air flow from an air conditioner.
-"
Should be used indoors where the system is not exposed to direct
sunlight.
-
Heat to be accumulated radiation heat.
WARNING
CAUTION
<Accessories>
-"
Mounting bracket:
2 pieces
*1,*2
-"
Mounting screws (with hexagon nuts)
: 2 pieces
*1,*2
-"
Instruction manual
[
IMCB02-E5
]
(1 copy)
*1 CB400/CB500/CB700 waterproof/dustproof construction
specification.: Same quantities as those on the above side
also for waterproof/dustproof construction
*2 CB900 waterproof/dustproof construction spec.: 4 pieces
CB400
CB500
CB700
CB900
....
-
..
*
..
-
..
/
.
/Y
#$
%
&'
()
*
+
,