IMPORTANT NOTICE!
Safety Definitions
These instructions contain information that is very important to know and understand. This information is provided for
safety and to prevent equipment problems. To help recognize this information, observe the following symbols:
WARNING indicates a potentially hazardous situ-
ation which, if not avoided, could result in property
damage, serious personal injury or even death.
CAUTION indicates a potentially hazardous situa-
tion which, if not avoided, may result in property dam-
age, or minor or moderate personal injury.
CAUTION used without the safety alert symbol in-
dicates a potentially hazardous situation which, if not
avoided, may result in property damage.
NOTE
Refers to important information and is placed in italic
type. It is recommended that you take special notice of
these items.
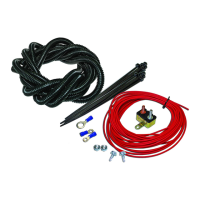
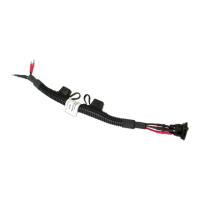
Bulb and socket kit
part number 155
Installation Instructions
ROADMASTER, Inc. • 6110 N.E. 127th Ave. • Vancouver, WA 98682 • 800-669-9690 • Fax 360-735-9300 • roadmasterinc.com
All specifications are subject to change without notice.
Time Tested • Time Proven
851727-10 11.17
Read all instructions before install-
ing the kit components. Failure to un-
derstand how to properly install the kit
could result in property damage, per-
sonal injury or even death.
Before you begin the installation…
• This kit uses four-prong connectors to conduct lighting
signals from the motorhome to the towed vehicle. If you
would prefer electrical sockets at both vehicles, optional kits
with sockets, mounting brackets and straight or Flexo-Coil
™
electrical cords are available from ROADMASTER.
• If the motorhome has separate brake and turn signals
(Figure 1), an optional Brite-Lite
™
3-to-2 wiring converter is
required.
Installation instructions for these accessories are included
with the kits.
Note: if the motorhome has a separate lighting system,
a 3-to-2 converter must be installed in order to use this
kit. A 3-to-2 converter converts a separate system to a
combined system.
Many late-model motorhomes come with converters
already installed — test for this before installation: if the
motorhome's trailer plug energizes the same pins for both
brake lights and turn signals, then a 3-to-2 converter is
already installed and the motorhome should be treated
as combined.
If a converter is needed, install ROADMASTER's Brite-
Lite
™
, part number 732.
Required Tools
• 1" hole saw or rotary cutting tool • drill
• wire stripper • wire crimper • test light
Installation Instructions
1. You will attach one end of the wiring harness to the
taillight assemblies, then route the other end of the harness
to the front of the vehicle.
Before you attach the wiring harness, plan a route to
the front of the vehicle. Choose a route that avoids the pos-
sibility of fraying or melting the wiring against moving parts,
sharp edges, the fuel lines or hot components. (If the OEM
wiring harness is accessible, consider routing the harness
alongside it.)
Plan a route that will avoid moving parts, sharp edges,
the fuel lines or hot components such as the engine or
exhaust system.
Wiring exposed by moving parts, sharp edges or hot
continued on next page
Figure 1