08
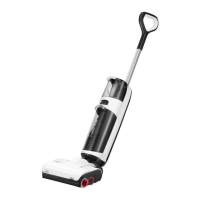
Instructions for
Using the Wet and
Dry Vacuum Cleaner
C
C1
Filling the Clean Tank
C2
Adding Detergent
C3
Locking and Unlocking
Push the clean tank release button and
remove the tank.
Push the detergent cartridge release
button and remove the cartridge.
Tap the side of the cleaning head
without the detergent cartridge, and
push the handle to lock the cleaning
head or pull the handle to unlock the
cleaning head.
Open the cover, fill the tank with tap
water, and then close it tightly. The water
level should not exceed the MAX line.
Tilt the clean tank, install the bottom in
place, and then gently push it inward to
secure it in place.
Open the detergent cartridge, fill it with
detergent, and then close it tightly.
Reinstall the detergent cartridge.
C1-1—
C2-1—
C3-1—
C1-2—
C1-3—
C2-2—
C2-3—
To avoid deforming the clean tank, only use cold water.Note:
Notes:
• The detergent cartridge requires refilling after about 20
tanks of clean water.
• Remove or empty the detergent cartridge if detergent is
deemed unnecessary.
• To prevent corrosion or damage, do not use any
disinfectant and only use detergent recommended by
Roborock.
Connecting to the App
❶ Download the app
❷ Reset WiFi
❸ Add the Device
Search “Roborock” in the App Store or Google
Play or scan the QR code to download and
install the app.
a. Keep the machine upright and press
to
light up the screen and enter standby mode.
Open the Roborock app, tap “Scan to Connect”
or “Search for Device” on the home page, and
add the device as instructed in the app.
If the mobile phone fails to connect to the vacuum
cleaner because your router configuration has changed or
you forget your password or for any other reasons, reset the
WiFi and add your device again.
Do not store the main unit and dustbin combo unit on
the top of the baton to prevent it from falling down.
Note:
Note:
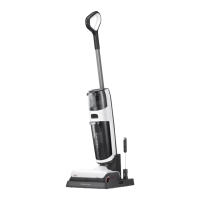
B4
Installing the Storage Stand
and Storing Vacuum Accessories
B4-1—
B4-2—
B4-3—
B4-4—
Put the storage stand on the floor, align
its connection point with the right-hand
side of the charging dock, and install
charging dock from the top down.
Insert the baton holder into the slot on
the storage stand until it clicks in place.
To remove the holder, press the clip on
the back and pull the holder upward.
Store all accessories.
Notes:
• The actual process may vary due to ongoing app updates.
Follow the instructions provided in the app.
• Only 2.4 GHz WiFi is supported.
• If the vacuum cleaner waits more than half an hour for a
connection, WiFi will be automatically disabled. If you want
to reconnect, reset the WiFi before proceeding.
• During firmware updates, do not remove the main unit
from the wet and dry vacuum cleaner, otherwise the update
will fail.
B3-2—
B3-3—
Connect the power cable into the side
of the charging dock and plug it in.
To disassemble the charging dock,
grasp the side handles of the tray and
pull upward.
C4
Starting the Vacuum Cleaner
Unlock the cleaning head and press the
button to start the vacuum cleaner.
Locked
Unlocked
C3-2—
C3-3—
Notes:
• The cleaning head does not work when locked. Unlock
it first.
• Press
button can only start drying when the vacuum
cleaner is charging.
b. Press and hold and until you hear the
“Resetting WiFi” voice alert. The reset is
complete when the WiFi indicator flashes
slowly. The vacuum cleaner will then wait for
a connection.