EasyManua.ls Logo

Rockville RVA-M2 - User Manual

Rockville RVA-M2
24 pages
Print Icon
To Next Page IconTo Next Page
Loading...
RVA-M3/RVA-M2
OWNERS MANUAL
A
m
p
l
i
f
i
e
r
P
o
w
e
r
S
t
a
n
d
a
r
d
C
E
A
-
2
0
0
6
C
o
m
p
l
i
a
n
t
TM

Questions and Answers

  • R
    Rhonda BrownAug 15, 2025
    Why does my Rockville RVA-M2 Amplifier go into protect mode?
    • M
      Margaret IbarraAug 15, 2025
      Your Rockville Amplifier might enter protect mode due to several reasons: a short-circuit caused by loose power or ground wires (in this case disconnect the speakers from the amp to find out if the issue is with power, ground, or remote wire); overheating (check that your subwoofers are compatible and wired correctly); a blown speaker (disconnect all speakers; if the amp exits protect mode, replace the faulty speaker); wrong speaker impedance (replace the speaker with one of the proper impedance); touching speaker wires (ensure the wires are not touching); reverse polarity (connect the speaker wires to the correct terminals); an inadequate power wire gauge (use the proper gauge wires); or faulty RCA cables (hook up a set of known good RCA cables to your head unit and amp to check this).
  • G
    greenmiguelAug 21, 2025
    What to do if my Rockville RVA-M2 won’t power on?
    • P
      Paul RyanAug 21, 2025
      If your Rockville Amplifier won’t power on, check the following: Ensure the external fuse is properly seated and making contact. Replace the external fuse if it's blown, but never with one of a larger value. Also, replace the amplifier’s internal fuse if it's blown, again never with a larger value. Ensure the ground wire connection is secure and tight. Check the power wire connection to the ring terminal, cleaning off any corrosion. Verify the power wire is correctly connected (positive to positive, negative to negative) and secure. Confirm the remote turn-on wire is securely connected at both the amplifier and receiver ends. Ensure the power wire is connected to the +12V terminal, not the ground terminal, and that all connections are tight.
  • N
    nguyenrobertSep 2, 2025
    What causes a Rockville RVA-M2 to keep blowing fuses?
    • J
      Jessica RobertsSep 2, 2025
      If your Rockville Amplifier keeps blowing its main fuse, pay attention to when it blows. Try inserting a good, properly rated fuse with your head unit and amplifier turned off. If both sides of the main fuse have power, and one side of the distribution block has power, but the other side of that fuse is dead, then you’re either dealing with a shorted power wire or an internal amplifier fault. Check the power wire that connects the distribution block to your amp.
  • C
    Christopher PenaSep 5, 2025
    Why does my Rockville RVA-M2 get very hot?
    • M
      Melissa ClarkSep 5, 2025
      A Rockville Amplifier can overheat if the impedance it's running at is very low, or if the subwoofer requires more power than the amp can provide. Ensure the amp is running at the proper impedance and use subwoofers compatible with the amp. A poor ground cable connection can also cause overheating, so check and tighten the ground connection. Also, ensure the amp is mounted in a location with proper ventilation.
  • V
    vfloresSep 8, 2025
    Why doesn't my Rockville Amp or powered sub turn off with the vehicle?
    • B
      Beverly JonesSep 8, 2025
      If your Rockville Amp or powered sub doesn't turn off when you turn off the vehicle, it's likely because the remote turn-on wire is connected to a constant 12V power wire instead of the remote turn-on wire of your receiver’s wire harness. To fix this, plug the amplifier’s remote turn-on wire into the correct remote turn-on terminal of your receiver’s wire harness. In rare cases, the remote turn-on wire input might be touching the power wire; if so, carefully reposition it so it doesn't touch the power wire.
  • C
    Christopher ValenciaSep 12, 2025
    What to do if one channel on the Rockville Amplifier isn’t working?
    • G
      Geoffrey HuertaSep 12, 2025
      If one channel on your Rockville Amplifier isn’t working, first check the RCA cable going from the amplifier to the receiver, and test with a spare if possible. Ensure the RCA cable is plugged into the red and white pre-amp output on your receiver. Verify that the receiver settings enable all RCA outputs. Make sure the speaker wire is securely tightened into both the speaker and amplifier terminals. Check that the positive speaker wire is connected to the positive terminal on both the speaker and amp, and the negative to the negative. Finally, ensure the gain on the non-working channel of the amplifier is turned up.
  • T
    thomascynthiaNov 17, 2025
    How to fix distortion, background noise, crackling, or hissing in Rockville RVA-M2 speakers?
    • A
      Anthony TaylorNov 17, 2025
      To address distortion, background noise, crackling, or hissing in your Rockville Amplifier speakers, first check the routing of your wires. If your RCA cables and speaker wire are run alongside your power cables, they may be picking up feedback. Also, a poor ground cable connection can cause noise; ensure the ground connection is secure. If you're experiencing engine noise that increases with engine revs, consider installing a ground loop isolator on the receiver’s power lead. High gain settings on your amp combined with a high preamp voltage from your receiver can also cause unwanted noise; set your gain properly by playing music and setting the receiver volume to 75% - 80% of the max. Finally, try testing with different RCA cables and using high-quality insulated speaker wire made for ma...
  • L
    Leslie PollardNov 23, 2025
    What to do if my Rockville RVA-M2 is clipping?
    • N
      Nicole HendersonNov 24, 2025
      If your Rockville Amplifier is clipping, it could be due to several reasons. The speakers or subwoofers might be too powerful for the amplifier; check their compatibility and replace them if needed. The speakers or subwoofers might be wired at a lower impedance than the amp is designed for; ensure they are wired at the proper impedance. The gain setting might be too high; to properly set it, turn your receiver volume to 75% of the maximum, and then slowly increase the gain. A poor ground cable connection can also cause clipping; check the connection and ensure it's securely tightened. Additionally, using a power and ground wire that is too thin for the amplifier can cause clipping; determine the proper wire gauge and replace the existing wires. If you're using multiple devices with volume ...
  • M
    Marco ReyesNov 26, 2025
    How to troubleshoot a Rockville Amplifier that has power but no sound?
    • K
      karenpittmanNov 26, 2025
      If your Rockville Amplifier has power but no sound, start by checking if any protection lights are illuminated. Ensure the RCA cable is plugged into the RCA input, not the output. Test the RCA cable going from the amplifier to the receiver, using a spare if possible. If the amplifier is in bridged mode, verify the speaker wire is connected to the proper terminals. Check the gain settings on the amp and bass remote, increasing them slowly if they are at 0. Confirm the RCA cable is plugged into the red and white pre-amp output on your receiver. Enable front, rear, and sub pre-amp outputs in your receiver's fader/balance settings. Make sure the speaker wire is securely tightened into the speaker and amplifier terminals. Test for pinched or cut speaker wires by using new speaker wire. Ensure t...
  • E
    Eric McculloughDec 1, 2025
    Why is the sound too low on my Rockville RVA-M2 Amplifier?
    • C
      cassidy58Dec 1, 2025
      Low sound from your Rockville Amplifier can be caused by several factors. It might be due to wiring at too high of an impedance, so properly wire your speakers or subs to the amplifier. Check the gain level on the amp and increase it if needed. Power and ground wires that are too thin may also cause low sound, so replace them with the proper gauge wires. Ensure your positive and negative speaker wires are not reversed, as this can cause the sub to move without producing much noise. Check your crossover setting on your amplifier and filter out more high frequencies if necessary. Also, check the volume level control for the pre-amp outputs on your receiver, adjusting the subwoofer level and front/rear pre-amp output controls. The amplifier may not be powerful enough, and if so, consider upgr...

Summary

Introduction

Important Safety Instructions

Key safety guidelines and warnings for amplifier installation and use.

Installation

Wiring

Twin Amp Bridging

Features

Power and Protection Circuitry

Details the IC-controlled protection circuits, LEDs, and various protection modes.

Woofer Wiring Guide

Troubleshooting

Amp goes into protect mode

Troubleshooting steps for when the amplifier enters protection mode due to various issues.

Amp wont power on

Common causes and solutions for the amplifier failing to power on.

Power but no sound

Troubleshooting steps when the amplifier powers on but produces no audio output.

Amp is clipping

Identifying and resolving audio clipping issues, often related to gain settings or impedance.

Amp keeps blowing fuses

Diagnosing and resolving issues causing the amplifier's fuses to blow.

Overview

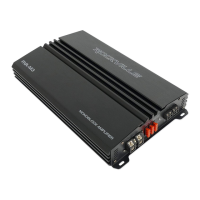
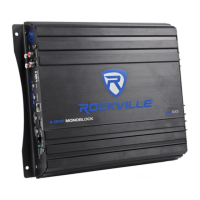
The Rockville RVA-M3/RVA-M2 is a Class D monoblock amplifier designed for car audio systems, offering robust power output and a range of features for optimal sound customization and protection. These amplifiers are 1 ohm stable, ensuring compatibility with various speaker impedance configurations, though the final impedance should not fall below 1 ohm to prevent overheating and damage.

Function Description:

The RVA-M Series amplifiers are designed to enhance the audio experience in vehicles by providing significant power to subwoofers. They feature a sophisticated IC-controlled protection circuitry that constantly monitors internal temperature and various voltages, automatically adjusting and protecting the amp from dangerous conditions. The amplifier includes a low pass electronic crossover, a subsonic filter, and a phase shift control, allowing users to fine-tune their subwoofer output for optimal integration with the rest of the audio system. Twin Amp Bridging capability allows two identical RVA-M2 or RVA-M3 amplifiers to be bridged for double the power output into a single 4-ohm load. The dash-mounted bass remote provides convenient control over the amplifier's bass level from the driver's seat.

Important Technical Specifications:

RVA-M2:

  • RMS Power Output (CEA Compliant @ 14.4 Volts):
    • 1 Ohm: 625 Watts (<1% THD, 70.2% efficient)
    • 2 Ohm: 440 Watts (<1% THD, 82.4% efficient)
    • 4 Ohm: 264 Watts (<1% THD, 83.7% efficient)
  • Peak Power: 2500 Watts @ 1 Ohm (for reference)
  • Minimum THD at Rated Power: < 0.1%
  • Frequency Response: 10Hz – 300Hz
  • S/N Ratio: >90dB
  • Damping Factor: >150 @ 100Hz
  • Voltage Protection: Under Voltage Protection at 9V, Over Voltage Protection at 16V
  • Fuses: Three 25A External Fuses
  • Dimensions (W x H x L): 13″ x 8.5" x 2.24"
  • Weight: 7 Lbs
  • Power Supply: High-Speed MOSFET
  • Technology: Class "D"
  • Crossover: Fully Adjustable 12dB/Octave with Differential Circuitry
  • Low Pass Filter: 32Hz – 300Hz
  • Subsonic Filter: 10Hz - 50Hz
  • Bass Boost: 0db - 12dB
  • Phase Shift: 0° - 180°

RVA-M3:

  • RMS Power Output (CEA Compliant @ 14.4 Volts):
    • 1 Ohm: 1000 Watts (<1% THD, 74.1% efficient)
    • 2 Ohm: 600 Watts (<1% THD, 84.5% efficient)
    • 4 Ohm: 360 Watts (<1% THD, 88.3% efficient)
  • Peak Power: 4000 Watts @ 1 Ohm (for reference)
  • Minimum THD at Rated Power: < 0.1%
  • Frequency Response: 10Hz – 300Hz
  • S/N Ratio: >90dB
  • Damping Factor: >150 @ 100Hz
  • Voltage Protection: Under Voltage Protection at 9V, Over Voltage Protection at 16V
  • Fuses: Three 40A External Fuses
  • Dimensions (W x H x L): 14" x 8.5" x 2.24"
  • Weight: 7.8 Lbs
  • Power Supply: High-Speed MOSFET
  • Technology: Class "D"
  • Crossover: Fully Adjustable 12dB/Octave with Differential Circuitry
  • Low Pass Filter: 32Hz – 300Hz
  • Subsonic Filter: 10Hz - 50Hz
  • Bass Boost: 0db - 12dB
  • Phase Shift: 0° - 180°

Usage Features:

  • Input Sensitivity Adjustment: The LEVEL or INPUT LEVEL control matches the output level of the source unit to the amplifier's input level. It should be set to the maximum volume of the head unit before distortion, then backed down slightly.
  • Low Pass Electronic Crossover: Features 12dB per octave fully adjustable crossovers. The LPF knob controls frequencies from 40Hz – 180Hz. Recommended setting for most installations is 80Hz – 150Hz.
  • Subsonic Filter: Attenuates very low frequencies that can damage subwoofers. For sealed enclosures, set to 25Hz – 35Hz. For ported enclosures, set to ½ an octave below the tuned frequency of the port. Subsonic filters have steep slopes (18 or 24dB/Oct).
  • Phase Shift Control: Synchronizes subwoofer output phase with other vehicle speakers (0 to 180 degrees). Adjust for best bass output.
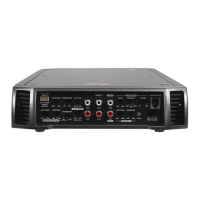
  • Twin Amp Bridging: Allows two identical RVA-M2 or RVA-M3 amplifiers to be bridged for double the power into a single 4-ohm load. The MASTER amplifier controls all functions, and its BRIDGE OUT RCA port connects to the SLAVE amplifier's BRIDGE IN RCA port.
  • Mute Circuit: Anti-thump, mute-and-delay circuit eliminates turn-on and turn-off transients.
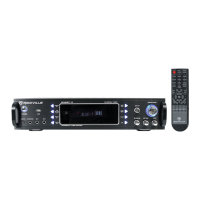
  • Bass Remote: Dash-mounted control for adjusting bass level, includes a power LED indicator.
  • Speaker Wiring Guide: Provides diagrams for various SVC and DVC woofer configurations, emphasizing the 1 ohm minimum impedance for single monoblock amplifiers. Warns against mixing different impedance speakers in series and/or parallel.

Maintenance Features:

  • Protection Circuitry: IC-controlled system monitors heat sink temperature and voltages. A green LED indicates normal operation, while a red LED signifies a diagnostic condition. The amplifier enters self-preservation mode or shuts down if a fault is detected.
  • Thermal Protection: Shuts off the amplifier at 80 degrees Celsius and automatically turns on again once cooled. Additional cooling fans are recommended in hot climates.
  • Speaker Short-Circuit Protection: Activates if speakers short-circuit or impedance is too low. Requires disconnecting speakers to identify and replace faulty ones, then resetting the amplifier.
  • Input Overload Protection: Shuts down or cycles the amplifier if input is overloaded. Requires reducing gain or head unit volume and resetting the amplifier.
  • DC Offset Protection: Protects speakers from damaging DC voltages and prevents amplifier operation until the condition is remedied.
  • Fuse Replacement: External fuses are equipped for protection. Always replace with fuses of the same value. Internal fuses (on the side of the amp) should also be replaced with the same value if blown.
  • Connection Checks: Regularly check power and ground wires for tightness and corrosion. Loose or corroded connections can cause heat buildup, leading to melted terminals and potential damage. Upgrade to heavier gauge wire if wires feel hot.
  • Troubleshooting Guide: Comprehensive guide for common issues like "Amp goes into protect mode" (short-circuit, thermal, blown speaker, wrong impedance, touching wires, reverse polarity, thin power wire, faulty RCA cables), "Amp won't power on" (fuse issues, loose connections, incorrect wiring), "Power but no sound" (incorrect RCA input, gain settings, speaker wire issues, receiver settings), "Amp is clipping" (too powerful speakers/subs, low impedance wiring, high gain, poor ground, thin power wire, multiple volume controls), "Distortion, background noise, crackling, or hissing" (wire routing, poor ground, engine noise, high gain, bad RCA/speaker cables), "Sound is too low" (high impedance, low gain, thin power/ground wire, reversed speaker wires, crossover settings, receiver level controls, underpowered amplifier), and "Amp keeps blowing fuses" (short in power cable, internal amplifier fault, incompatible subwoofers, incorrect impedance wiring).

Rockville RVA-M2 Specifications

General IconGeneral
BrandRockville
ModelRVA-M2
CategoryAmplifier
LanguageEnglish

Related product manuals