4. Hardware Installation
Please follow the instructions below to complete the hardware installation:
Step 1:
Open the package and take out the product making sure that all contents are not damaged or missing.
Should you nd any damage or missing contents, please contact your supplier immediately.
Step 2:
Place the system on a stable surface. Ensure that it is installed in a well ventilated area with
acceptable airow for the vent and keep product away from moisture.
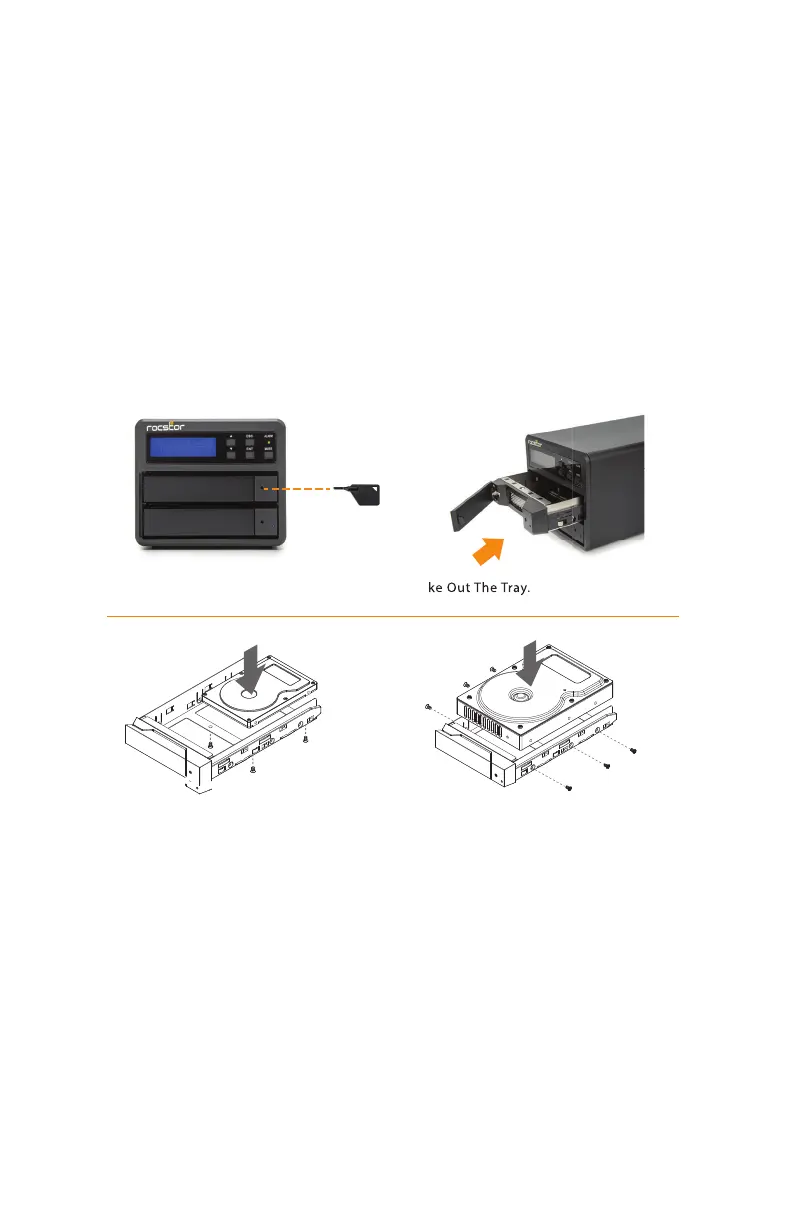
Step 3:
Use the provided key in the accessory kit to eject the removable tray,
pull tray handle to remove from U32.
Step 4:
Install your hard drives onto the removable drive tray and secure it with the screws included in the
accessory kit. Once completed, insert the hard drive tray into the system.
Step 5:
Use the provided cables to connect your computer to the preferred interface connection.
Step 6:
Power on the unit and wait for the system to initialize. When the LCD display panel indicates
“OK”,the system has completed initialization and is ready for hard drive formatting.
2.5” or 3.5”HDD Screws
ESC
ENT
ALARM
MUTE
1.Push the key
2.Realese the Tray
3.Take Out The Tray.
page 5 - 10ROCPRO™ U32 Series User Manual