MAR.
27,198O
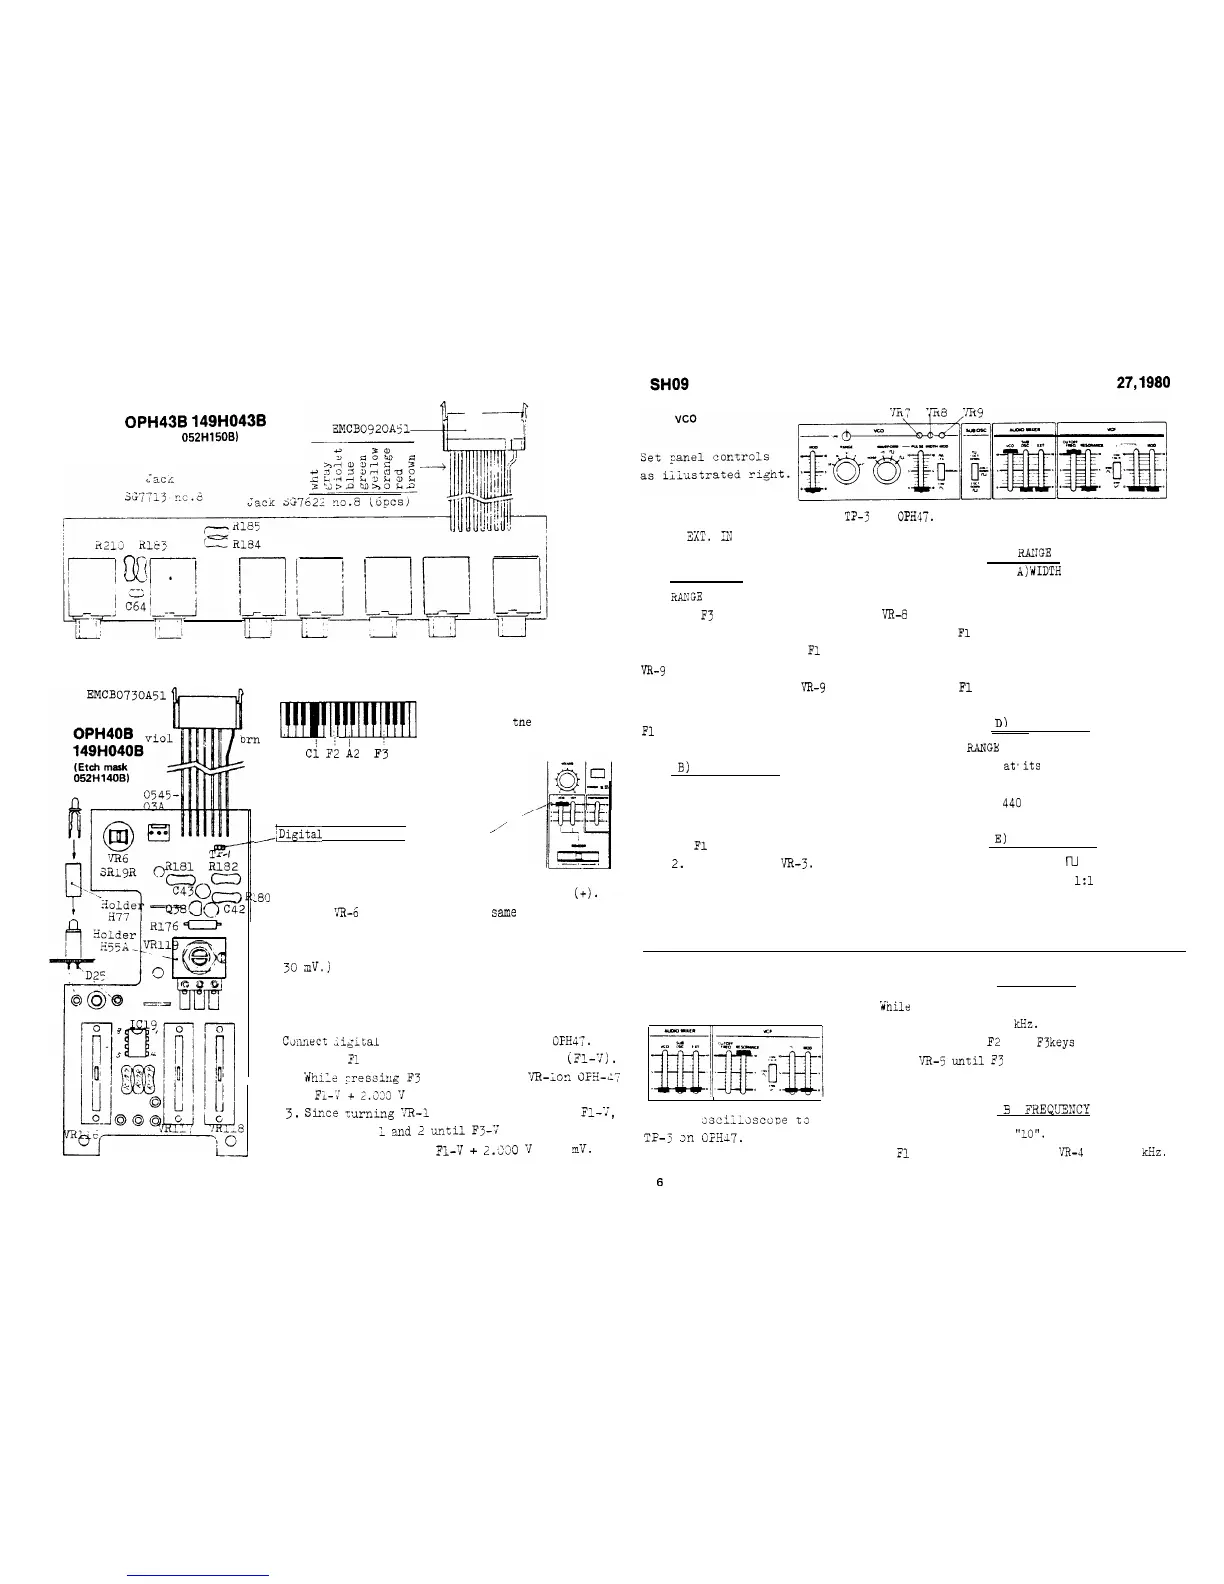
OPH43B
149H043B
(Etch mask
052H15OB)
View from the foil side
ADJUSTMENT
Fl
Ci
F;
h2
F3
KEY DESIGNATION
only for
tne
adjustments
BENDER
Panel setting and connection:,,-
/iDigital voltmeter!
at 10
_,'
1. Flip and hold Bender lever
at
the left(-). Note the reading.
L~C
2. Turn and hold the lever at the right
(+).
Adjast
VR-6
on OPH40 for the
same
reading, but
opposite polarity, as in step 1.
(Difference between two readings must be within
30
mv.j
J
KCV
Ctinniect
;igital
voltmeter to TP-2 on
OFHK.
1. Press
Fl
key and note the reading,
(Fl-7).
2.
While
,-ressi:lg
F3
key, adjust
'/R-l
0::
CFii-LiT;
for
FL--r
f
2.233
7
reading.
3.
Sir.ce
turning
X3-1
has an effect on
FL--T,
repeat steps
1
and
2
.until
F3--T
becomes
Fl-V
+
2.330
v
+ 1
m!v.
Connect an oscilloscope to
T?-3
on
OPR47.
Apply reference F note to the
scope X0.
I?1
for Lissajous figures.
A) 'WIDTH
Set
RANGE
at 8'.
1. With
F3
key held down, adjust
VR-8
for motionless figures.
2. While pressing down
Fl
key, adjust
VR-9
for motionless figures.
F3 pitch will vary as
VR-9
turned.
3. Repeat steps 1 and 2 until F3 and
Fl
figures stand still.
B)
LINEARITY
--
details follow A) WIDTH --
Set RANGE at 2'.
Adjust the pots.
1.
Fl
key --- VR-8.
2.
F3 key ---
'JR-3.
3. Repeat steps 1 and 2.
Adjustments A and B must be repeated
C)
ElllrIGE
--refer to
A)WIDTH
for details--
Set RANGE at 32'.
Obtain stable Lissajous figures.
1.
Fl
key --- VR-8.
Place RANGE at 2'.
Obtain motionless figures.
1.
Fl
key --- W-7.
Dl
FREQUENCY
Set
RANGE
at 8'.
Set TUNE
at,its
midpoint.
1. While playing A2 key,adjust
I
VR-8 for
440
Hz.
E)
DUTY CYCLE
because of cross interference between them.
Set WAVEFORM at
m
.
1. Adjust VR-2 for
1:l
mark/space.
VCF
A) WIDTH
Set Controls as shown below.
1.
While
pressing A2 key, set CUTOFF FREQ.
for approximate 1
'kHz.
2. While playing
F2
and
F3
keys
alternateiy,
turn
VR-5
until
F3
figure doubles F2 in
cycle.
5
FREQTUEMCY
Connect
2sci;lsscope
to
TP-3
3n
G1HJ7.
Slide up CUTOFF knob to
"10".
1. With
Fl
key held down, set
'JR-4
for 20
kHz.
6
 Loading...