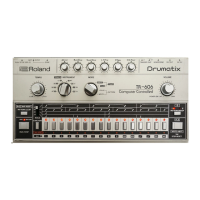
Fig. 1
step no. --> 1234567890123456
BD x-----x---x---x-
SD ----x-------xx--
OH --------------x-
CH xxxxxxxxxxxxxx--
AC x---x-----x-x-x-
PROCEDURE
1. Connect either headphones or an amplifier to the TR-606, (see BASIC
CONNECTIONS).
2. Turn the POWER switch (A) on. (Clockwise).
3. Turn the TEMPO control (D) and INSTRUMENT MIX controls (E) to the
mid point.
4. Set the MODE selector (B) to PATTERN WRITE position.
5. Press the PATTERN GROUP button (N) to select Pattern Group I.
* The PATTERN GROUP button (N) switches alternately between I and II and
illuminates the selected indicator.
6. Press the #1 SELECTOR switch (K), which is the location where we will
write the first Rhythm Pattern.
* The selected indicator (#1) should be flashing.
7. While holding down the #1 SELECTOR switch (K) down, press the
CLEAR/RESET button (F).
8. Press the RUN/STOP button (H).
* The RUN/BATTERY LED (G) lights up and the other LED INDICATORS (L)
begin scanning across from #1 to #16, step by step.
9. Set the SCALE selector (I) to #1, then press the FUNCTION button (J).
* When the FUNCTION button (J) is held down, the TR-606 displays the
position of every quarter note on the LED indicators (L).
* If you make a mistake, or wish to change the SCALE, simply repeat
operation 9. (Refer to the
ADVANCED COURSE MANUAL
for details).
10. While holding the FUNCTION button (J) down, press the SELECTOR switch
(K) of the last step in the measure. In this case, press #16.
* The LED indicators (L) begin scanning across from #1 to the last step that is
#16 in this case.
Once again, if you made a mistake, just repeat operation 10.
11. Select the instrument to be written by rotating the TRACK/INSTRUMENT
selector (C). Set it at BD (Bass Drum) in this case.
12. Press the SELECTOR switches (K) corresponding to the dots [I’ve used Xs -
ed] in the score (Fig. 1) one by one.
* The LED indicators (L) of the selected steps will light, and you will hear the
selected instrument sound on those steps.
* You can adjust the speed using the TEMPO control knob (D). This will allow
you to write at a slower speed, if a faster speed proves difficult, etc.
* If you press the wrong SELECTOR switch (K), just press the same
SELECTOR switch (K) again, and then the written sound will be erased and
the LED indicator (L) will be turned off.
13. Repeat 11-12 for the other instruments in the Fig. 1 example.
* BD . . . . . . . .Bass Drum

 Loading...