ADVANCED
COURSE
(Cont'd)
Chaining Rhythm Patterns
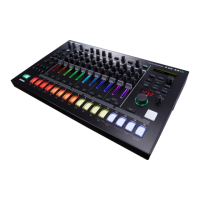
You will notice that tlie sixteen SELECTOR
Switches (K)
liave been
divided into (our Block
Groups of four switches
each (1-4, 5—8.
9—12,
and
13—
16). These
represent groupings
of
Rhy-
thm Patterns that can be chained
together to
run sequentially in a
group.
This is
used for per-
forming a two
measure repeating rhythm,
(which
is very
common in Rock Music), for
doing
4/4
time using scale 2 or
4,
or
for doing
odd
time signatures.
To chain Rhythm patterns
together, press two
SELECTOR
Switches (K) such as
(2
and
4)
within a group simultaneously. This
action
causes the first switch's LED
(2)
to
flash
while the others
(3
&
4)
illuminate
but do not
flash.
This
LED
status indicates itial the
Rhythms are chained and will play
in a
sequence.
It is
possible to chain
2, 3,
or
4
Rhythm
Patterns together, but they
must all
be from
the
same
group.
You
cannot, how-
ever, create more than one chain
within each
four groups.
For now, select the chained Rhythm Pattern
2,
3 and
4.
Press SELECTOR Switches (E)
2
and 4 simultaneously .
and then LED
indicators
(L)3and
4,
illurTiinate
while LED 2 flashes.
Select
one of the two
PATTERN
GROUPS
(N)
by
pressing
the
PATTERN GROUP button
(N).
Again, the PATTERN GROUP selection
is
available only under
Rliythm
Stopped condi-
tion.
Start the TR-606 by pressing
RUN/STOP
(H)
and you will see that the
Rhythm
runs from
2
to 3 to 4 and then back
to 2
again.
Press the
TAP
button
@
while the Rhythm
is running.
This
action causes the running
Rhythm to restart from the
first
step of
tfie
Rhythm
immediately. This re-set type of action
allows for diverse and creative
Pattern changes
while a chained
Rhythm
is
running as the
Rhythm
re-starts
from the
first
step of what-
ever
Rhythm
is
playing rather than from
the
beginning of the chain. For
example, if you
press the TAP button (M)
while playing the
Rhythm
Pattern 4
of
the chained
Rhythm
2,
3,
4,
the Rhythm will re-start from tfie first
step
of
#2
rather
than #4.
Writing
Rhythm
Patterns
As
mentioned earlier, your
TR-606 will not
only play
back Rhythms but
also allow you
to
write
them as well. Because we are not just
writing
the Rhythms but
are storing
them
into
computer Ivlemory
as
well,
we call this process
"Programming".
We
will now program the
Rhythm Score written
in Fig.
2.
Fig.
2 Rhythm Score 1
Stop the Rhythm if
it is running, and set the
MODE
Selector
(B)
to PATTERN WRITE.
This
will cause the LED
on the Rhythm
Pattern
selected to stop flashing.
Press SELECTOR
Switch
(K) #1
and set the
PATTERN GROUP
(N)
to
I.
Clear the fvlemory
in
#1
position
by
pressing
the
CLEAR/RESET (F) buttott
while
CH
OH"
h
BD
-Jl
-j^
±
J7
J
s
[step
Nol-*
1 2
3 4 5 6 7 8
9 10 11 12 13 14
t6
16
BD
holding down the
#1 SELECTOR
Switch (k).
When
this
is
done, the
PATTERN GROUP
indicator LED
@
will
flash
to
indicate tfiat the
memory
in position #1 has been cleared.
The
TR-606 programs Rhythms in a
Step
Sequence
process, which breaks each measure
(and each beat) down
into
a series
of
steps
so
that the programming can be completely
accurate.
To
Program
a Rhythm, you must first
select a Scale
position
which basically deter-
mines how many steps there will be
for
each
beat (quarter
note). This process will be
described in detail later in
this
section.
Press the RUN/STOP (R) sequence, but you
will
not hear a Rhythm because
it
has been cleared.
While
the
Rhythm
is
running, set the SCALE
se lector
(T)
switch
to
1 and press the FUIMC-
TiON
button
(j).
You have just set up a scale
in
wtiich the
quarter note will consist of four
steps
(each
step corresponding to
one sixteenth
note). Once the FUNCTION button
(j)
has
been
pressed, the Scale
is
memorized for
its
selected
position. While the FUNCTION
button
24

 Loading...