[Battery]
Shows the inspection results of the lithium battery on the
main board.
If there is no problem, "OK" and the current voltage of the
battery are shown.
If there is a problem, "NG" and the current voltage of the
battery are shown.
If the board has no battery mounted, "<NoBattry>" appears.
[Mouse Connected]
Shows the inspection results of the mouse connection.
"OK" appears if the mouse is connected and operates
normally.
"NG" appears if no mouse is connected or there is a
connection error.
[Keyboard Connected]
Shows the inspection results of the keyboard connection.
"OK" appears if the keyboard is connected and operates
normally.
"NG" appears if no keyboard is connected or there is a
connection error.
5. Explanation of the Inspection Items
[01:LCD Check]
Check the LCD screens.
Every time you press the switch, the white, black or letter
screen changes to another.
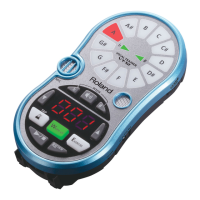
[02:Switch Check] (Fig. 2)
Check the operation of the switches on the panel board.
Check ’ON/OFF’ of all the switches on the board.
If two or more switches were pressed at the same time during
the check, the LED blinks to warn you.
[03:LED Check]
Check the operation of the LEDs on the panel board.
Check that all the LEDs on the board light up.
Every time you press the [PLAY] button, the LEDs light up
one by one.
Every time you press the [STOP] button, the lighting process
is reversed.
When the check is completed successfully, all the LEDs
should be lit.
[04:Encorder Check]
Check the operation of the encoders on the panel board.
Turn each of the sixteen encoders on the fader three clicks or
more to the right and left.
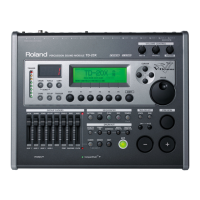
[05:FtSW...Check] (Fig. 3)
Check the operation of the foot-switch, jog-shuttle and
monitor volume.
"ON" or "OFF" appears as you press the foot-switch or
release it, respectively.
Turn the jog of the jog-shuttle three clicks or more to the right
and left.
Turn the shuttle all the way to the right and left.
Check that the displayed value changes from "-910" to "+60"
as you turn the monitor volume.
[Fig.2]
[06:SMPTE Check]
Check the operation of MIDI IN/OUT and SMPTE IN.
Press the [F2] (OUT/Th) button so that "OUT" appears at the
lower right of the display.
Connect MIDI IN and MIDI OUT with a MIDI cable.
Connect a device which outputs SMPTE signals to SMPTE
IN.
Press the [F5] (EXEC) button to start the inspection.
[07:IDE Check]
Inspects the operation of the IDE hard-disk drive.
Caution : This inspection rewrites the hard disk.
So, be sure to back up the data on the hard disk
before starting inspection.
[08:Digital Check] (Fig. 4)
Check the operation of Digital AUDIO (both Coaxial and
Optical).
Connect a device to Coaxial IN/OUT.
Press the [F3] (Coax) button.
Check that Digital In sound is output from Digital Out and that
the Coaxial’s LOCK Status is ’LOCK’.
Connect a device to Optical IN/OUT.
Press the [F4] (Opt) button.
Check that Digital In sound is output from Digital Out and that
the Optical’s LOCK Status is ’LOCK’.
[09:R-BUS Check]
Inspects the R-BUS connection.
Note : This function is used only during the shipping test at the
factory.
You need not use it when servicing in the field.
[Fig.3]

 Loading...