16
Carefully stand your unit upright.
Position your unit in its final location. We recommend using the SAFETY STRAP (60M) for added stability.
NOTE: Do not turn the SAFETY DRYWALL ANCHOR (61M) into a wall stud. If you prefer to fasten the SAFETY
STRAP (60M) to a wall stud, go to your local hardware store for proper hardware.
INSTALLATION INSTRUCTIONS: (Also available at www.yl-anchors.com)
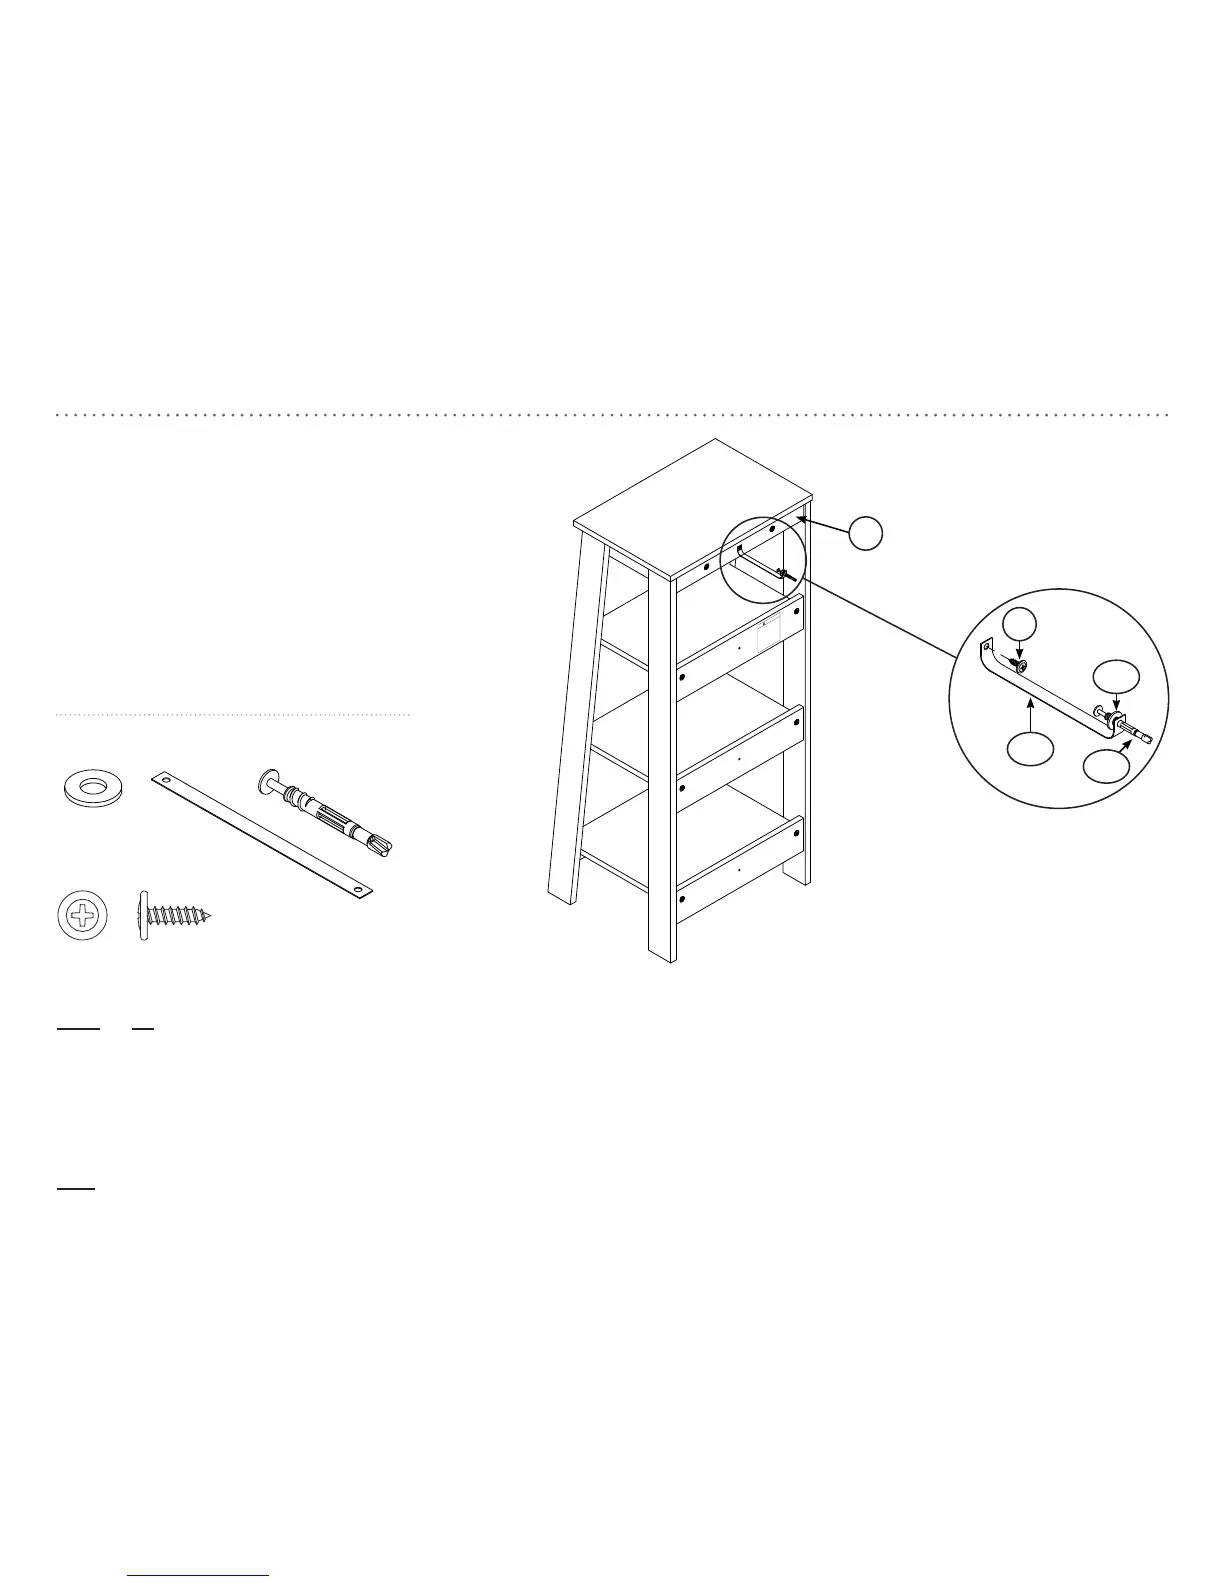
1. Insert the SAFETY DRYWALL ANCHOR (61M) through the WASHER (13M) and one end of the SAFETY STRAP (60M).
2. Using a Phillips screwdriver or a hand drill, press the screw slightly onto the drywall.
3. Apply pressure; turn the screw until a pilot hole is made and the nylon sheath slips through.
4. Turn the screw until it is flush against the wall and you feel a firm resistance.
5. Continue to turn until the screw starts spinning freely.
Use a BLACK 9/16" LARGE HEAD SCREW (1S) through the other end of the SAFETY STRAP and into the pre-drilled hole in the upper SKIRT (J2).
NOTE: Before moving your unit to a different location, unscrew the SAFETY DRYWALL ANCHOR (61M) from your wall. The nylon sheath will remain behind your wall.
417087
step 11.
(13M) x 1
washer
(61M) x 1
safety drywall anchor
(60M) x 1
safety strap
(1S) x 1
black 9/16" large head screw
60M
13M
1S
61M
J2
Serious or fatal crushing injuries can occur
from furniture tip-over. To help prevent
tip-over:
• Install tip-over restraint provided.
• Place heaviest items on the lowest surfaces as
far back from the front edge as possible.
• Unless specifi cally designed to accommodate,
do not set TVs or other heavy objects on top of
this item.
• Never allow children to hang on drawers, doors
or shelves.
Use of tip-over restraints may only reduce, but
not eliminate, the risk of tip-over.
This is a permanent label. Do not attempt to remove!
WARNING