2
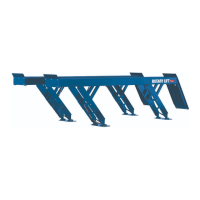
Step 1: Remove All 3/8" HHCS And 3/8" Hex Nuts
From Shipping Braces (1) On Each Side Of Brace.
Step 2: Break Spot Welds On Braces
And Remove Braces.
Shipping Brace
3/8"
HHCS
3/8" Hex Nut
Saddle Pocket
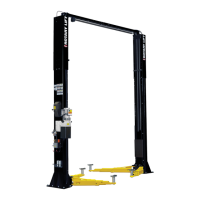
Cross Section Of Moveable Post Housing Tracks
Clean LDS*
Bracket
Clean Power Unit Brackets
Clean Area Where
Rear Post Will
Be Mounted
Clean Saddle Pocket
Top View Of Stationary Housing
*LDS = Liquid Detection System
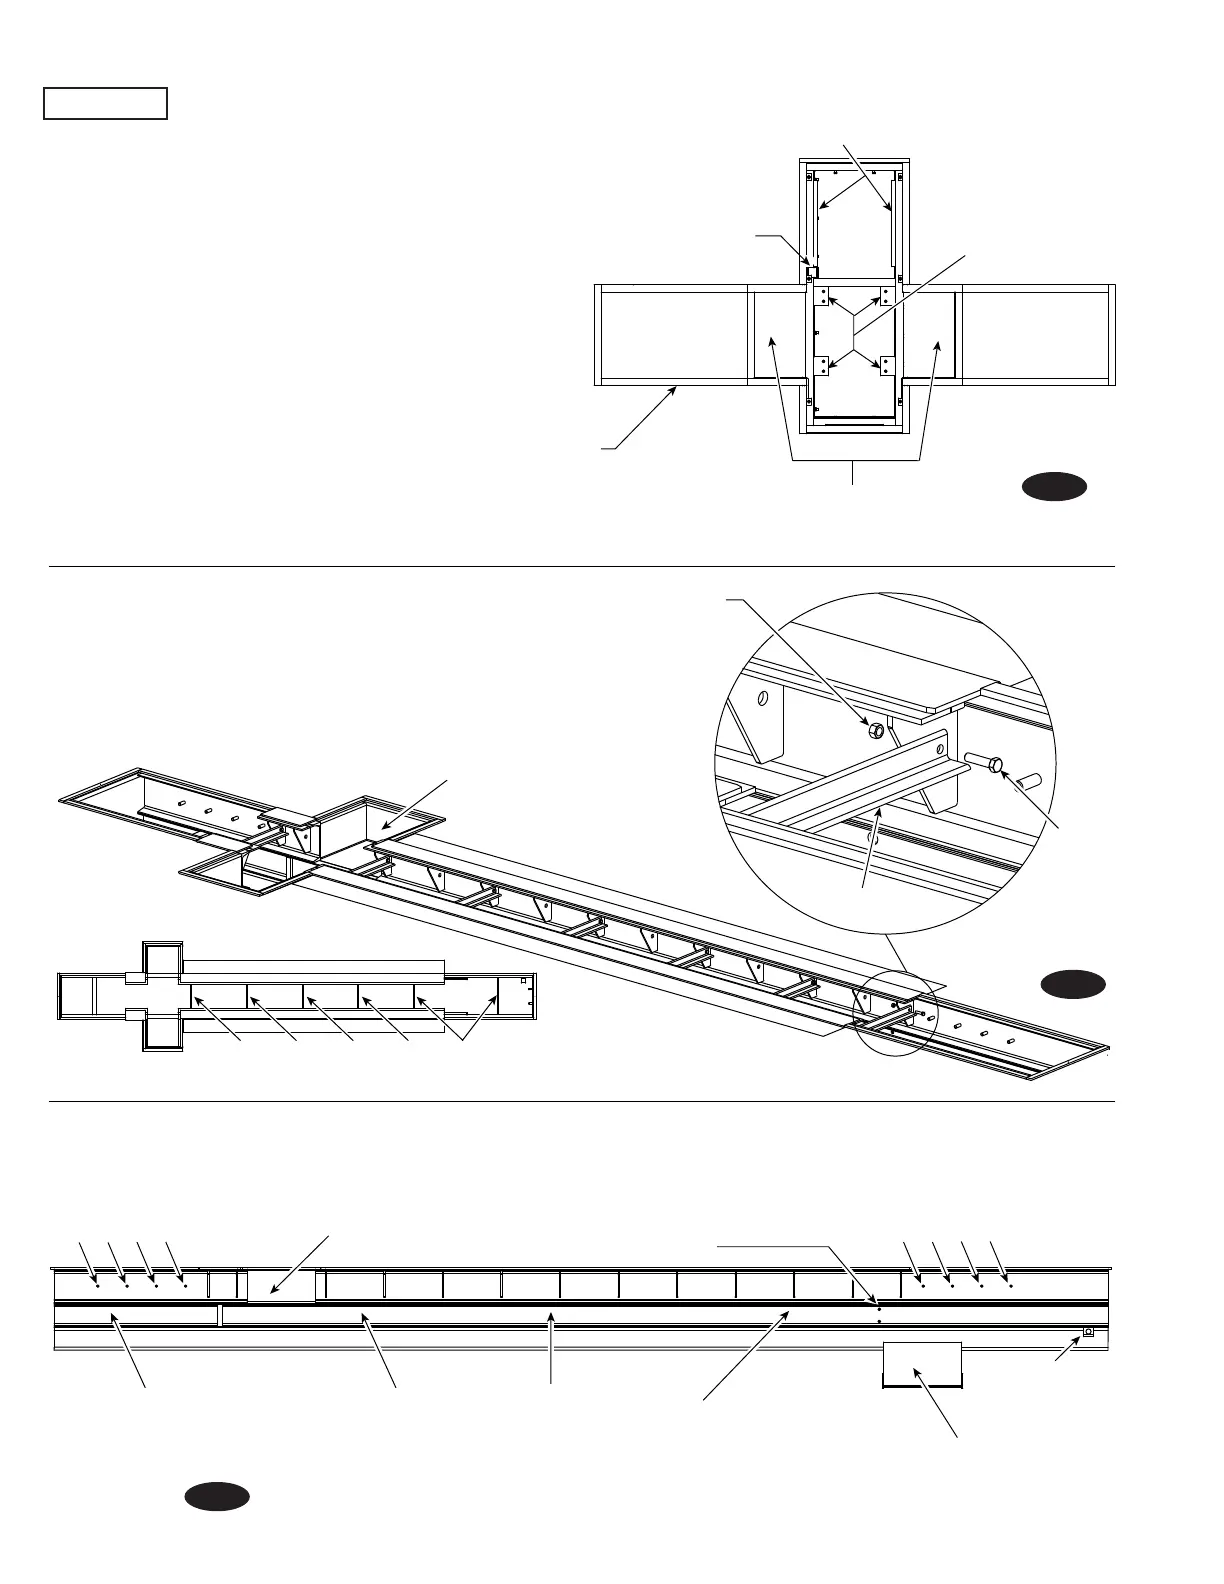
Bolt-on Wheel Dishes
(Installed Prior to Concrete)
Moveable Housings
Top View
Step 3: Remove All Braces
From Lower Housings
Clean Saddle Pocket
Clean Lower C-Channel
(This Is Where Axle Assemblies Travel
Carrying The Post In The Housing)
Grind Down High Spots
Remove Any Bolts
In This Area
Clean Power Unit Brackets
Clean Area Around Studs
Where Shutter Plate Ramps
Will Be Installed
Clean Area Around Studs
Where Shutter Plate Ramps
Will Be Installed
Clean LDS*
Bracket
Clean Removable
Wheel Stop Bolt
Holes
Step 1: Removing Shipping Braces And Cleaning Housings:
Never remove shipping braces before housing
has been set and the concrete has cured.
Note: Refer to local codes for concrete cure times.
A.) Remove shipping braces from front and rear housings, Fig. 1a.
B.) Clean front, middle and rear housings from all debris that
would prohibit proper installation of components,
Figs. 1 & 1b.
C.) Bolts were put in holes where the wheel stops will be
installed in later steps will have to be removed to allow the post to
be moved into the pocket.
Fig. 1
Fig. 1a
Fig. 1b

 Loading...