28
ERGO-DigiStick operating a Front Loader Valve
4
3
1
2
C
B
A
D
How to Connect the Joysck to the Valve and How the Joysck
Movements Corresponds with the Steering Cable Markings
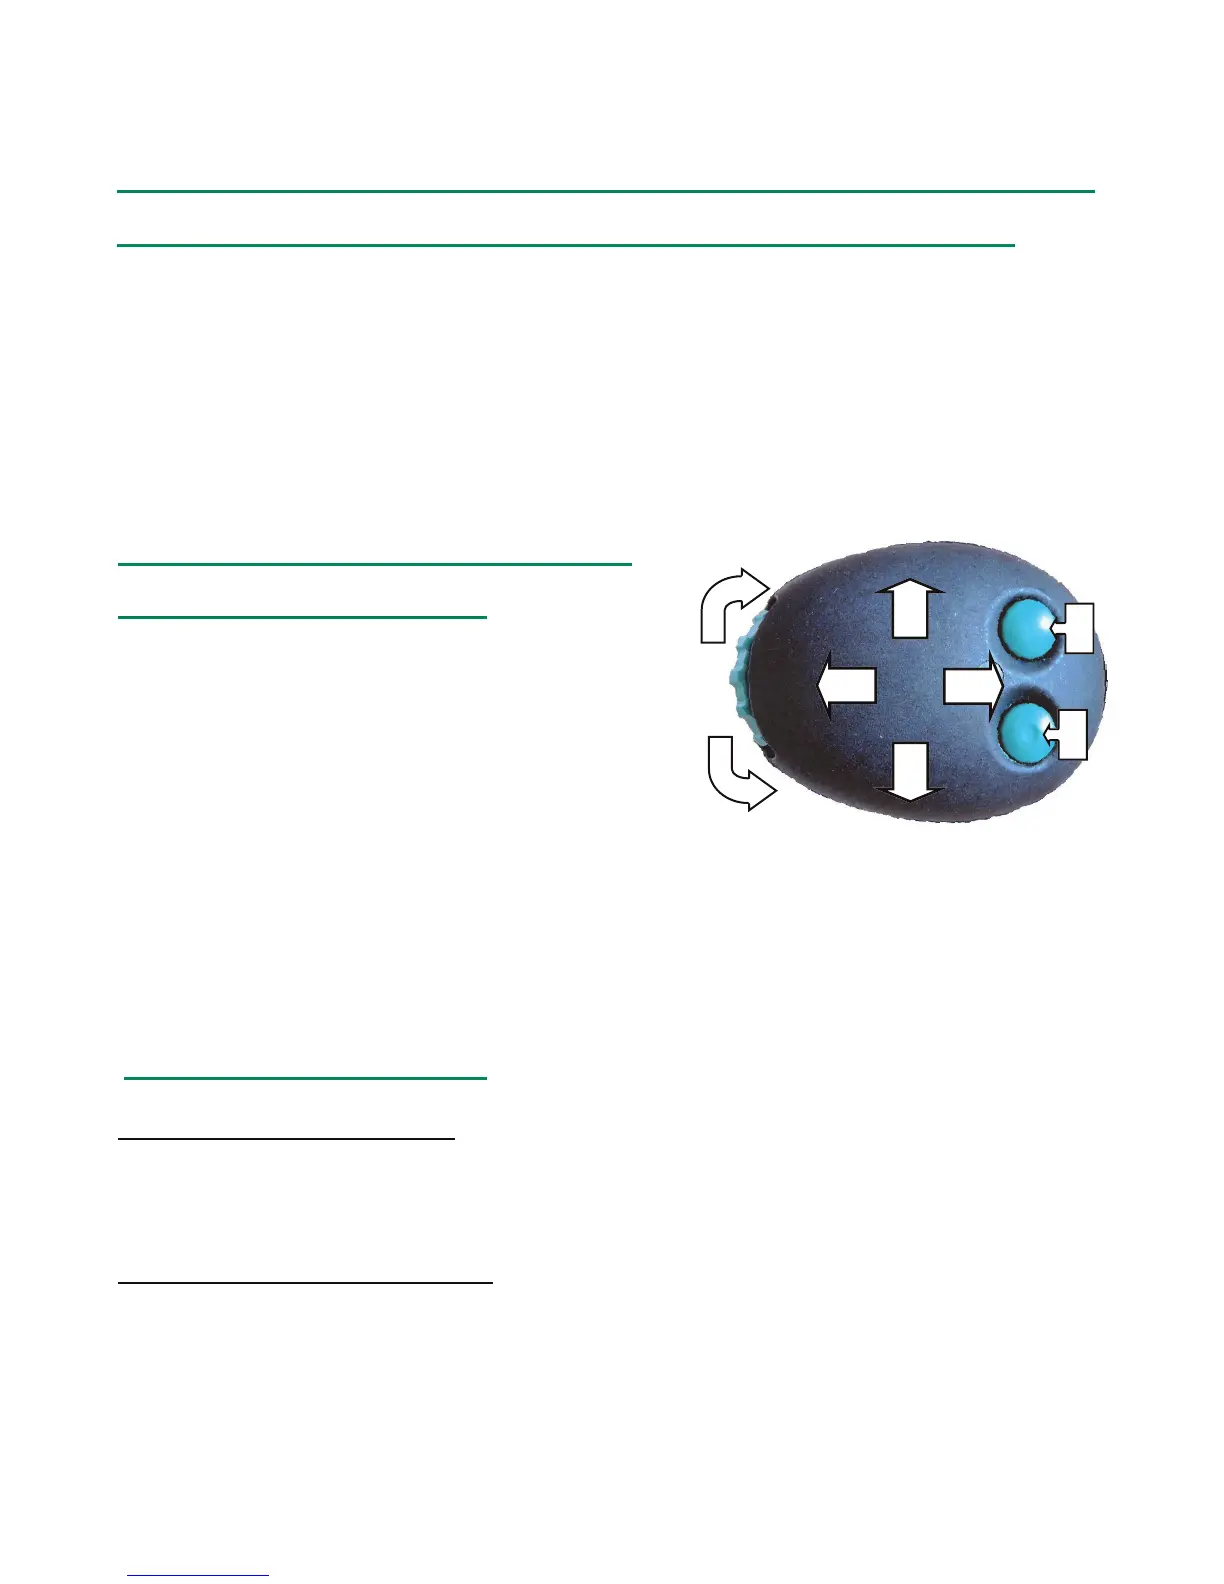
In the picture below the direcons of the joysck are marked with [1, 2, 3, 4].
The direcon of the roll is marked with [C, D] and the buons with [A, B]. Under
the picture you nd the funcons which the dierent movements corresponds to.
The 8 connectors of the steering cable are marked [1, 2, 3, 4, A, B, C, D] and
should be connected to the solenoids so that they corresponds to the funcons
below.
The steering cable is connected to
the solenoids as follows:
1 Loader down --- joystick forward
2 Loader up --- joystick backward
3 Tilt the bucket forward (bucket dump) ---
joystick to the left
4 Roll back the bucket --- joystick to the right
A Floating contact (Hirschman contact) --- press the A-switch
B On-Off signal (if needed) --- press the B-switch
C Proportional output signal (if needed) --- roll forward
D Proportional output signal (if needed) --- roll backward
How to use the floating:
Activate the floating mode: Push the lever all the way forward and press the A-
switch. The LED light on top of the joystick indicates that the floating function is
active. It is possible to use all movements when the floating is active.
De-activate the floating mode: A rapid press on the A-switch will de-activate the
floating mode (LED light goes out)
NOTE: If one or more movements are slow, please control the servo pressure.
Different circumstances (e.g. dirty return filter or severe cold) may raise
the tank pressure, and because of that the servo pressure should be
raised. 20-25 bar servo pressure is usually enough.