14
FA ROTEX SC / SCS / HYC - 02/2013
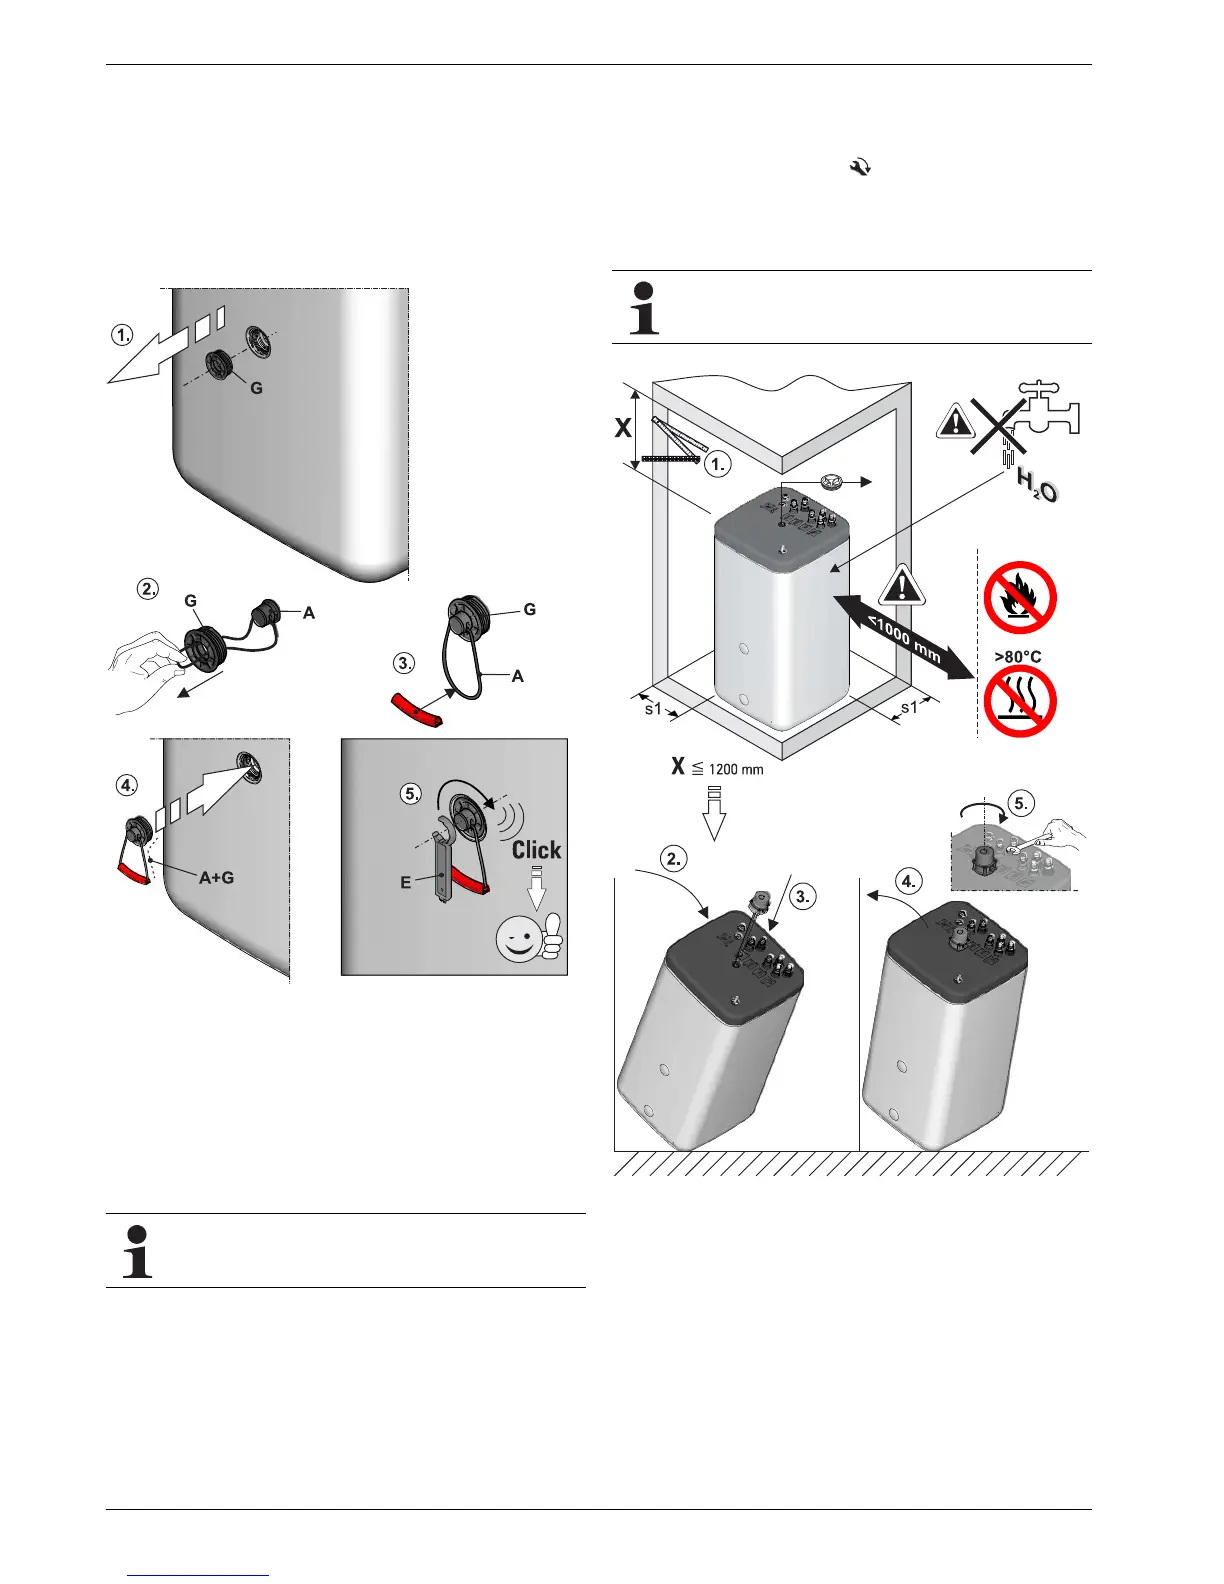
4 x Set-up and installation
4.1.3 Installing the hot water storage tank
Ɣ Remove the packaging and dispose of it in an environmen-
tally sound manner.
Ɣ Unscrew the threaded inserts (fig. 4-2, item G), onto which
the carrier loops are to be attached, from the hot water
storage tank.
Ɣ Thread the carrier loops (item A) through the threaded pieces
(item G) and mount onto the available connections on the
front and back of the hot water storage tank.
Ɣ Transport the domestic hot water storage tank carefully to the
site of erection, using the handles provided.
Ɣ Install the domestic hot water storage tank at the installation
site.
– Recommended distances (fig. 4-3):
From the wall (s1): 200 mm
To the ceiling (X): 1200 mm.
– Install the hot water storage tank close to the discharge
point.
Ɣ If you are using an electric immersion heater (booster heater)
(see chapter 3.3.1 "Electric immersion heaters"), screw it
into the opening in the cover on the hot water storage tank
(example see fig. 4-3).
– Only tightne hand-tight ( see chapter 8.3 "Tightening
torque").
– With restricted headroom tilt the hot water storage tank
until the electric immersion heater can be fitted without
damage.
Fig. 4-2 Mount the handle
When setting up the unit in a cabinet, behind panels or
in other restricted conditions, sufficient ventilation (e.g.,
using ventilation gratings) must be ensured.
Switch the power supply to the electric immersion
heater (booster heater) on only after filling the hot water
storage tank.
Fig. 4-3 Erecting the hot water storage tank (shown on the
HybridCube)
 Loading...