18
FA ROTEX SC / SCS / HYC - 02/2013
4 x Set-up and installation
7. Establish connections to the heating circuit.
– Sanicube: When connecting the heating side of the hot
water storage tank you must always ensure proper de-
areation of the storage tank charging pipes (e.g. by the
use of automatic vent valves at connections 3 to 6,
fig. 4-4 / fig. 4-5).
– HybridCube: The heating side connection of the hot
water storage tank must be carried out in accordance with
the installation and operating instructions of the individual
storage tank connection kit (E-PAC). You must always
ensure proper de-aeration of the storage tank lines.
8. Establish connections to the heat generator.
– Sanicube: Create the connections to the heat generator
in accordance with the suitable plant schematic
(chapter 6.1 "Connection diagrams").
– HybridCube: In combination with a ROTEX heat pump,
the heating side connection of the hot water storage tank
must be carried out in accordance with the installation and
operating instructions of the individual storage tank con-
nection kit (E-PAC).
– With bivalent combustion, the connections need to be
carried out in accordance with the connection schematic
in the installation and operating instructions of the individ-
ual controllers.
– Optional: Connect the connections to the solar system
(see solar installation and maintenance manual).
9. Carefully lag the hot water pipes to prevent heat loss. Install
heat installation in accordance with country-specific
guidelines. ROTEX recommends a lag thickness of at least
20 mm.
4.2.4 Connecting together several hot water storage
tanks
If the heat output of a single ROTEX hot water storage tank is not
adequate you can interconnect several Sanicube / HybridCube
modules.
This means that both the stainless steel heat exchangers for
post-heating and the hot water heat exchangers are intercon-
nected in accordance with the Tichelmann principle (chapter 6
"Hydraulic connection").
With seasonal variations in demand these individual units can be
added or taken out of service accordingly. In this way the total hot
water output can be manually matched to the actual demand.
In chapter 8.2 "Performance diagrams" you can see what
efficiency characteristics can be achieved by interconnecting
several ROTEX Sanicube / HybridCube units.
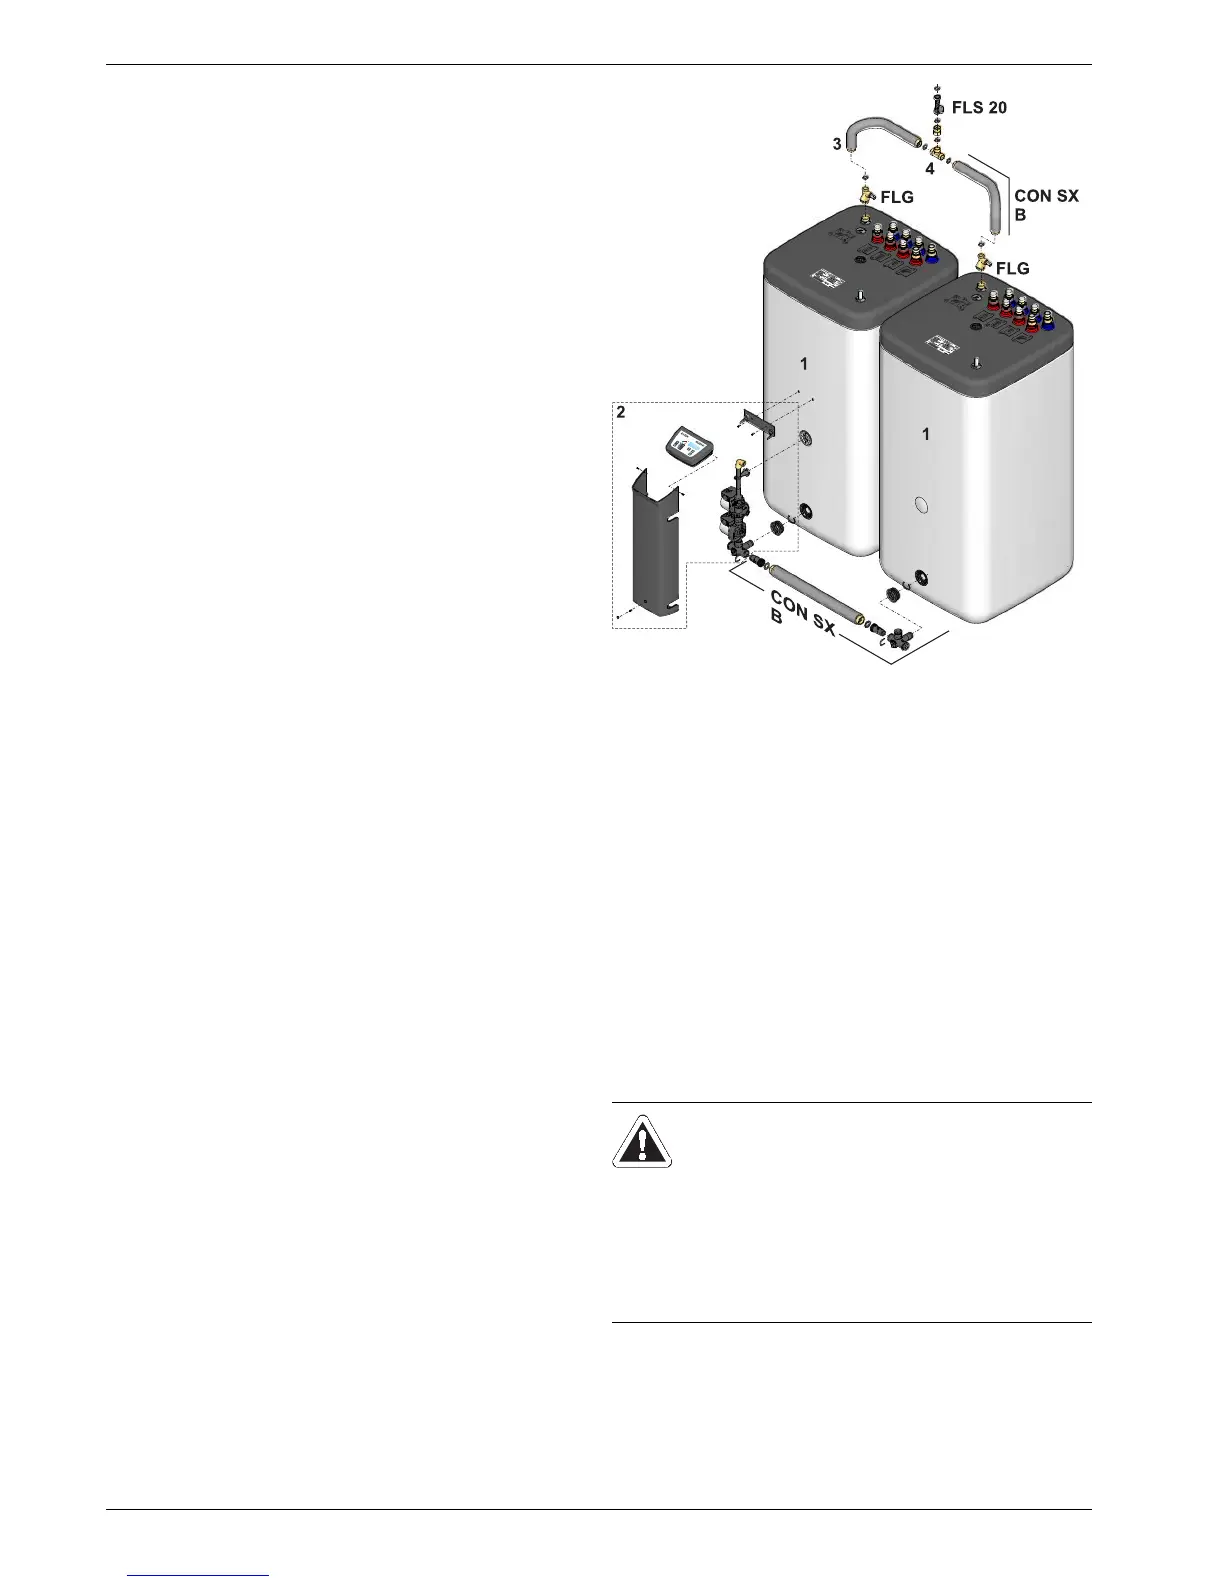
For the interconnection of several ROTEX Sanicube /
HybridCube units we have the addditionally available storage
tank extension kit CON SX and the FlowGuards. For purchasing
information see chapter 3.3.5.
The installation and operation of this accessory component is
described in detail in the individual operating and installation
instructions provided.
4.2.5 Connection electric immersion heater / booster
heater (accessories)
1 Hot water storage tank
2 Regulation and pump unit RPS3
3 Solar flow distribution pipe
4 T-connector
CON SX B Storage tank extension kit
FLG FlowGuard
FLS FlowSensor
Fig. 4-9 Schematic for storage tank extension
WARNING!
If non-flame-resistant power supply cables are fixed
directly on the hot water storage tank they can catch
fire if the electrical cable is overheated.
Ɣ Do not lay or fix the power supply cable directly
on the hot water storage tank.
or
Ɣ use flame-resistant power supply cable
(in accordance with IEC 60332.1).
 Loading...