Installation with adhesive flange
El adhesivo afecta a las propiedades de
policarbonato. Policarbonato Bonding sólo se
permite con la cartilla.
Siga las instrucciones
de aplicación.
The adhesive affects the properties of
polycarbonate. Bonding polycarbonate is allowed
only with primer. Follow application instructions.
La fijación con brida adhesiva se realiza en
todo vidrio laminado de seguridad en el lado
del refrigerante.
Fastening with bonding flange is based on
laminated safety glass on the side of the
Limpie la placa cuidadosamente con un
agente disolvente de grasa (p. ej. con
isopropanol) y pase luego un paño blanco y
sin pelusas. La placa debe estar limpia, libre
Thoroughly clean the machine window,using a
degreasing agent (e.g. IPA), and finish wiping
the window with a white, lint-free cloth. The
window must be clean, free of grease and dry.
La brida adhesiva debe apoyar de forma plana
y estar correctamente orientada.
The bonding flange must be flush with the
surface and aligned properly
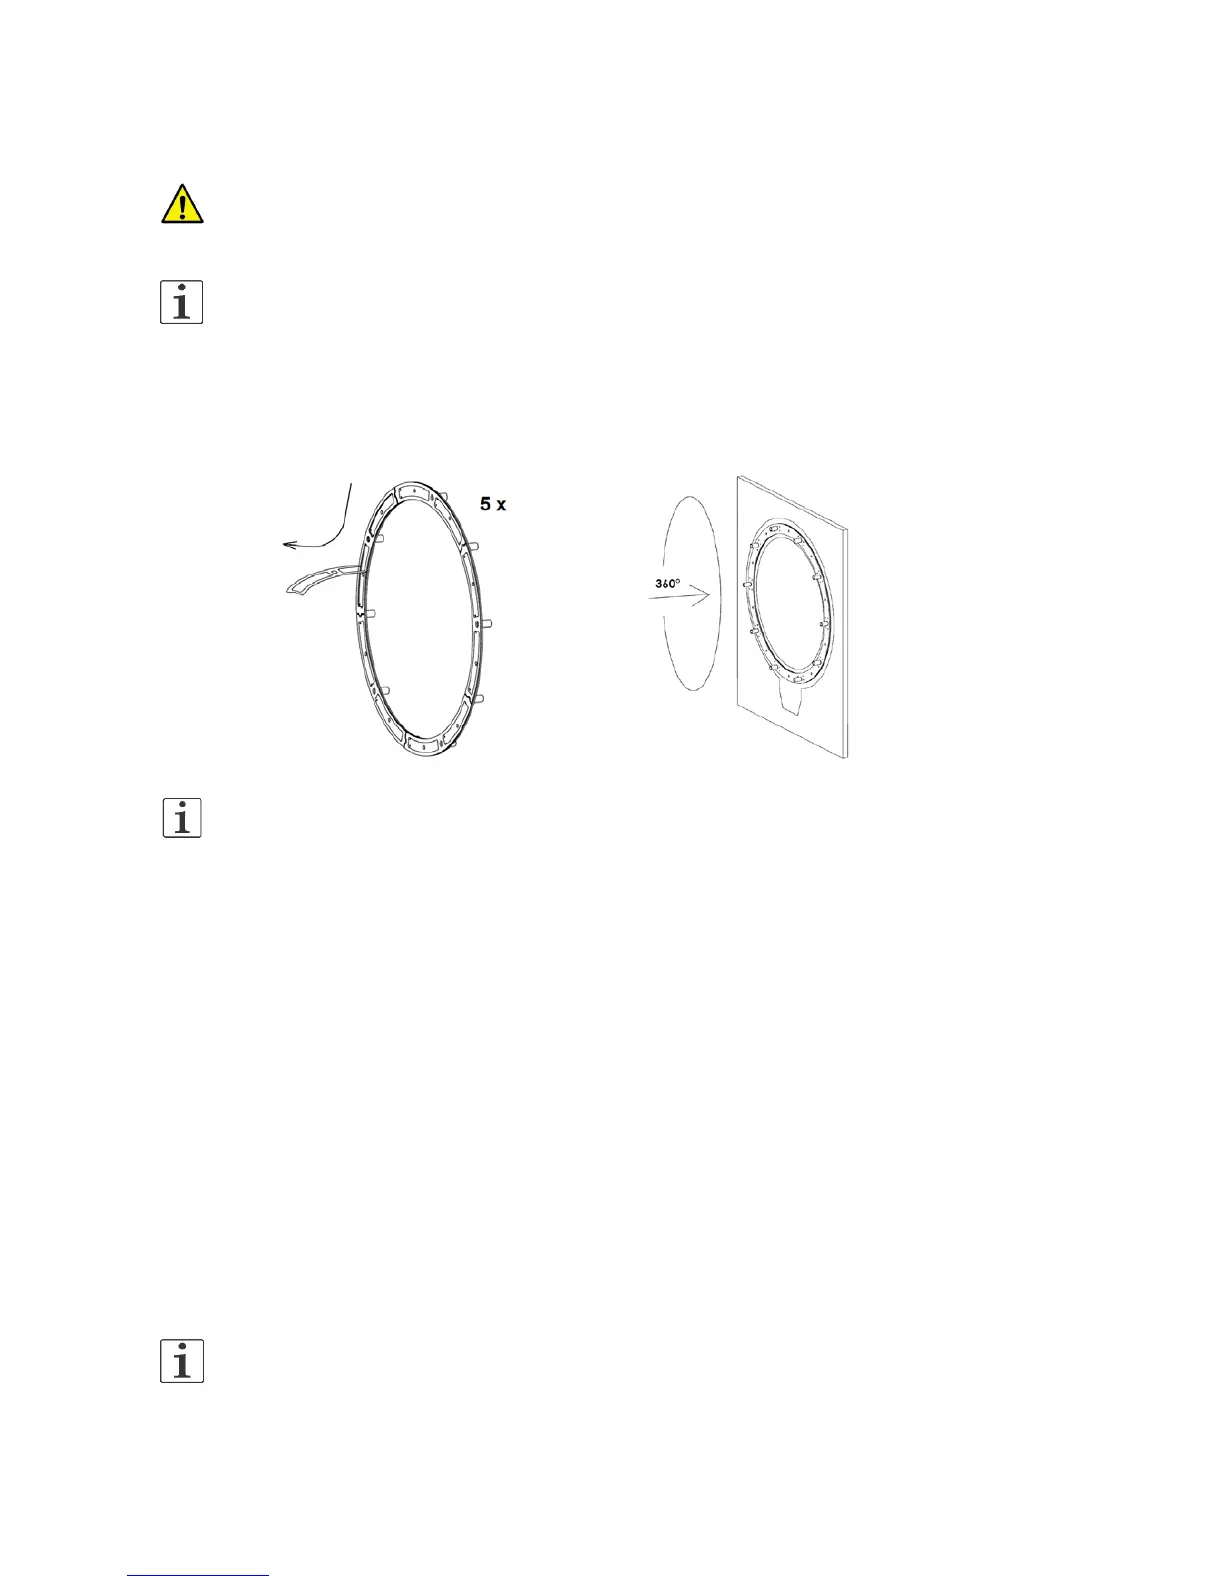
Marque la orientación y la posición de la brida
adhesiva. Retire las láminas protectoras de la
parte trasera adherente de los segmentos.
Mark the position and alignment of the bonding
flange on the interior of the window. Remove
protective film from the rear adhesive side of the
pocket segments.
Presione la brida adhesiva con fuerza
uniforme al vidrio. Prepare la pistola de
adhesivo y deje salir una buena cantidad de la
boquilla de mezcla para garantizar que el
adhesivo está bien mezclado. Introduzca el
adhesivo de dos componentes en las
perforaciones entre los manguitos, hasta que
el adhesivo salga por las pequeñas
perforaciones. Repita este procedimiento 10
veces.
Fig. 4a.3
Tightly and evenly press the bonding flange onto
the window. To blend the adhesive, prepare the
glue gun and press some epoxy glue through the
mixing tube. Now slowly press the glue into the
bore between the two pins until the glue leaks
out of the check bore holes.
Repeat the process
for all 10 sectors. Fig.4a.3
Espere al menos 6 horas, entonces el
adhesivo se habrá endurecido en un 90%.
Corte el adhesivo sobrante y limpie las
superficies interior y exterior en la brida.
Wait at least 6 hours until the glue is about 90%
cured. Cut off the residual glue and thoroughly
clean the surfaces inside and outside of the
Oriente el logotipo horizontalmente y monte la
carcasa. Apriete los tornillos suministrados
M5x20 Tx15 con un par de 1,1 Nm. Fig. 4a.4
Align the Logo in a horizontal position and mount
the housing. Tighten the enclosed M5x20 tx15
screws to a torque of 1.1 Nm. Fig. 4a.4
Preste atención a que la junta tórica se
encuentre en la posición correcta.
Verify that the seal ring is properly seated.
Limpie ahora el lado opuesto. Retire las
láminas protectoras del panel. Pégue la lámina
en la posición exacta y firmemente sobre el
Now clean the opposite side. Remove the
protective films from cover plate. Press the cover
plate to position accurately and firmly.
 Loading...