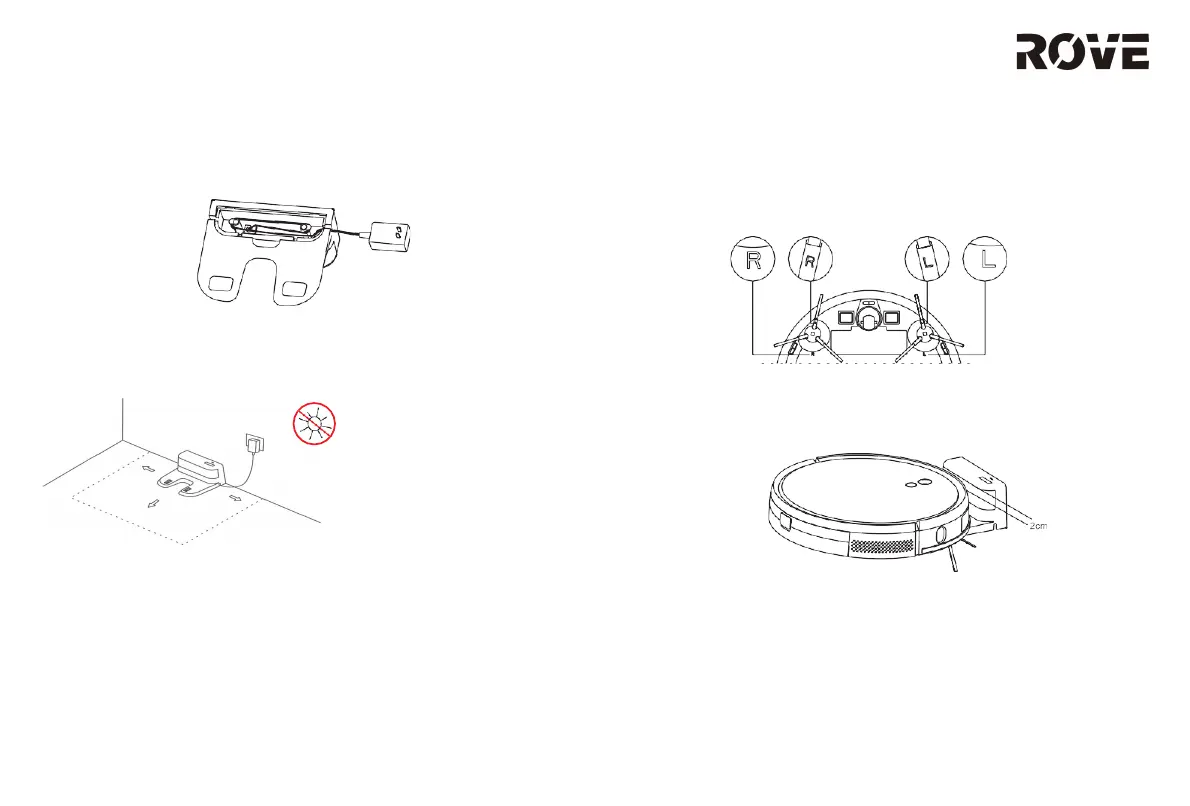
1. Connect the adapter power cable to the charging base, and
then place any excess cable into the charging base’ s inner
compartment.
2. Place the charging base against the wall on a flat surface.
Then connect the base to a power supply. Do not place
charging base where it will be directly exposed to sunlight.
Note:
Ensure that the charging base has at least 0.5 m of free space on
both sides, and 1.5 m of free space in front of it.
During installation, keep the power cable off the ground. When
the power cable is on the ground, it may be dragged by the robot,
which will cause the charging base to power off.
The charging indicator light will remain on as long as the
charging base has power.
3. Install the Side Brushes
Align the left and right brushes with the corresponding markings
on the bottom cover of the device. Press side brushes down until
they click.
4. Power On and Charging
Press and hold the Power button to turn on the device. Wait until
the indicator light turns on, and then place the device on the
charging base.
Note:
This device cannot start if it does not have enough power. Place the
device on the charging base, and it will automatically turn on when it
has enough power. The device can work normally only when the
battery is ≥20% charged. As shown in the figure above, the front of the
device should face the charging base so that the charging contact of
the robot is touching the wireless power receiver. The distance between
the front of the device and the charging base should be around 0.8
inches.
ROVE SETUP
8