necessary to dismantle the crankcase and drive the
tappet and guide out from underneath.
The guide should have an interference fit of
.0015 to .0025 in. in the crankcase and can be
driven in with a bronze drift, care being taken
when the guide is nearly home to avoid breaking
the collar.
22. Dismantling the Breather.
If the breather is not operating efficiently, it
may cause pressure in the crankcase, instead of a
partial vacuum, giving rise to smoking or over
oiling.
See that the discs and backplate are clean and
undamaged and that the discs are seating properly.
When re-assembling the breather, apply
jointing compound very sparingly to the back of
the steel plate, taking great care to keep it away
from the discs or their seatings.
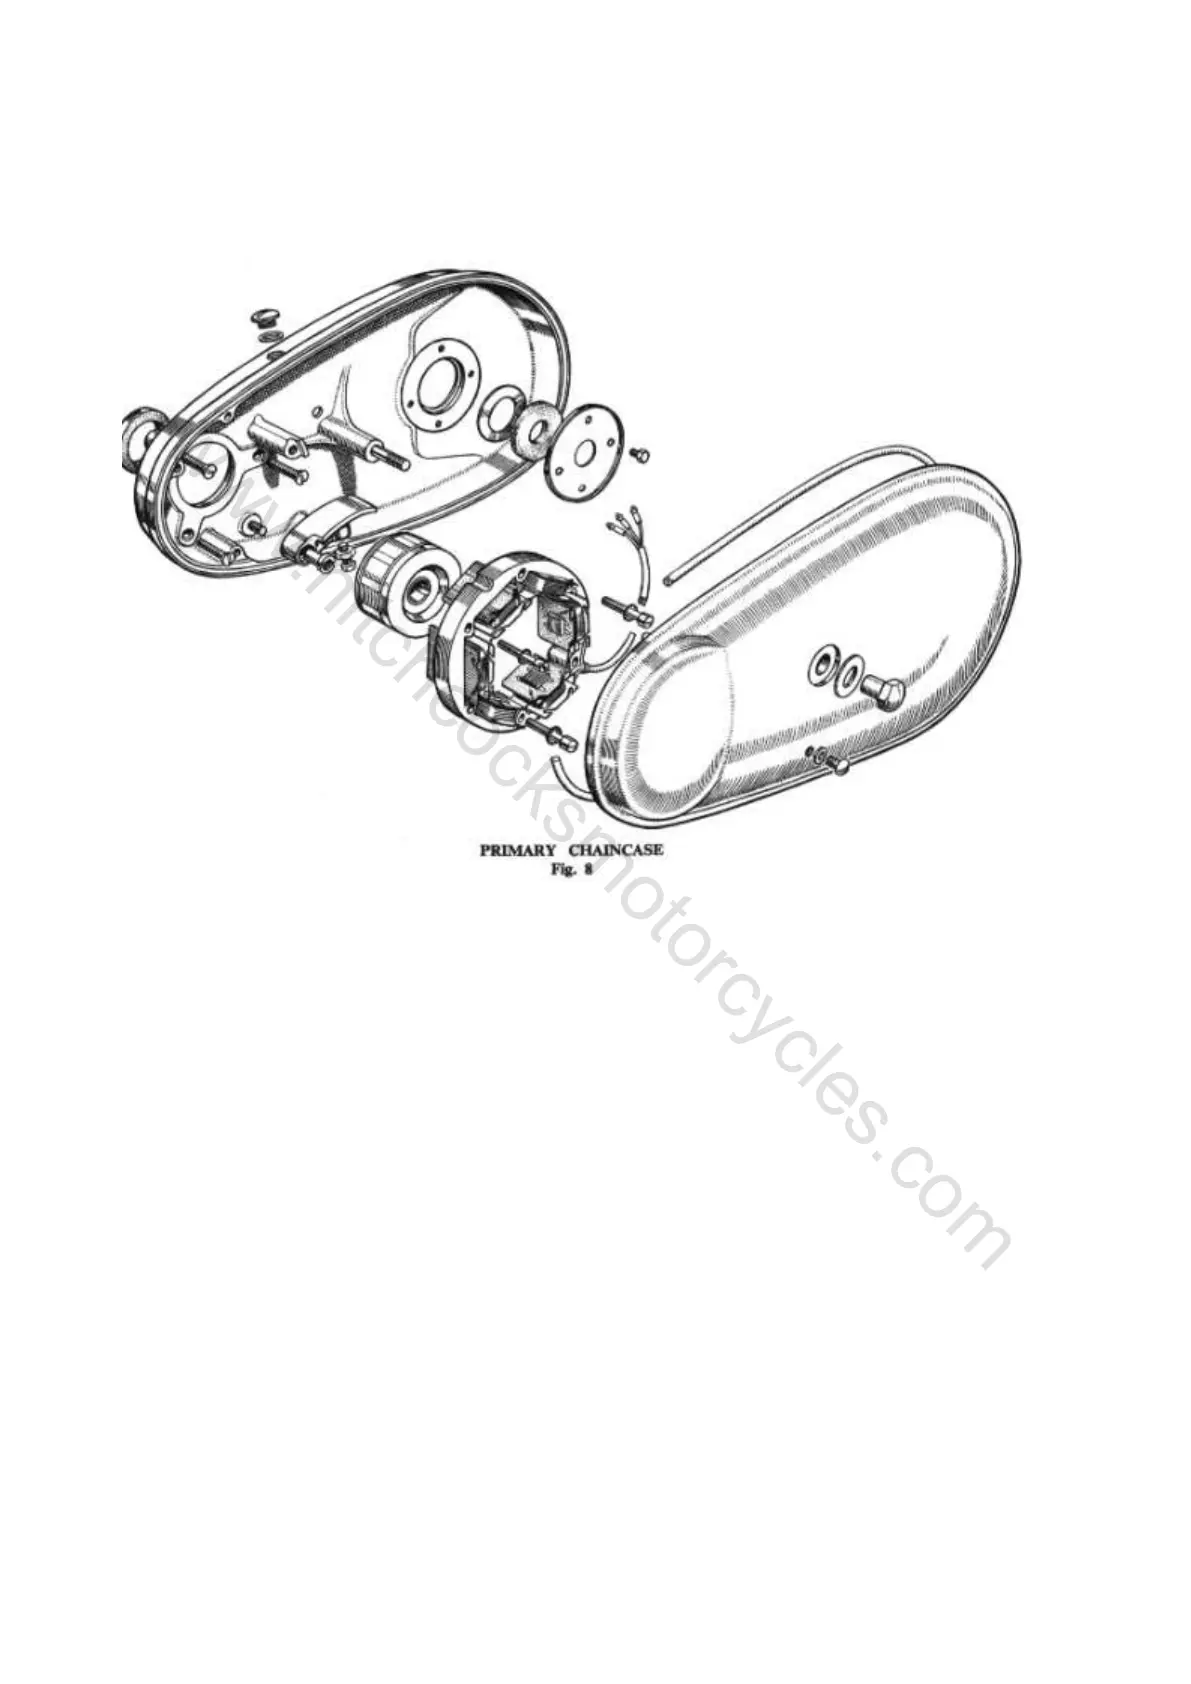
23. Removal of the Clutch.
Remove the primary chain cover and take off
the primary chain by opening the spring link.
Remove the clutch sprocket as described in
Subsection 20.
To remove the clutch hub, hold the clutch with
Special Tool No. E.4871 and remove the centre
retaining nut and washer with a box spanner.
The hub can then be withdrawn from the shaft
with Special Tool No. E.5414.
24. Removal of Final Drive Sprocket.
Remove the engine sprocket and alternator
rotor as described in Subsection 20 and the clutch
as described in Subsection 23.
Remove the primary chain tensioner.
Remove the alternator stator. (Later models
only.)
Remove the rear half of the primary chain case
by taking out three socket screws.
Remove the set screw locking the final drive
sprocket nut.
Hold the sprocket and remove the nut (Right
Hand Thread). The sprocket can then be with
drawn.
 Loading...