Do you have a question about the Royal 425cx and is the answer not in the manual?
Lists all items included in the cash register box, such as paper rolls, ink rolls, batteries, and keys.
Provides guidance on how to navigate and use the instruction manual effectively for easy reference.
Essential initial steps before operating or programming the cash register, including installation and setup.
Introduces the Quick Start program for basic programming options and familiarizing users with capabilities.
Step-by-step instructions for initial setup, including placement, power, batteries, and paper installation.
Guidelines for proper care, cleaning, and operational environment to ensure the longevity of the machine.
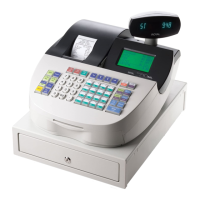
Details on how the cash drawer operates, its electronic and manual locking mechanisms, and its removal.
Explains how to interpret the information shown on the cash register display, including numbers and symbols.
Defines the meaning of various symbols that appear on the display during operation and error conditions.
Instructions on how to view the current time on the cash register display.
Describes how the error alarm functions and how to clear errors indicated by an 'E' symbol.
Procedure to clear an error message and unlock the keypad after an incorrect entry or operation.
Instructions on how to correct or void entries that have already been printed on the receipt or journal.
Detailed steps for installing or replacing the backup batteries to protect memory and program data.
Step-by-step guide on correctly loading paper rolls for customer receipts or journal records.
Instructions for replacing the ink roll when print quality deteriorates, with important cautions.
Tips and advice for a smooth initial setup and programming of the cash register.
Provides general guidance on programming changes, control switch usage, and battery maintenance.
Procedure to access and start the programming mode for customizing register settings.
Instructions on how to properly exit the programming mode and return to normal operation.
Steps to follow if an error occurs during programming, including handling security code prompts.
Guide to setting the current date for accurate record-keeping and receipt printing.
Option to change the date format from Month-Day-Year to Day-Month-Year.
Instructions for setting the current time, specifying 12 or 24-hour format.
Procedure to enable or disable the clerk tracking feature for sales attribution.
Steps to assign clerk numbers and configure security code requirements for each clerk.
Specific instructions for assigning a unique security code to individual clerks.
How to generate a report detailing sales and transactions attributed to each clerk.
Guide on how to record transactions under a specific clerk's ID before starting a sale.
How to program a default percentage for discounts applied to items or total sales.
Example of applying a preset percentage discount to the entire transaction total.
Example demonstrating how to apply a preset discount to specific items in a transaction.
Instructions for manually entering a different discount percentage than the preset rate.
Allows departments to be programmed as taxable or non-taxable.
Configures departments for single item sales or multiple item sales within a transaction.
Optional feature to program a fixed price for items in a department for faster entry.
Procedure to set up departments as taxable, including tax rate and preset price.
Procedure to set up departments as non-taxable with no preset price.
Details on setting up to four tax tables and linking them to departments.
Instructions for programming a fixed percentage tax rate for transactions.
Guide to programming tax rates using state tax table codes instead of fixed percentages.
Setting PLU status to Fixed Price or Open Price (sub-department).
Steps to program prices for PLU codes, either fixed or for open PLU entry.
Instructions on how to generate a report that lists all programmed PLU numbers and their settings.
Instructions for assigning a security code to protect programs and management reports.
How to enter the security code when accessing the Program mode.
How to enter the security code to print the 'Z' report for end-of-day closing.
Procedure to set the number of decimal places for currency display and calculations.
Steps to turn the currency conversion feature on or off.
Setting options for which currencies appear on the receipt.
Designating the default local currency or the Euro currency.
Procedure for programming the exchange rate for currency conversion.
Illustrates a typical transaction receipt and its components.
Defines symbols used on the paper tape and management reports for transaction identification.
Example of processing a single item sale and calculating change.
Example of processing a sale involving multiple quantities of the same item.
Example of processing a sale transaction that is charged to an account.
Explains how to use the minus key for reductions or coupons.
Example of applying a reduction or coupon to an item or total sale.
Example of applying a percentage discount to individual items in a transaction.
Example of applying a preset percentage discount to the entire transaction.
Example of applying a preset percentage discount to specific items.
Example of how to manually enter a discount percentage to override the preset value.
Example of registering an item using a preset PLU price.
Example of registering an item with an open PLU price that can be manually entered.
Example of registering an item with an open PLU price that has a preset value.
Example of voiding an incorrect entry before completing a transaction.
Example of voiding a single item that was previously entered.
Example of voiding multiple items from a transaction.
Example of processing a refund for a single item.
Example of processing refunds for multiple items.
Procedure to exempt a specific item from tax in a taxable department.
Procedure to exempt tax for the entire transaction in a taxable department.
Procedure to add tax to an item in a department previously set as non-taxable.
Example of recording money received on account.
Example of recording money paid out from the cash drawer.
Procedure for entering an identification number for a transaction.
Example of processing a 'No Sale' transaction, which opens the drawer.
Prints accumulated data without resetting totals, used for mid-day readings.
Prints all data and resets totals to zero, used for end-of-day closing.
Instructions on how to print the 'X' or 'Z' sales reports.
Procedure to reset the grand total to zero via the program mode.
Formulas for calculating system balance, including net sales, gross sales, and ending grand total.
Formulas for calculating the cash in drawer based on transactions.
Guidance for resolving common operational issues, including system checks and contacting support.
Information and programming for the Canadian tax system.
Information and programming for the Value Added Tax system.
First step in choosing the VAT Tax System: entering program mode and initial key presses.
Programming the VAT tax rates, including the tax number, shift, rate, and total.
Instructions for setting up Canadian GST and PST taxes using Method 1.
Instructions for setting up Canadian GST and PST taxes using Method 2 (tax on tax).
An example chart demonstrating how to calculate state tax table codes.
A worksheet template for recording results when calculating state tax table codes.
| Brand | Royal |
|---|---|
| Model | 425cx |
| Category | Cash Register |
| Language | English |