Do you have a question about the Rubbermaid 2U84 and is the answer not in the manual?
Covers building codes, surface prep, location choice, part checks, and help contact.
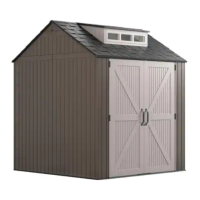
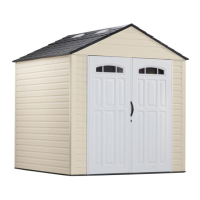
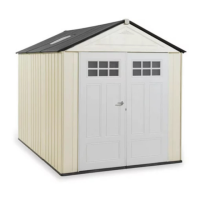
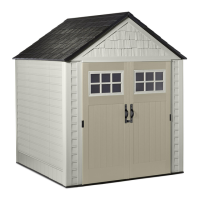
Key safety, usage, and maintenance guidelines for the storage shed.
List of tools needed, including safety glasses and gloves.
Highlights like not overtightening screws and lubricating dovetails.
Specific points for securely anchoring the shed to the ground for stability.
Attach base floor panels (A and B) using tapping screws (F-1).
Attach floor extension pieces (V) to the base panels (A and B) with screws.
Install side wall panels (E and W) onto the base, ensuring alignment and a click-fit.
Continue attaching side wall panels (E and W), ensuring proper alignment and connection.
Install front wall panels (C and DU) onto the base, aligning and clicking them into place.
Continue attaching front wall panels (C and DU), ensuring proper alignment and connection.
Attach wall support pieces (S-3) and connectors (WP-1) to connect wall panels.
Install side wall panels (C and X) onto the base, aligning and clicking them into place.
Continue attaching side wall panels (C and X), ensuring proper alignment and connection.
Install rear wall panels (E and GU) onto the base, aligning and clicking them into place.
Continue attaching rear wall panels (E and GU), ensuring proper alignment and connection.
Attach reinforcing pieces (S-3) and connectors (WP-1) to wall panels for stability.
Install the center wall panel (Y) between existing walls, aligning and clicking it into place.
Continue securing the center wall panel (Y) with connectors and brackets.
Connect top wall sections using connectors, bolts, and nuts.
Attach gable connectors to front and rear walls using bolts and nuts.
Attach gable end pieces to the front and rear wall sections with supports.
Secure gable end pieces using screws, brackets, and supports.
Attach gable support pieces to wall sections using additional supports.
Secure gable support pieces using screws, brackets, and supports.
Install roof brackets and connectors to wall sections using screws.
Assemble roof trusses using panels and hardware, including brackets and bolts.
Continue truss assembly with panels and hardware, including brackets and bolts.
Install assembled roof trusses onto the shed structure using connectors and screws.
Attach roof support pieces and gable components using screws.
Secure roof structure elements using screws and bolts.
Continue securing roof structure with pieces using screws and bolts.
Complete roof structure assembly by attaching final pieces with screws and bolts.
Attach the right roof panel to the gable ends, ensuring it slides into place.
Secure the right roof panel using screws, clips, and brackets.
Attach the left roof panel to the gable ends, ensuring it slides into place.
Secure the left roof panel using screws, clips, and brackets.
Attach the center roof panel to the roof structure, aligning and ensuring a secure fit.
Secure the center roof panel using connectors and screws.
Complete roof panel installation using connectors and fasteners.
Attach the gable roof panel to the roof structure, aligning and ensuring a secure fit.
Secure the gable roof panel using connectors and screws.
Complete gable roof panel installation using connectors and fasteners.
Attach dormer wall pieces to the front roof section using screws.
Secure dormer wall components using brackets and screws to roof sections.
Attach dormer roof sections to the front wall using screws.
Begin installing roof shingles onto the main roof panels.
Secure roof shingles using clips and screws.
Continue installing roof shingles using clips and fasteners.
Install barrel bolts onto the door panel using screws.
Attach the door support guide to the door panel for smooth operation.
Attach door handles and latches to the door panel using screws and nuts.
Attach the main door panel sections using guides.
Fit door handles and latches onto the door panel sections.
Mount door hinges onto the door panel using screws.
Mount door hinges onto the shed frame using screws.
Apply final screws to secure various components of the assembled shed.
Information on product registration, helpful tips, and contacting customer service.
| Brand | Rubbermaid |
|---|---|
| Model | 2U84 |
| Category | Outdoor Storage |
| Language | English |