12
JR SODCUTTER
ADJUSTMENTS
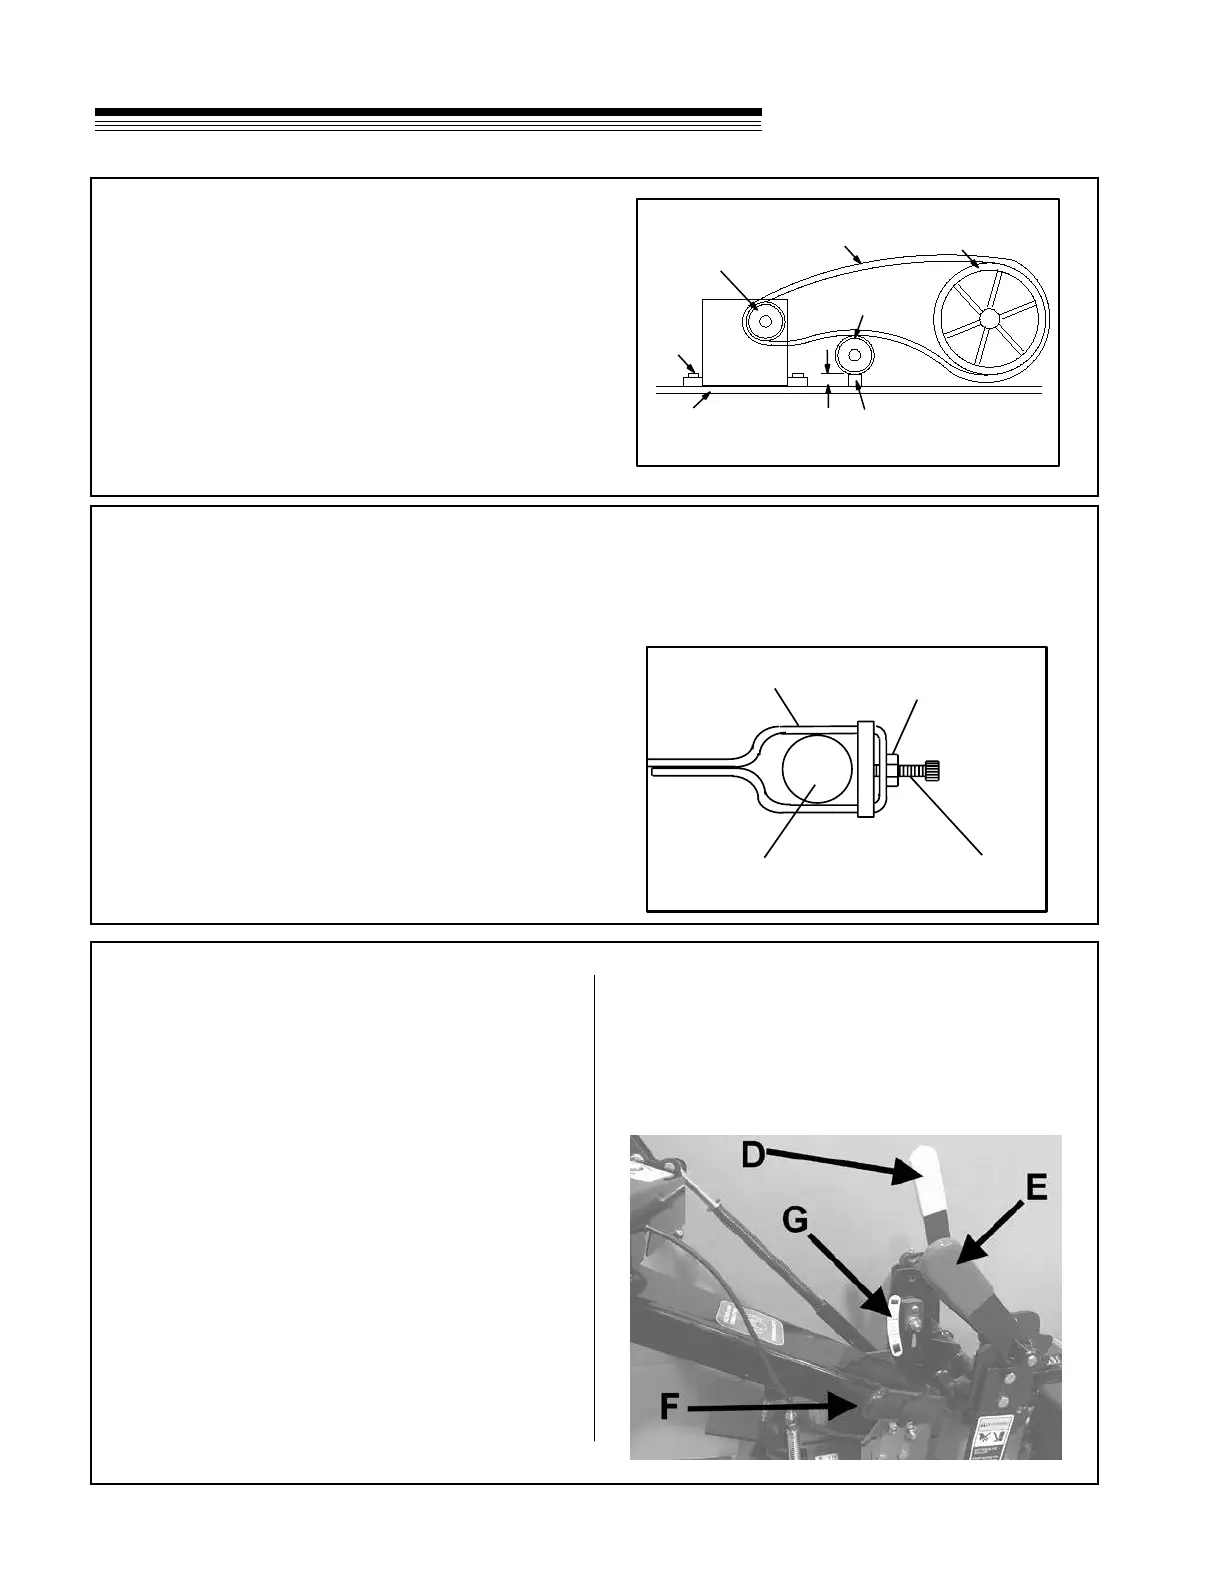
DRIVE BELT ADJUSTMENT
Keep belt free of oil and dirt, and adjusted to
proper tension at all times.
Belt tension is adjusted by loosening four (4)
engine mounting bolts and shifting engine on the
base.
Belt tension is correct when the distance between
the roll pin and sleeve on the master clutch rod is
1" to 1 1/4" (25-30mm) when the master clutch is
engaged.
ENGINE
ENGINE
BOLT
ENGINE
PULLEY
BLOCK
ENGINE
MOUNT PLATE
1" (25.4 mm)
IDLER
PULLEY
BELT
DRIVE
PULLEY
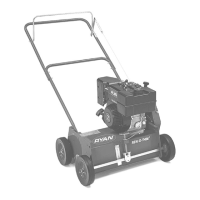
BRAKE BAND ADJUSTMENT
When adjusted properly:
- With the red master clutch control lever engaged,
the brake band is not braking the large drive pulley.
- When the red master clutch control leveris disen-
gaged, there will be some brakig occuring on the
large drive pulley.
- When the red master clutch control lever is disen-
gaged, and pulled back rmly, the brake will fully stop
the large drive pulley.
1. For less braking, loosen the locknut, unscrew the
adjusting screw, then retighten the locknut.
2. For more braking, loosen the locknut, turn the
adjusting screw in, then retighten the locknut.
Start the machine, and check for proper operation.
Readjust if necessary. IF the engine kills when
engaging the red master clutch control lever, the
brake may be set too tight.
Brake Band
Lock Nut
Adjusting Screw
Guard Support Rod
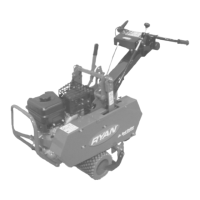
ADJUSTING DEPTH OF CUT
3/4" (20mm) is a good general starting depth of cut.
Depth of cut can be varied from there depending on
conditions and what you are trying to accomplish.
1. Make an initial depth setting. Park the machine
on a hard surface. Loosen green depth control
locking lever E and lower yellow depth control
lever D until the blade rests on the surface.
2. Loosen the depth gauge lock and set top of
depth gauge G to 3/4" (20mm) below the yellow
depth control lever D. Tighten the depth gauge
lock knob to secure the depth gauge setting.
3. Use your left hand to tip the machine forward
while lowering the yellow depth control lever D
until the depth control crossbar hits the Depth
Stop G. Tighten the green locking lever E to
lock in the depth setting, make a trial run in turf.
Check the depth of cut.
4. Re-adjust the depth gauge G and yellow depth
control lever D if necessary.