4 SETUP
2
4 SETUP
4.1 EQUIPMENT AND PARTS
INSPECTION
Remove equipment and parts from the packing box and
inspect for possible shipping damage. You should have
the following items:
• Upper and lower handle
• Pre-assembled chassis and engine
• Loose parts bag
• Reel assembly (if ordered with unit)
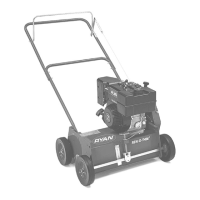
4.2 REEL INSTALLATION
1. Remove the belt guards and tilt the unit back to allow
access to the underside of the chassis.
CAUTION
!
Block the unit as required to prevent it from
falling accidentally.
2. Loosen the reel clamps and pivot down and away
from chassis. With the pulley end toward the engine
side of unit, set the reel into place against the
chassis. Bearing guides on the reel will provide
correct alignment. See Figure 2.
1
2
FIGURE 2
1. Reel Clamp
2. Bearing Guide
3. Pivot the clamps back up over the reel bearings.
Install the reel clamp rods, washers and nuts. See
Figure 3. Tighten the nuts securely but do not over
tighten. Check reel to make sure it rotates freely.
1
2
FIGURE 3
1. Reel Clamp Rod
2. Reel Clamp Nut and Washer
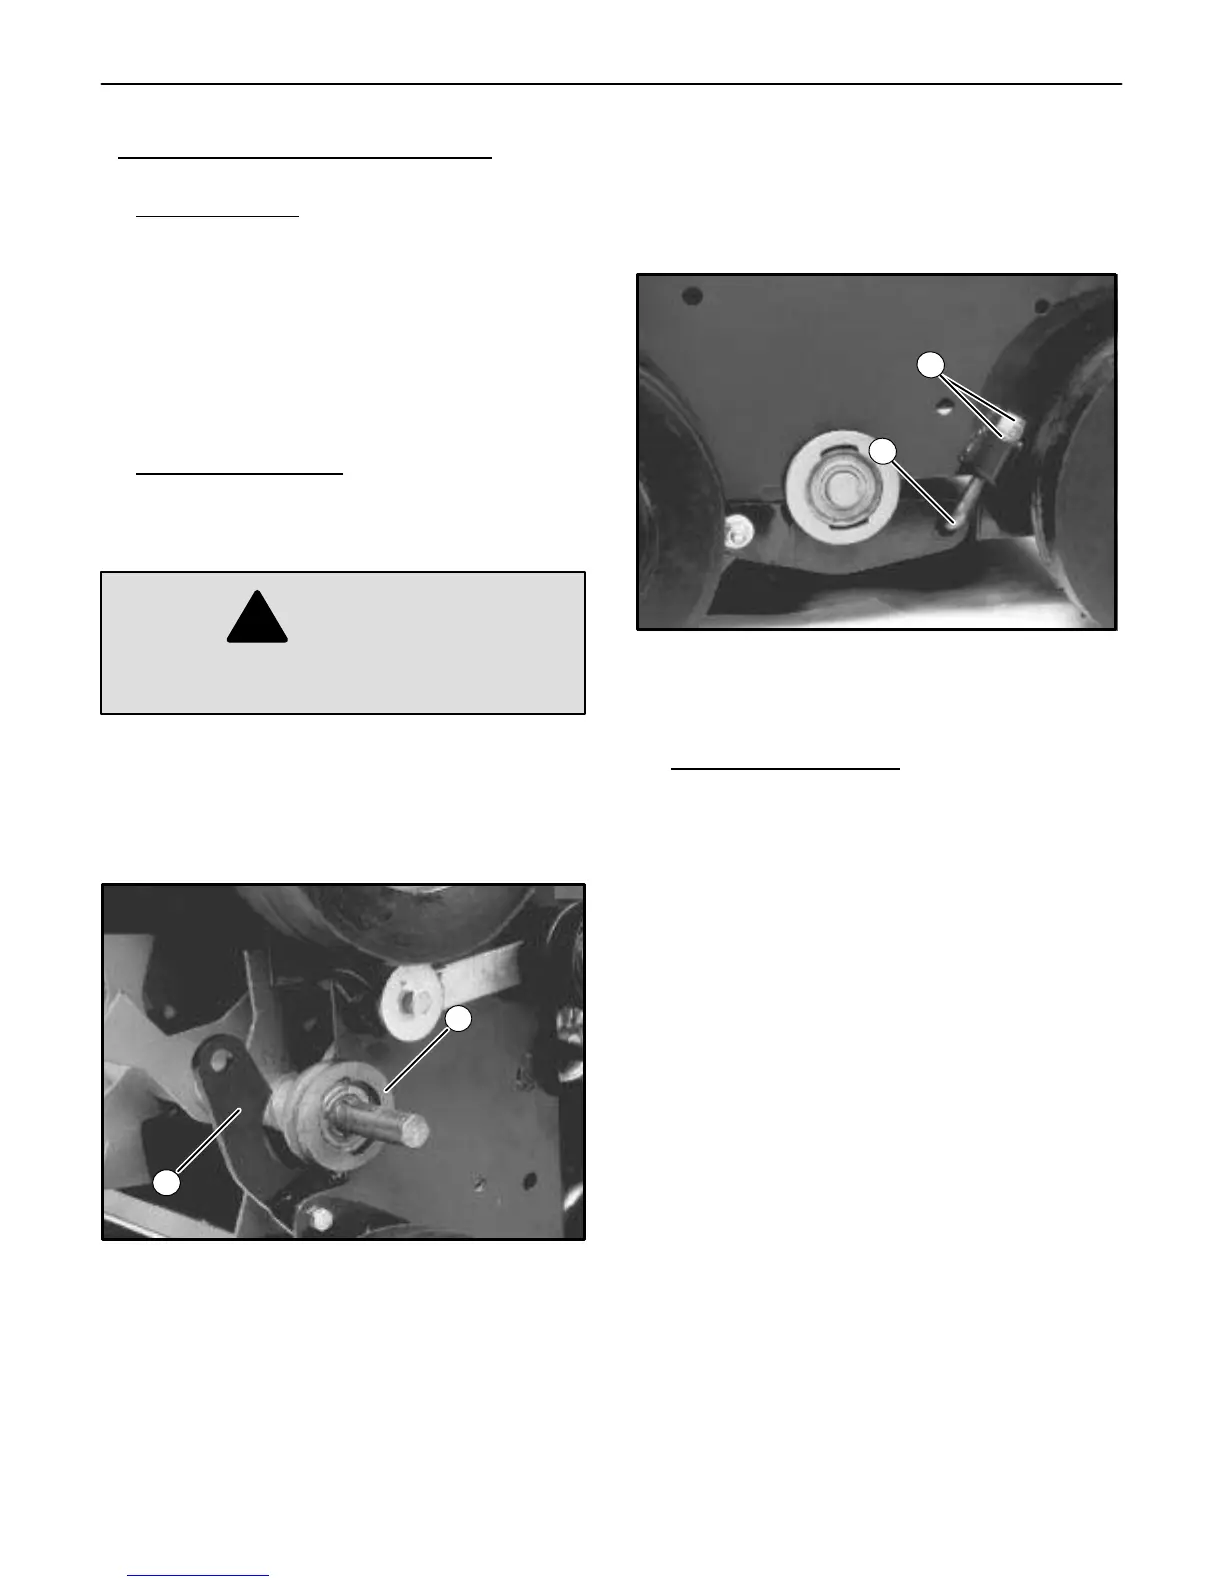
4.3 PULLEY AND BELT
INSTALLATION
1. Gently tap the woodruff key (from loose parts bag)
into the slot on the reel shaft.
2. Start the two (2) set screws into the reel pulley.
3. Slide the pulley, hub side inward, onto the reel shaft.
Tap it into position over the woodruff key.
4. Align the reel pulley with the engine pulley. Placing a
straight edge across both pulleys will show when the
two pulleys are aligned.
5. Tighten the reel pulley set screws and check the
engine pulley set screws to make sure they are also
tight.
6. Place the new belts between the idler pulley and the
snubber on the idler arm, then over the engine and
reel pulleys. See Figure 4.