SETUP 4
3
1
2
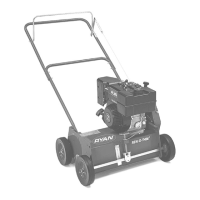
FIGURE 4
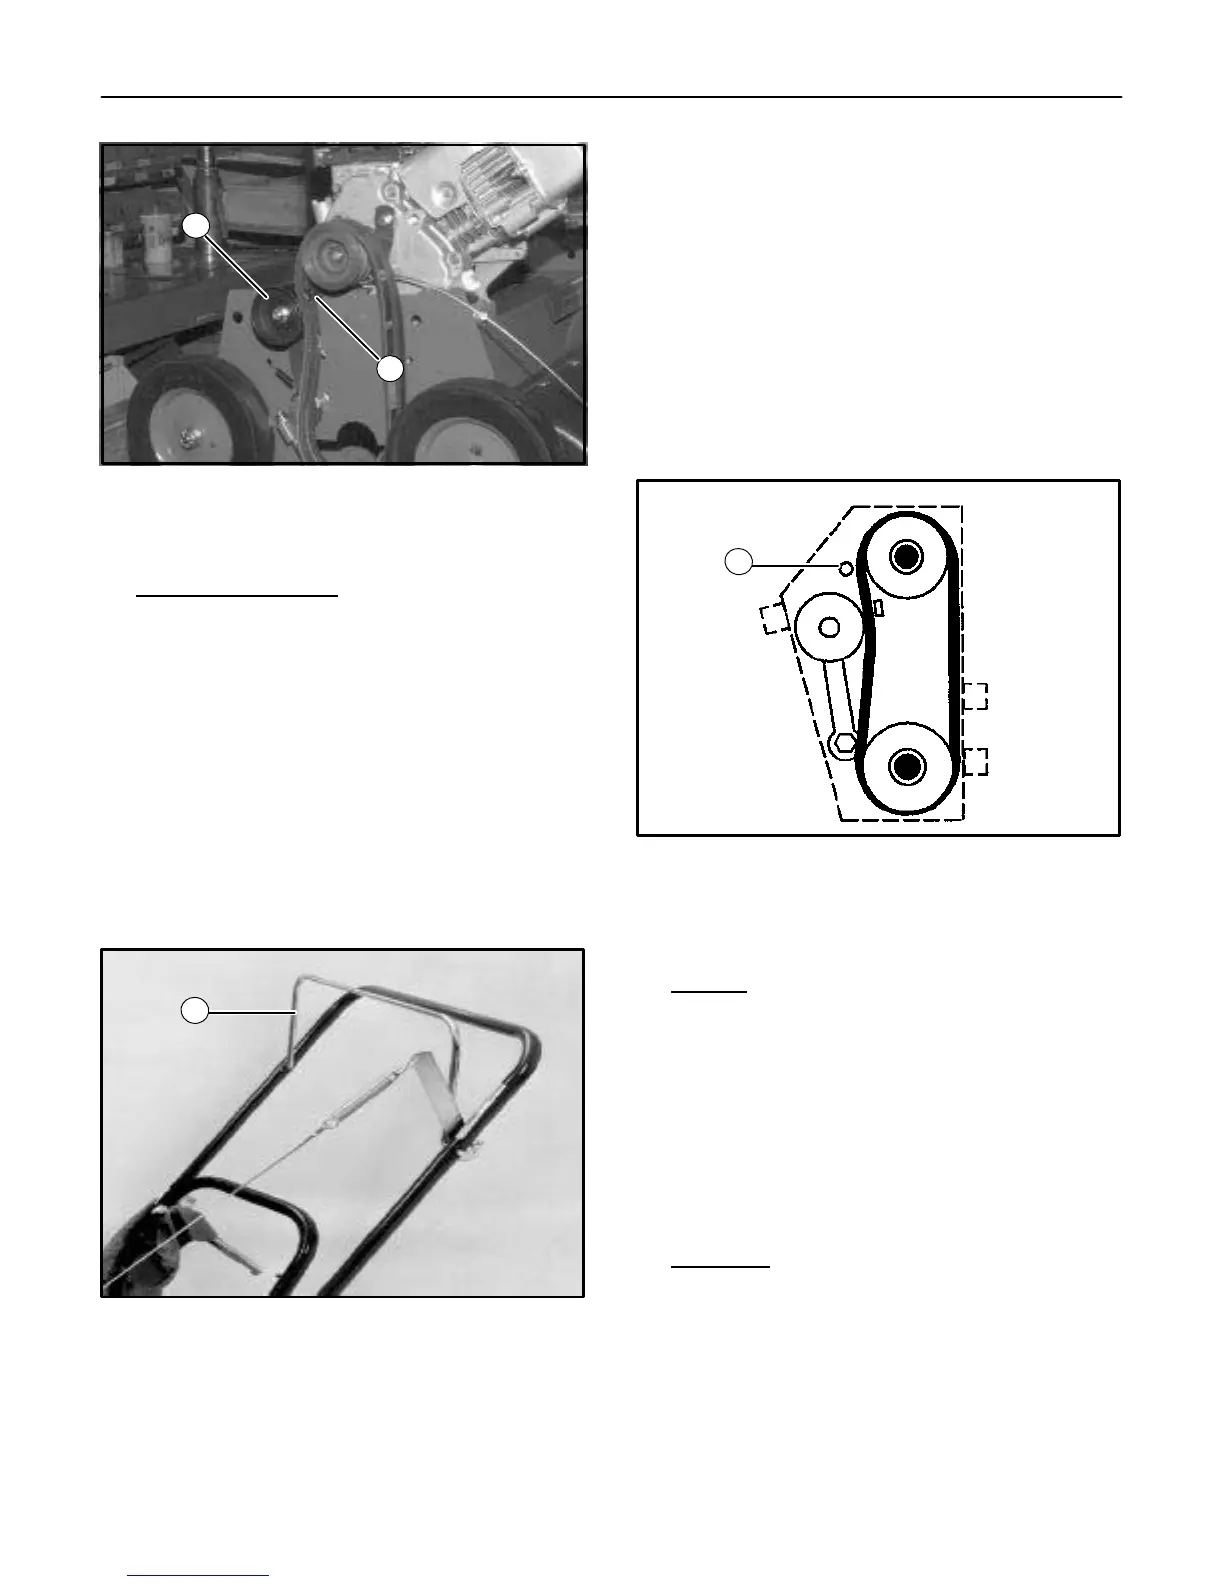
1. Snubber
2. Idler Pulley
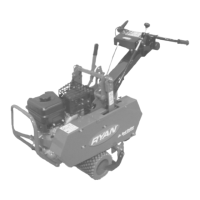
4.4 HANDLE AND CABLE
INSTALLATION
1. Assemble the upper and lower handle sections using
the hardware provided in the loose parts bag.
2. Mount the handle to the unit by placing the bottom
ends of the handle over the pins at the top edge
center of the chassis. Secure the handle with
hairpins (from loose parts bag).
3. Connect one end of the spring (from loose parts bag)
to the clutch cable and the other end to the arm of the
clutch bail on the handle. See Figure 5.
1
FIGURE 5
1. Clutch Control Bail
4. Pull the bail back against the handle. The idler pulley
should be tight against the reel belts when the bail is
against the handle.
5. Release the bail. The idler pulley should move away
from the reel belts and allow the belts to slip on the
engine pulley when the bail is released.
6. Reinstall the belt guards. The belt stop rod should be
positioned outside the belts, as shown in Figure 6.
1
FIGURE 6
1. Belt Stop Rod
4.5 WHEEL BEARING LUBRICATION
Using a pressurized lubrication gun and a lithium based
lubricant, lubricate the wheel bearings. This procedure
should be done at the time of setup and also after every
25 hours of service.
NOTE:
During setup, each wheel cavity should be filled.
The cavity is full when lubricant is seen coming out
of bearing.
4.6 BLADE HEIGHT ADJUSTMENT
Blade height is adjusted by loosening the locking lever
and turning the adjusting knob to raise or lower the front
wheels. See Figure 7.