EasyManua.ls Logo

Ryobi AP1305 - User Manual

Ryobi AP1305
60 pages
Print Icon
To Next Page IconTo Next Page
Loading...
TABLE OF CONTENTS
****************
General Safety Rules ....................... 2-3
Specific Safety Rules ...................... 3-4
Symbols ...............................................5
Electrical .......................................... 6-7
Glossary of Terms ................................ 8
Features ...............................................9
Assembly ..................................... 10-11
Operation ..................................... 12-14
Adjustments ......................................15
Maintenance ................................ 16-17
Troubleshooting .................................18
Parts Ordering / Service ...... Back Page
TABLE DES MATIÈRES
****************
Règles de sécurité générales .......... 2-3
Règles de sécurité particulières ...... 3-4
Symboles
............................................. 5
Caractéristiques électriques ............ 6-7
Glossaire ..............................................8
Caractéristiques ..................................9
Assemblage ................................. 10-11
Utilisation ..................................... 12-14
Réglages ............................................15
Entretien ...................................... 16-17
Dépannage ........................................18
Commande de pièces /
réparation .......................... Page arrière
ÍNDICE DE CONTENIDO
****************
Reglas de seguridad generales ....... 2-3
Reglas de seguridad específicas
.... 3-4
Símbolos
.............................................5
Aspectos eléctricos
......................... 6-7
Glosario de términos ...........................8
Características
....................................9
Armado
........................................ 10-11
Funcionamiento
........................... 12-14
Ajustes ............................................... 15
Mantenimiento
............................. 16-17
Corrección de problemas .................. 18
Pedidos de piezas /
servicio
........................... Pág. posterior
OPERATOR’S MANUAL
MANUEL D’UTILISATION
MANUAL DEL OPERADOR
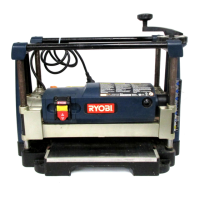
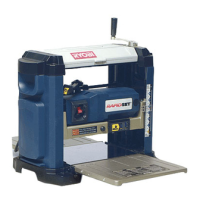
12-1/2 in. THICKNESS PLANER
PLANEUSE À RABOTAGE
DE 317,5 mm (12-1/2 po)
CEPILLO REGRUESADOR
DE 317,5 mm (12-1/2 pulg.)
AP1305
WARNING: To reduce the
risk of injury, the user must read and
understand the operator’s manual
before using this product.
SAVE THIS MANUAL FOR
FUTURE REFERENCE
ADVERTENCIA: Para reducir
el riesgo de lesiones, el usuario debe leer
y comprender el manual del operador
antes de usar este producto.
AVERTISSEMENT :
Pour
réduire les risques de blessures,
l’utilisateur doit lire et veiller à bien
comprendre le manuel d’utilisation avant
d’employer ce produit.
GUARDE ESTE MANUAL
PARA FUTURAS CONSULTAS
CONSERVER CE MANUEL
POUR FUTURE RÉFÉRENCE

Questions and Answers

  • S
    stevenspencerAug 2, 2025
    What to do if my Ryobi Planer will not start?
    • C
      Chad HarveyAug 2, 2025
      If your Ryobi Planer won't start, first check the power source to ensure it is plugged in. If it is plugged in, check for a blown circuit and replace the fuse, reset the breaker, or call an electrician. Also, push the reset button, if the ON/OFF switch malfunctioned. For motor failure, loose wire, or overloaded motor, have service performed by an authorized service center.
  • M
    Michael HughesAug 6, 2025
    Why does my Ryobi AP1305 have snipe (depressions at ends of workpiece)?
    • W
      Walter ThomasAug 6, 2025
      Snipe, or depressions at the ends of the workpiece, can occur in your Ryobi Planer for several reasons. It might be caused by dull cutter blades, so replace or turn them. Another cause could be incorrect butted stock; ensure you butt pieces end-to-end as they are fed into the planer. Finally, if the unit is not securely mounted, tighten the lag bolts.
  • L
    lopezmelissaAug 11, 2025
    What to do if my Ryobi AP1305 has interrupted operation?
    • L
      Laura HallAug 11, 2025
      If your Ryobi Planer's operation is interrupted, the unit may be overloaded, so reduce the load. Another cause may be a circuit overload. To resolve this, operate the planer on a circuit separate from other appliances or motors, or connect it to a circuit with an adequate amp rating.
  • A
    Allison BrownAug 15, 2025
    Why does my Ryobi Planer cause torn grain?
    • A
      Antonio HaleAug 15, 2025
      Torn grain when using your Ryobi Planer can be due to a few reasons. Check if the blade setting is too deep and reduce the depth of cut. Also, ensure the workpiece is not being fed against the grain; try feeding the other end of the board first. Dull cutter blades can also cause this, so replace or turn them.
  • D
    Dr. Melissa JohnsonAug 19, 2025
    Why does my Ryobi AP1305 Planer leave fuzzy/rough grain?
    • A
      Amanda LoweSep 12, 2025
      Fuzzy or rough grain after using your Ryobi Planer can be attributed to several factors. High wood moisture content may be the cause, so dry the wood before planing. Dull cutter blades can also lead to this issue, so replace or turn them. Additionally, check if the blade setting is too deep and reduce the depth of cut. Ensure adequate power supply by checking the cord and plug for damage and inspecting the condition of motor brushes. Incorrect feeding speed can also cause fuzzy/rough grain.
  • T
    tracy21Aug 23, 2025
    Why is the cutter head height difficult to adjust on my Ryobi AP1305?
    • J
      Jason WeberAug 25, 2025
      If the cutter head height on your Ryobi Planer is difficult to adjust, it may be due to a dirty elevation spindle; clean and lubricate it. If this doesn't resolve the issue, the chain may be worn, and you should have service performed by an authorized service center.
  • D
    David AdamsAug 28, 2025
    Why doesn't the board thickness match the depth scale indicator on my Ryobi AP1305?
    • J
      Jessica ParkerAug 28, 2025
      If the board thickness does not match the depth scale indicator on your Ryobi Planer, the depth scale may be incorrectly set; adjust it accordingly. Another possible cause is a dirty planing table; clean and wax it.

Summary

General Safety Rules

Specific Safety Rules

Symbols

Electrical

Extension Cords

Guidelines for selecting and using appropriate extension cords for the tool.

Electrical Connection

Details on connecting the planer to a power supply and voltage requirements.

Grounding Instructions

Explains how to properly ground the tool for electrical safety.

Motor Safety Protection

Details on protecting the motor from overload and ensuring proper ventilation.

Motor Overload Protector

How the overload protector works and how to reset it after tripping.

Glossary of Terms

Features

Product Specifications

Lists the technical specifications of the thickness planer, including dimensions and capabilities.

Know Your Planer

Emphasizes familiarizing oneself with the tool's features and safety rules before use.

Tool Storage

Information on where to store the blade wrench and magnets for convenience.

Assembly

Tools Needed

Lists the tools required for assembly and maintenance of the planer.

Loose Parts List

Details the components included with the planer that are not pre-assembled.

Mounting the Planer to Workbench

Instructions on how to securely attach the planer to a workbench or stable surface.

Clamping Planer to Workbench

Guidance on securing the planer to a workbench or mounting board for portable use.

Installing Depth Adjustment Crank Handle

Steps for attaching the depth adjustment crank handle to the planer securely.

Leveling the Table Extensions

Instructions for ensuring table extensions are level with the planer table for accurate planing.

Operation

Applications

Describes the primary purpose of the tool: planing the surface of lumber.

Thickness Planning

Explains how to size workpieces to desired thickness for a smooth, level surface.

Planing Tips

Provides essential advice for achieving optimal planing results and avoiding issues.

Avoiding Snipe

Details on how to prevent or minimize depressions made at workpiece ends during planing.

Warped Wood Handling

Guidance on how to plane workpieces that are cupped, bowed, or severely warped.

Power Switch Operation

Instructions on how to turn the planer on, off, and lock the switch for safety.

Adjusting Planing Depth

Steps for setting the depth of cut using the crank handle and understanding cut limits.

Planing Process

General instructions and safety warnings for the actual planing operation.

Adjustments

Thickness Scale Adjustment

Procedure for checking and adjusting the thickness scale for accurate measurements.

Blade Adjustment

Instructions on making minor adjustments to blades to correct planing imperfections.

Maintenance

General Maintenance

Guidelines for cleaning and maintaining the planer's parts, avoiding damaging chemicals.

Lubrication

Information on the lubrication needs of the tool's bearings, stating no further lubrication is required.

Motor;Electrical Maintenance

Advice on keeping the universal motor clean and ensuring its proper function.

Cleaning Procedures

Steps for cleaning sawdust buildup, dust hood, and feed rollers for accurate planing.

Brush Replacement

Procedure for inspecting and replacing worn carbon brushes in the planer's motor.

Blade Replacement

Detailed instructions for safely removing, replacing, or turning planer blades.

Troubleshooting

Ryobi AP1305 Specifications

General IconGeneral
BrandRyobi
ModelAP1305
CategoryPlaner
LanguageEnglish

Related product manuals