ADJUSTMENT
Page 9
NOTE: Remove gauge block before starting machine.
Thickness planing is the sizing of the material to a
desired thickness, while creating a smooth surface
parallel to the opposite side of the board.
The art of thickness planing consists mainly of using
good judgement about the depth of cut in various
situations. You must take into account:
1) The width of the timber
2) The hardness of the board
3) The dampness of the board
4) The straightness of the board
5) The grain direction
6) The grain structure
How these factors can effect the quality of the work
can only be learned through experience. Whenever
working with a new type of wood, or one with unusual
problems, always make test cuts on scrap material
prior to working on the actual piece.
FOR ADDITIONAL PLANING
If additional planing is needed to obtain the desired
thickness or nish, hand crank the cutterhead no more
than 3mm (at any one time) and complete another
pass.
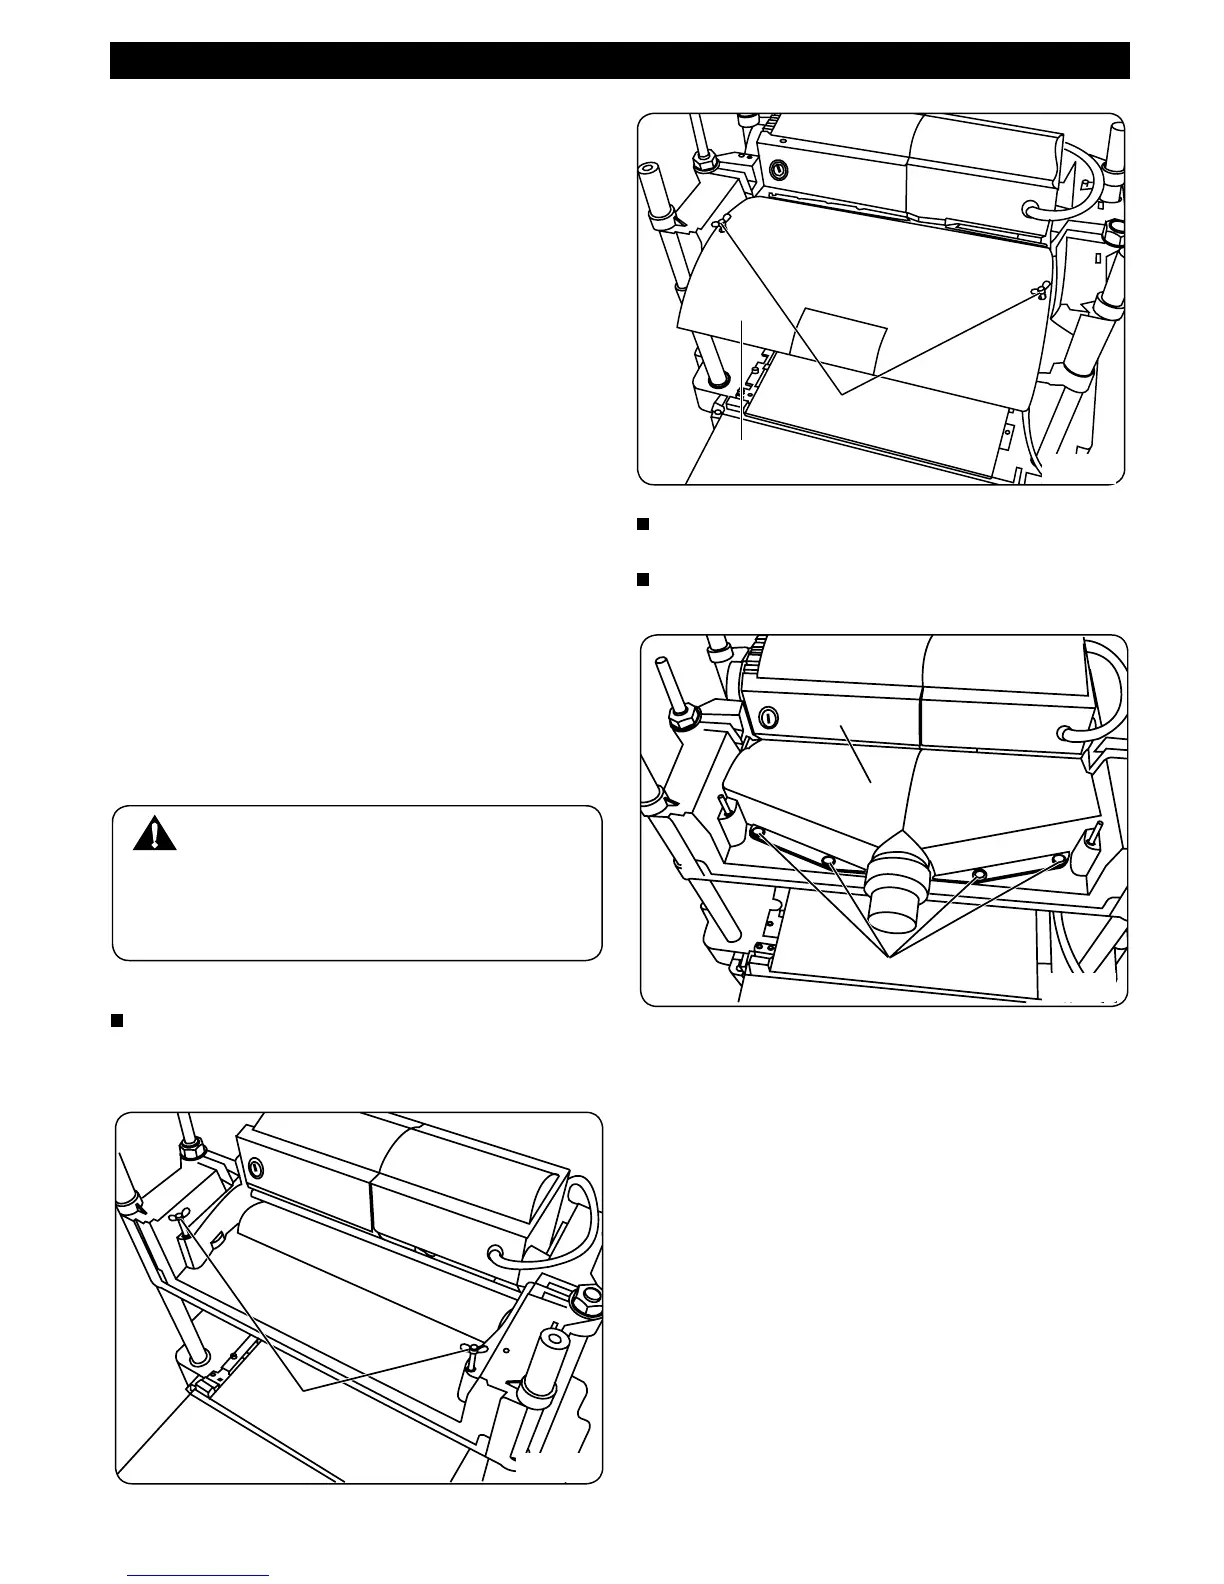
INSTALLING THE DUST CHUTE
Currently, the planer is assembled with a steel
cover , which is xed by 2 wing nuts (Fig. 13 & 13a)
WARNING:
Never plane more than 3mm in one pass and
never attempt to plane a board under 127mm
(5”) in length. Always wear a protective face
shield.
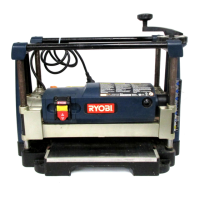
To install the dust chute , remove the steel cover
rst by unscrewing the 2 wing nuts.
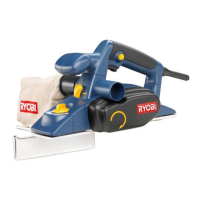
Fix the dust chute with 4 philip screws (Fig 13b)
Wing Nuts
Fig. 13
Fig. 13a
Fig. 13b
Wing Nuts
Screws
Steel Cover
Dust Chute