9
WASHING WITH DETERGENT
See gures 16 - 17.
As sold, this unit is designed for use with “downstream”
pressure washer detergents. To convert for use with
“upstream” detergents, contact an authorised customer
service center for more information.
Use only detergents designed for pressure washers;
household detergents, acids, alkalines, bleaches,
solvents, ammable material, or industrial grade solutions
can damage the pump. Many detergents may require
mixing prior to use. Prepare cleaning solution as instructed
on the solution bottle.
■ Remove the cap from the detergent container and pour
detergent in the container. Replace cap on container.
NOTE: The machine setting of this unit is 1:20, which
usually allows the use of 3.8l (1 US gallon) detergent
without further dilution. Check your detergent
instructions to be sure additional dilution is not
necessary.
■ Rotate the spray selector on the 5-in-1 Change Over
Nozzle to either the Soap Short Range or Soap Long
Range setting.
■ Spray the detergent on a dry surface using long, even,
overlapping strokes. To prevent streaking, do not
allow detergent to dry on the surface.
For long range detergent application:
With the nozzle installed on the spray wand and the
engine shut off, rotate the spray selector to the Soap Long
Range setting.
For short range detergent application:
With the nozzle installed on the spray wand and the
engine shut off, rotate the spray selector to the Soap Short
Range setting.
Before shutting off the engine:
■ Place the 5-in-1 nozzle to the 40
o
outlet position.
■ Flush for 1 - 2 minutes (spray clear water through the
spray wand).
■ Shut off the engine.
NOTE: Shutting off (O) the engine will not relieve pressure
in the system. Pull trigger to release water pressure.
RINSING WITH THE PRESSURE WASHER
■ Turn off the pressure washer and shut off the water
supply. Pull trigger to release water pressure.
■ Engage the lock out on the trigger handle by pushing
up on the lock out until it clicks into the slot.
■ Rotate the spray selector on the 5-in-1 Change
Over Nozzle to either the [40º], [25º], or [0º] setting
depending on the job. Refer to the chart in Using
the 5-in-1 Change Over Nozzle to determine which
setting is correct for your application.
■ When using these settings, test a small area first to
avoid surface damage.
■ Start at the top of the area to be rinsed and work down,
overlapping the strokes.
MOVING THE PRESSURE WASHER
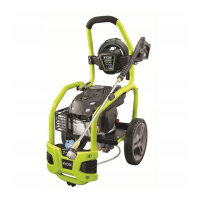
See gure 18.
NOTE: Never lift or carry this product using the handle
and never place the unit in any position other than upright
on its wheels.
■ Turn the pressure washer off and ensure the fuel valve
is closed.
■ Pull the handle up until the handle release knob snaps
into the locking position (if not already up and locked).
Ensure the lock is secured in the frame hole before
moving.
■ Tilt the machine toward you until it balances on the
wheels then roll the machine to the desired position.
For long term storage, see Storing the Pressure Washer
in the Maintenance section of this manual.
MAINTENANCE
WARNING
When servicing, use only original manufacturer’s
replacement parts. Use of any other parts may create a
hazard or cause product damage.
WARNING
Always wear eye protection with side shields marked to
comply with one of the following standards:
● Australian Standard – AS/NZS 1337
● European Standard – CE EN166
● American Standard – ANSI Z87.1
Failure to do so could result in objects being thrown into
your eyes resulting in possible serious injury.
WARNING
Before inspecting, cleaning or servicing the machine,
shut off engine, wait for all moving parts to stop, and
disconnect spark plug wire and move it away from
spark plug. Failure to follow these instructions can
result in serious personal injury or property damage.
GENERAL MAINTENANCE
Avoid using solvents when cleaning plastic parts. Most
plastics are susceptible to damage from various types of
commercial solvents and may be damaged by their use.
Use clean cloths to remove dirt, dust, lubricant, grease,
etc.

 Loading...