6. DISASSEMBLY/REASSEMBLY THE PRINTER
6.1. DISASSEMBLY/REASSEMBLY INTRODUCE
-
Disassembly/reassembly procedure:
Described the sequence of the
disassembly.
-
Notes
: recall adjustments that need to be made after reassembly,
precautions or warnings to be observed.
6.2. ATTENTIONS OF DISASSEMBLY/REASSEMBLY
- To ensure maximum safety, before starting any disassembly operation
power off the printer and unplug its power cord from the electrical outlet.
- All operations should be performed in a clean and uncluttered area.
- Follow the procedures carefully; do not unscrew parts that are not to be
disassembled.
- Store the disassembled parts in a clean place where there is no danger
of them getting lost.
- After replacing the parts, make sure that they have not been deformed
during assembly; restore the correct conditions if necessary.
- Reassembly must be performed by following the disassembly
procedures in reverse order.
- Before disconnecting the cables make sure to take note of their
connections for reassembly.
- After servicing, lubricate where specified.
- When replacing the main board, update the firmware to the latest
release, run the installation set-up and then perform the
electromechanical adjustments from the console.
- When replacing the power supply assembly, make sure that the line
voltage rating of the replacement module corresponds to the value
indicated on the printer's electrical data plate.
- At the end of the service call, run an overall check on the printer to make
sure that all failures are corrected.
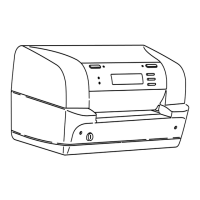
6.3. DISASSEMBLY/REASSEMBLY OF THE BASIC MACHINE
6.3.1. CASE DISASSEMBLY/REASSEMBLY
- Open the printer's top cover.
- Unplugging the console cable from its connector (1) in the left rear side
of the frame.
- Using a flat-blade screwdriver, Unclench the case's two front snap